To create a case in iLab, enter patient and clinic details, add notes, and select shades and restoration types.
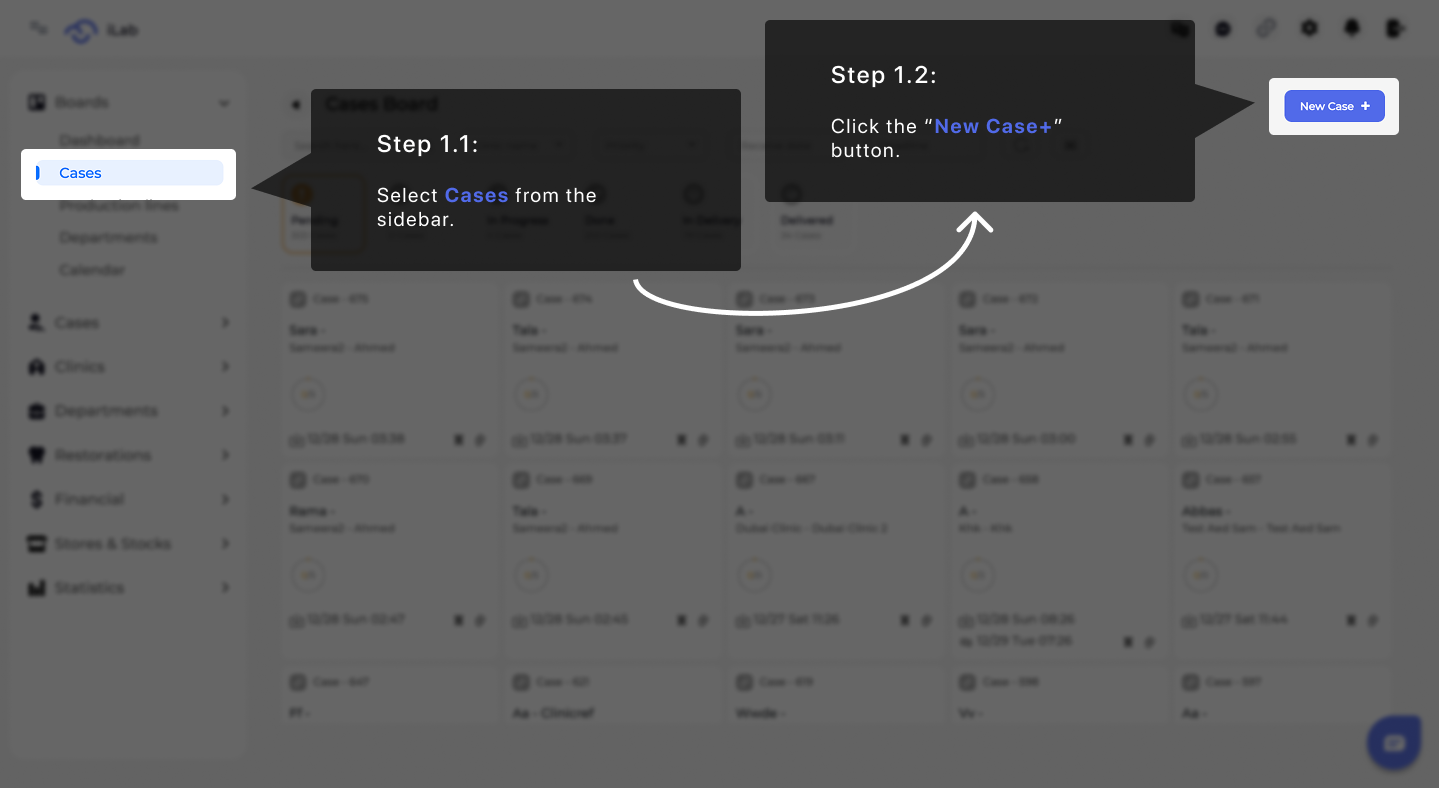
From the sidebar navigation, select Cases to access the full overview of all existing cases. This view allows you to manage, track, and review case statuses in one place. Once you are on the Cases page, click the New Case + button. This action opens the Case Creation page, where you can begin entering all required clinical, logistical, and production details for a new case.
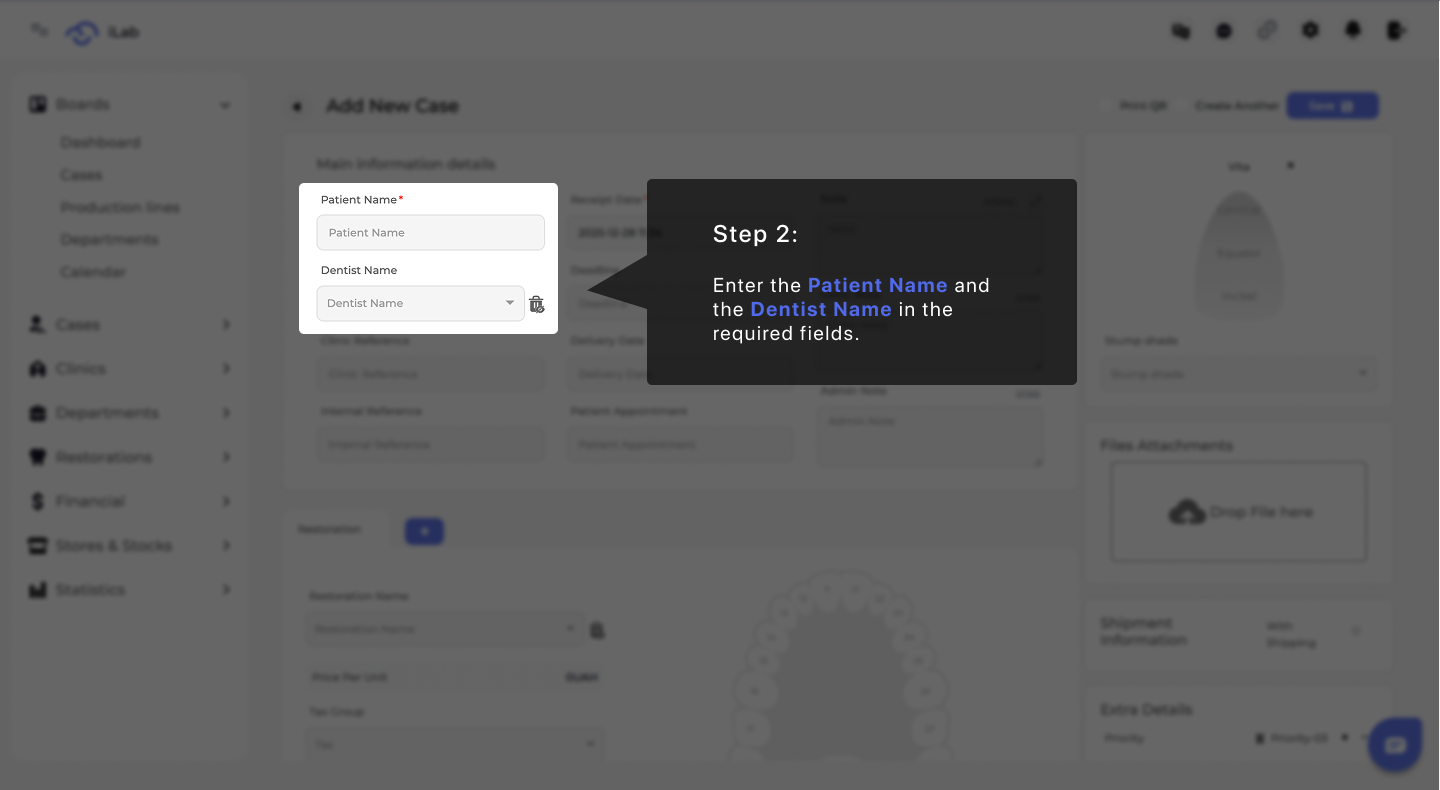
Start by filling in the Patient Name and Dentist Name fields. These details clearly identify who the case is for and who submitted the request. Accurate information here ensures proper communication, traceability, and correct association with the clinic throughout the case lifecycle.
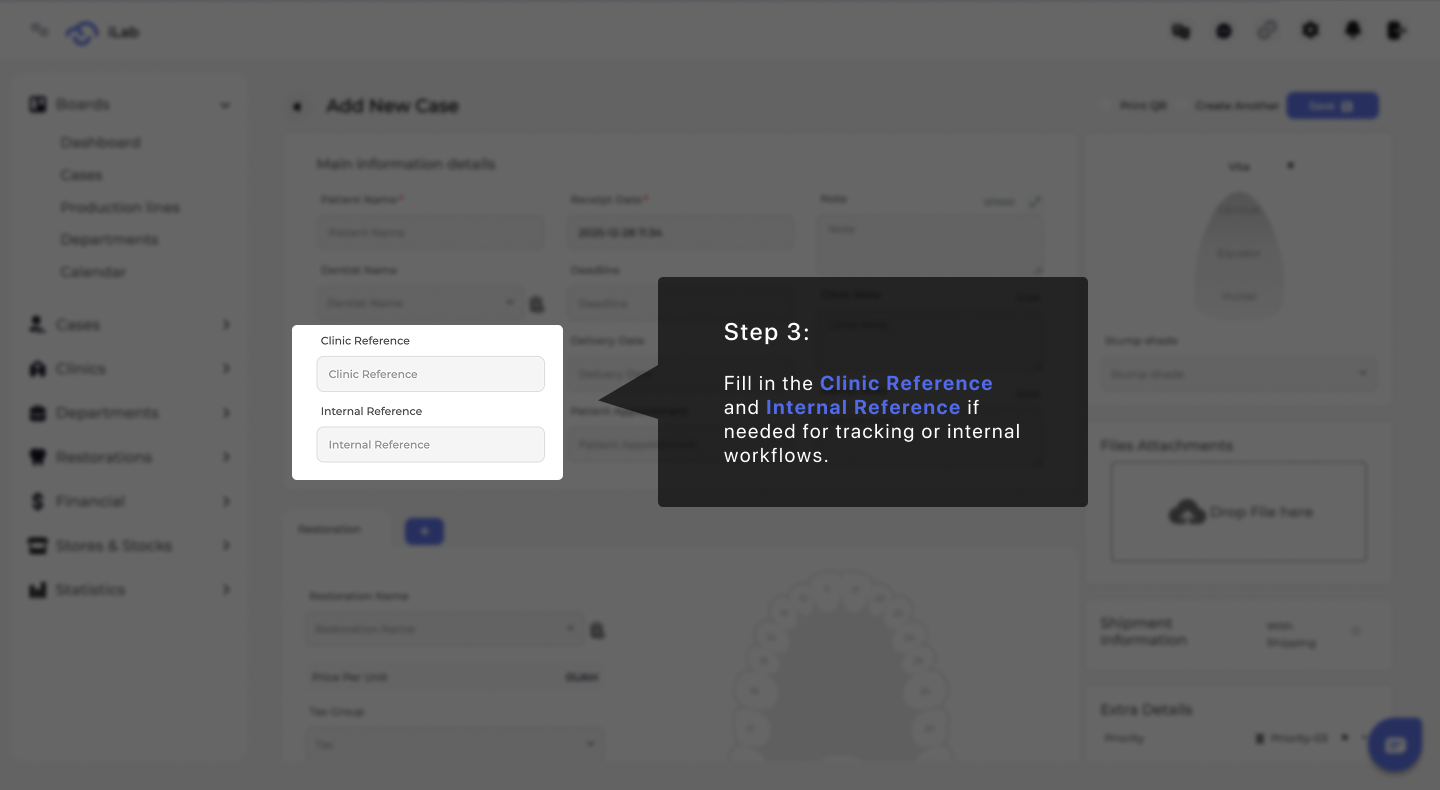
Enter the Clinic Reference and Internal Reference if applicable. These fields are optional but highly useful for internal tracking, reporting, and aligning the case with clinic-specific workflows or external systems.
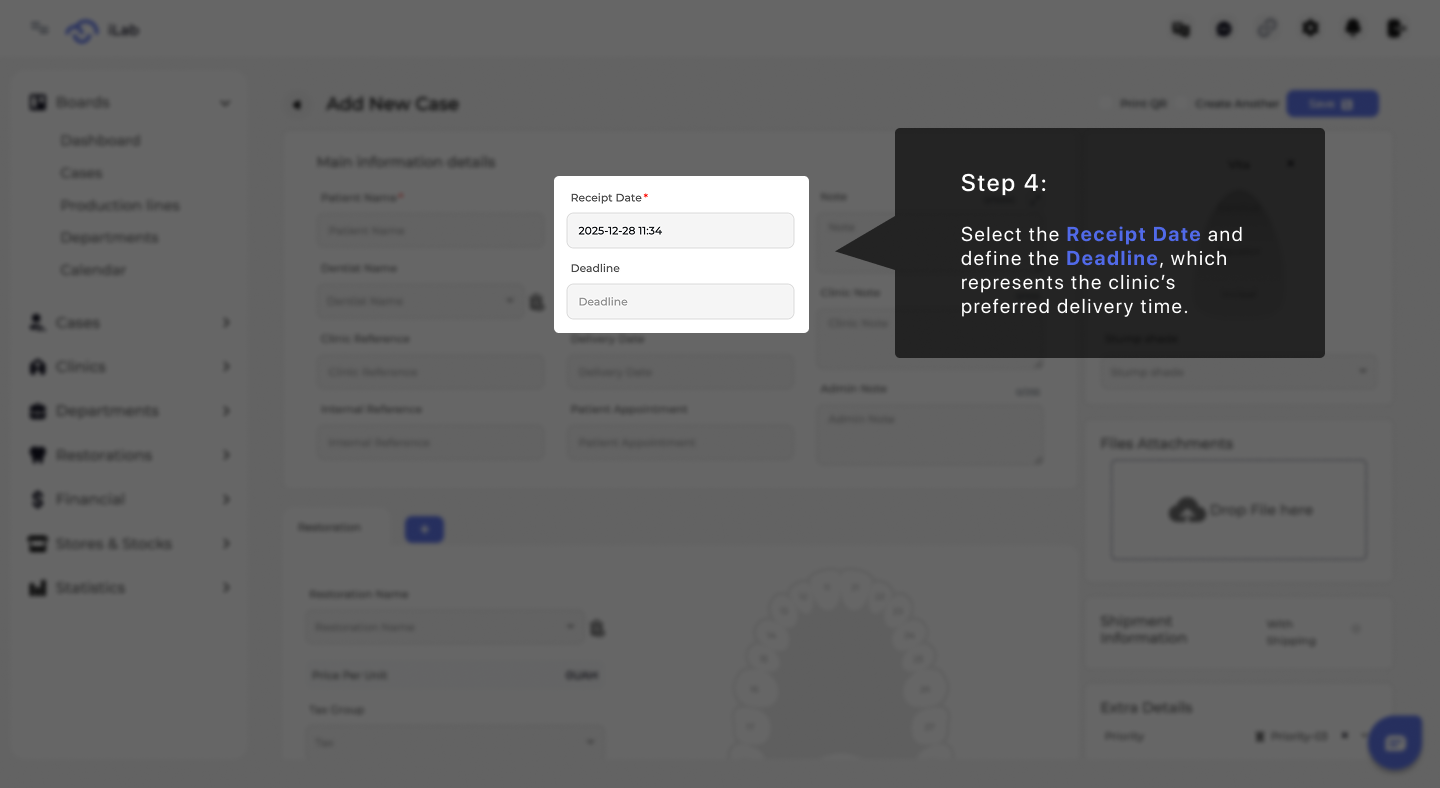
Select the Receipt Date to indicate when the case was received by the lab. Then set the Deadline, which represents the clinic’s preferred delivery date. These dates help the lab plan production timelines and prioritize work effectively.
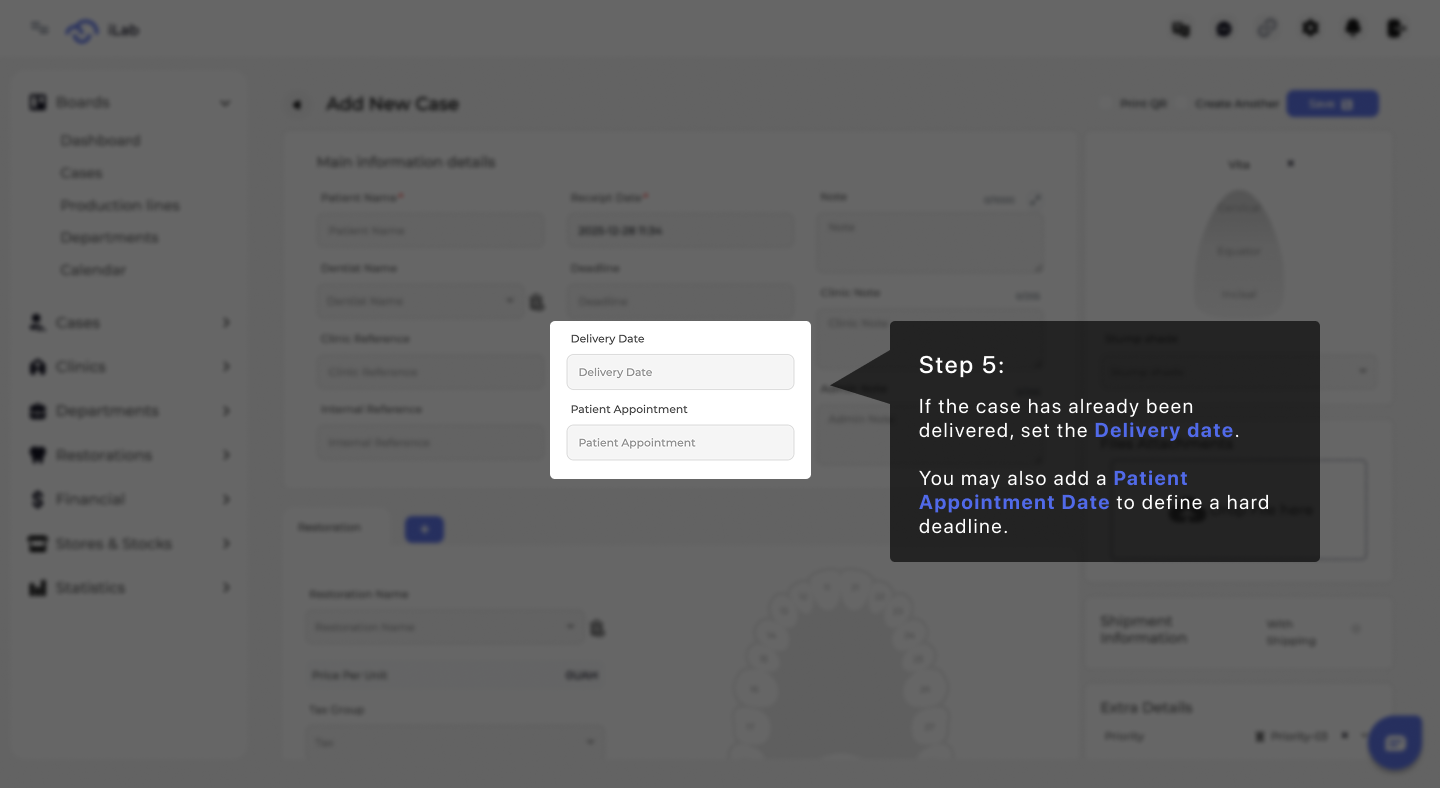
If the case has already been delivered, specify the Delivery Date. You may also add a Patient Appointment Date, which defines a strict, non-negotiable deadline and helps ensure the case is completed in time for the patient visit.
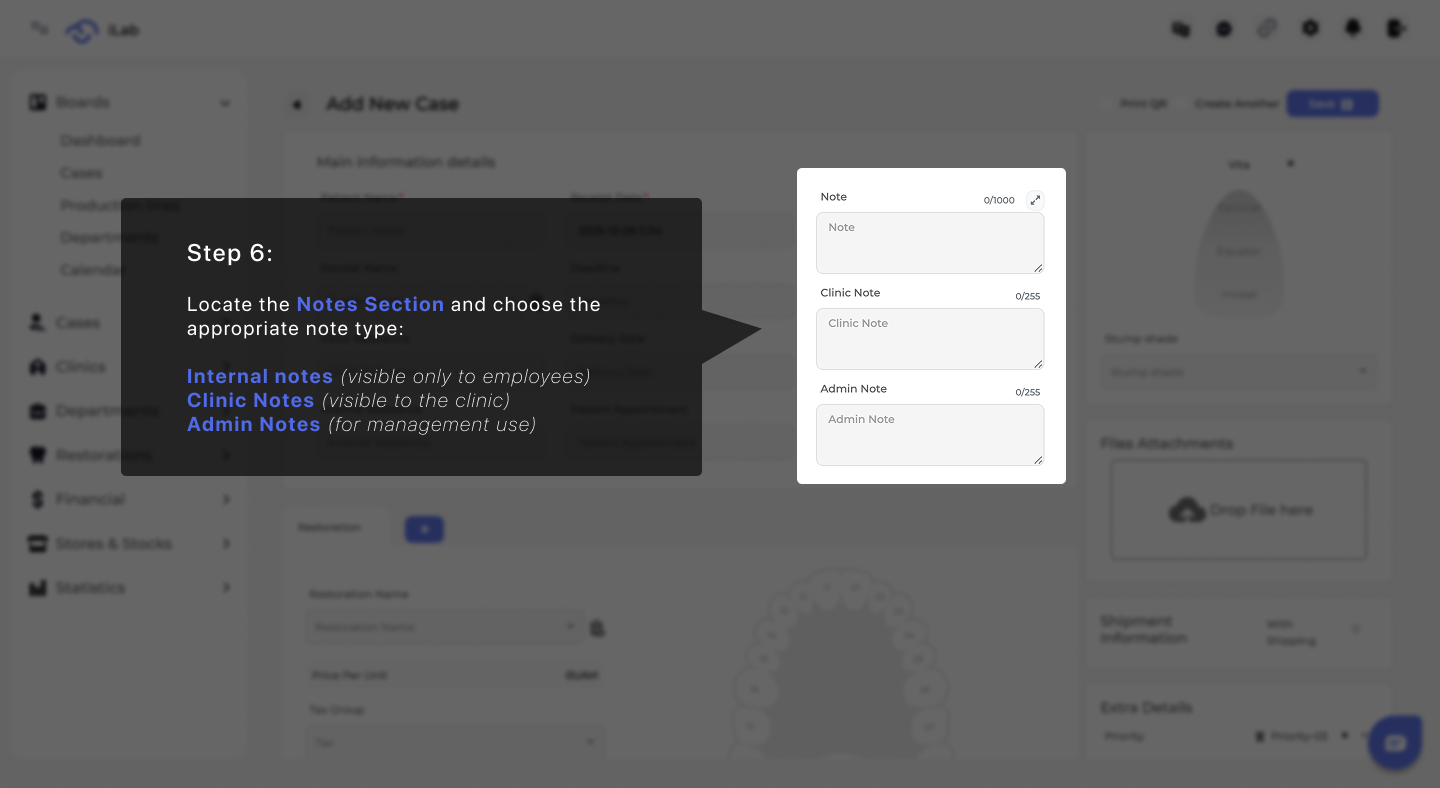
Use the Notes section to include any important information that supports the handling of the case. This may include special instructions, clarifications, or internal comments that help ensure the case is processed correctly. Notes can be tailored to different audiences, allowing you to control who can view the information while keeping communication clear and aligned throughout the workflow.
Choose the Shade Guide and define up to three shade levels to achieve optimal aesthetic accuracy. If relevant, select a Stump Shade to support translucency and ensure accurate final color outcomes.

Upload any supporting materials such as photos, digital scans, or documents in the file attachments section. Providing complete and high-quality files helps reduce revisions and speeds up production.

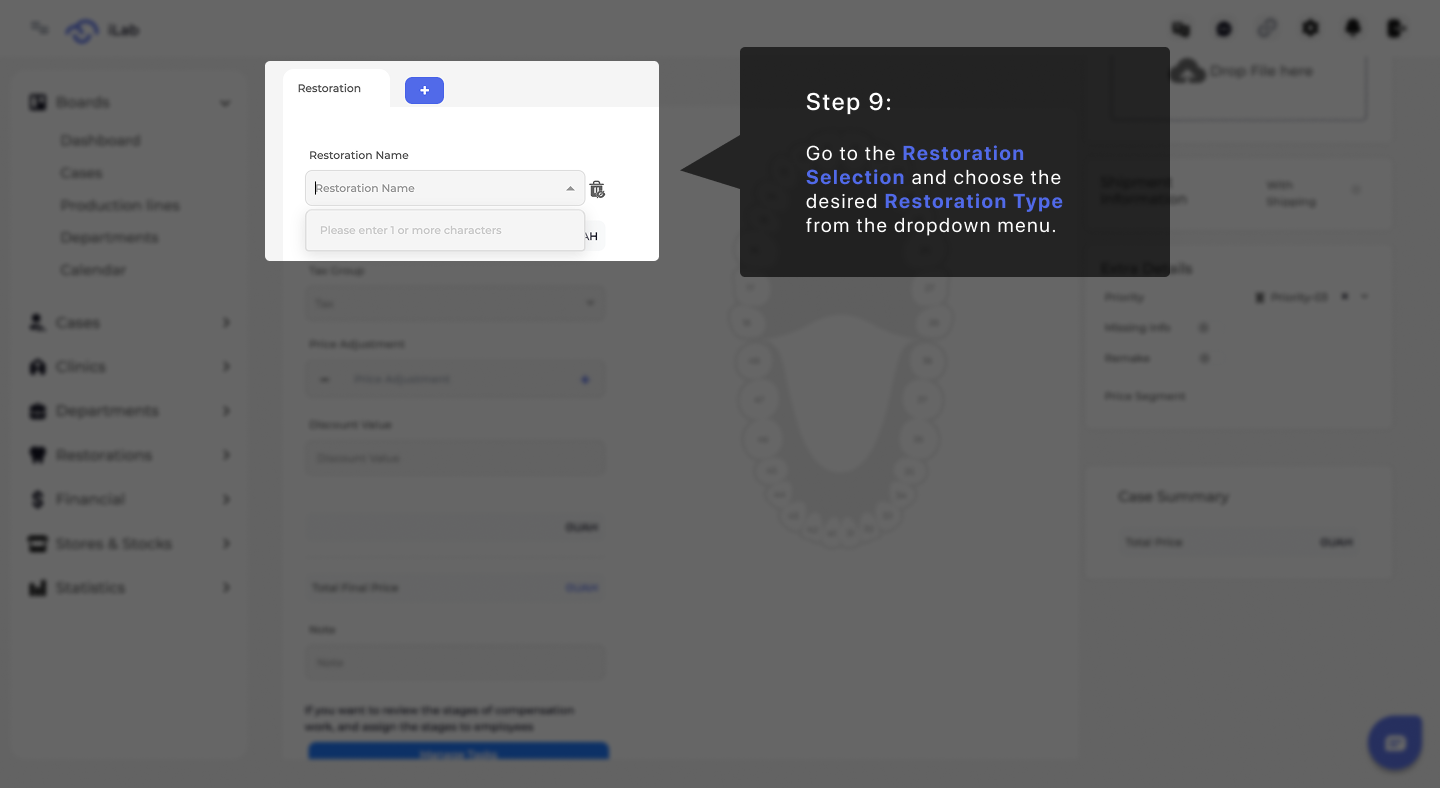
Navigate to the Restoration Selection section and choose the desired restoration type from the dropdown menu. This selection determines which options, pricing, and workflows apply to the case.
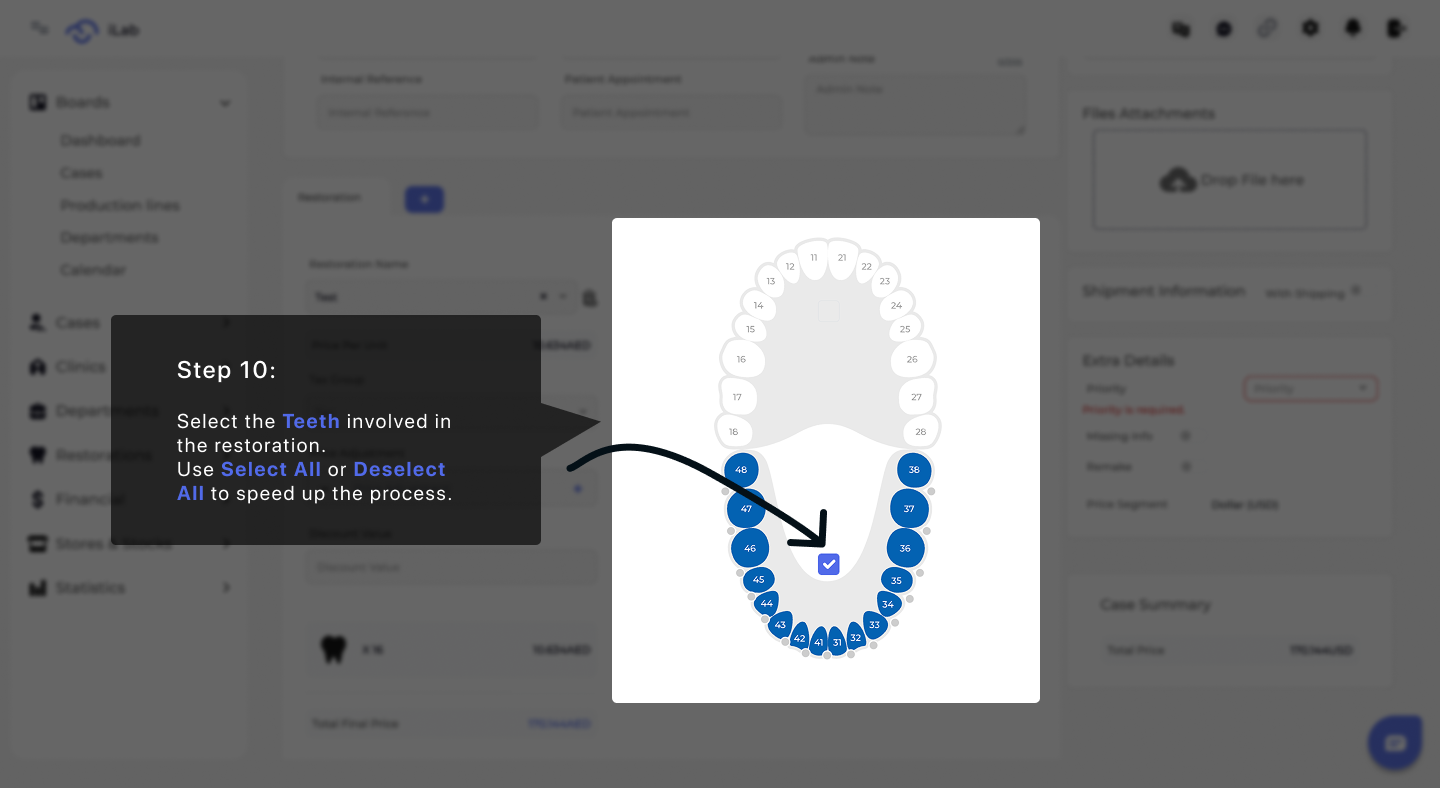
Indicate which teeth are included in the restoration by selecting them in the diagram. This step ensures the restoration is designed and produced for the correct area. When working with multiple teeth, you can quickly adjust your selection to save time and reduce the risk of errors.
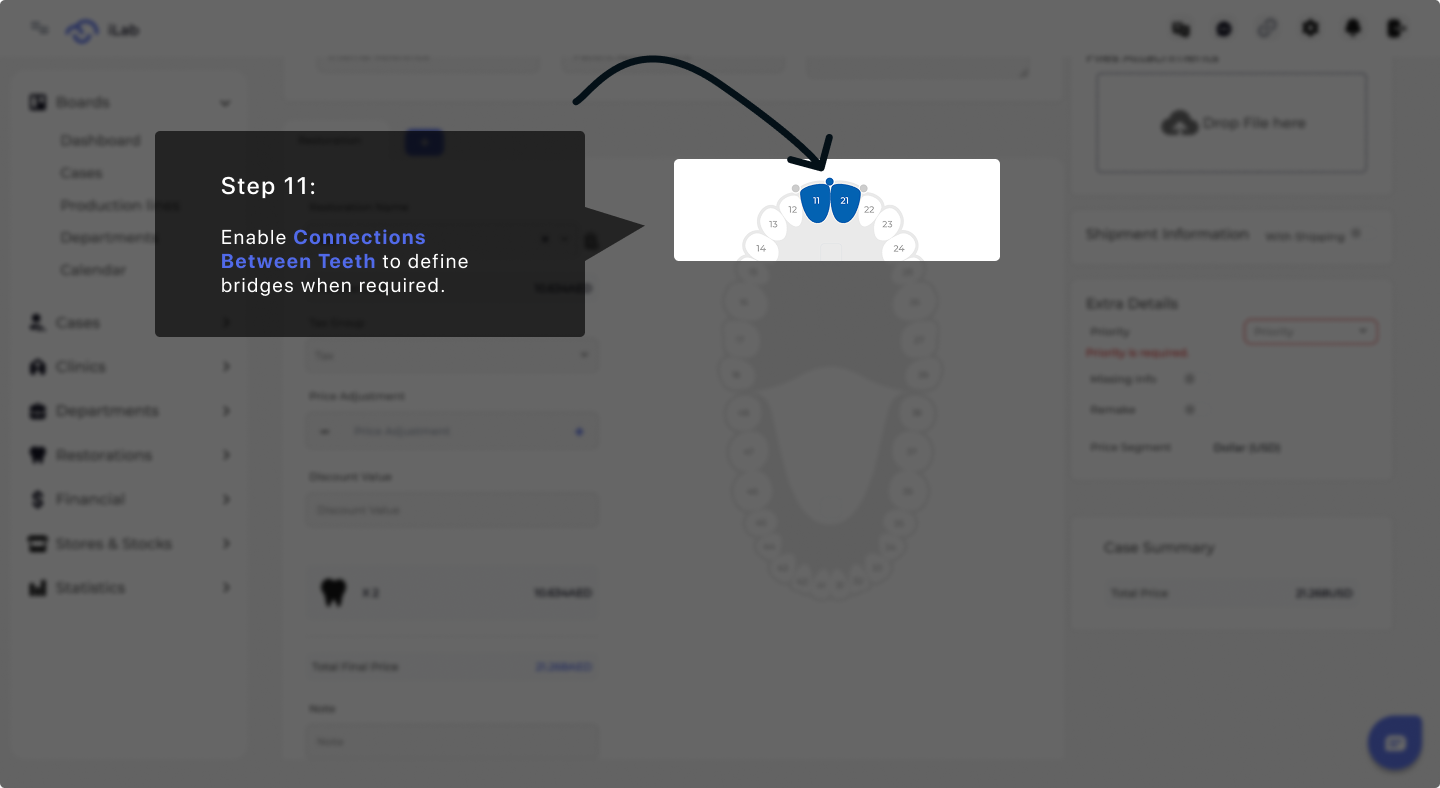
Enable connections between teeth to define bridge restorations when required. This step ensures correct structural and production handling of connected restorations.
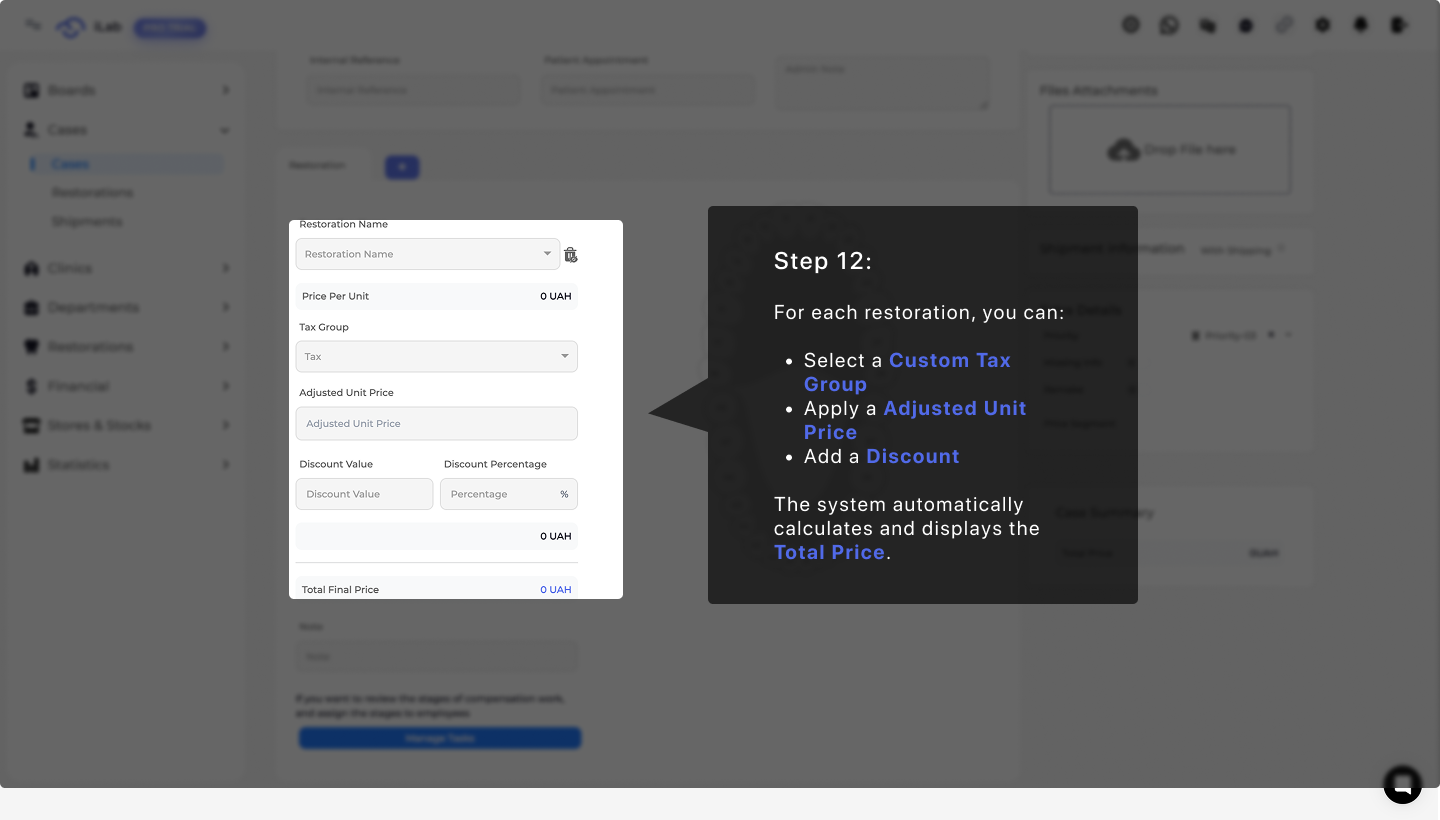
Review the pricing details for each restoration and make any necessary adjustments. You can modify pricing elements to reflect specific agreements or case requirements, while the system automatically updates and displays the final total to ensure clarity and accuracy before proceeding.
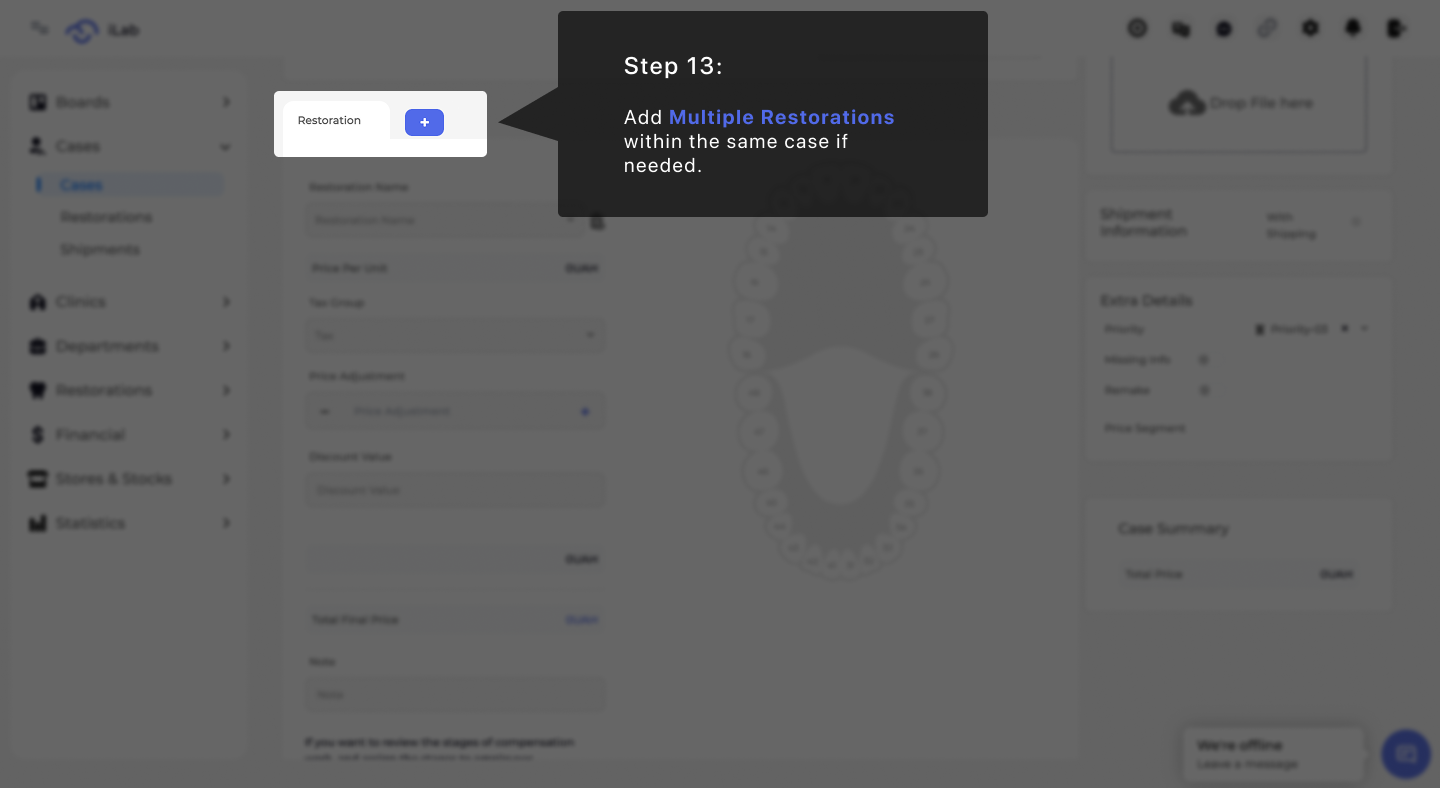
If needed, add multiple restorations within the same case instead of creating separate cases. This helps keep related work organized under a single case.
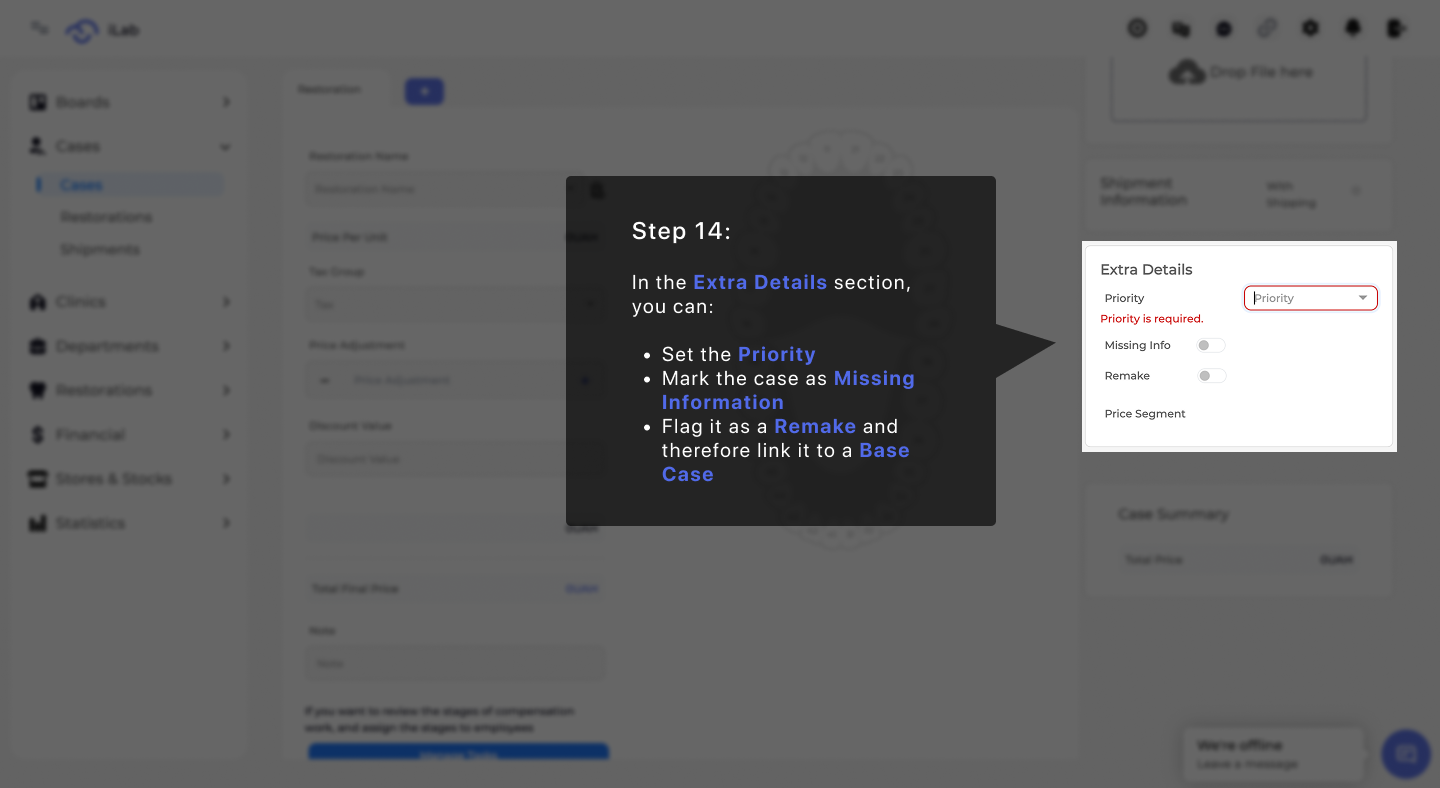
Use this section to add important contextual information about the case, such as urgency, special status, or whether the case is a remake. These details help guide internal handling and ensure the case receives the appropriate level of attention during production.
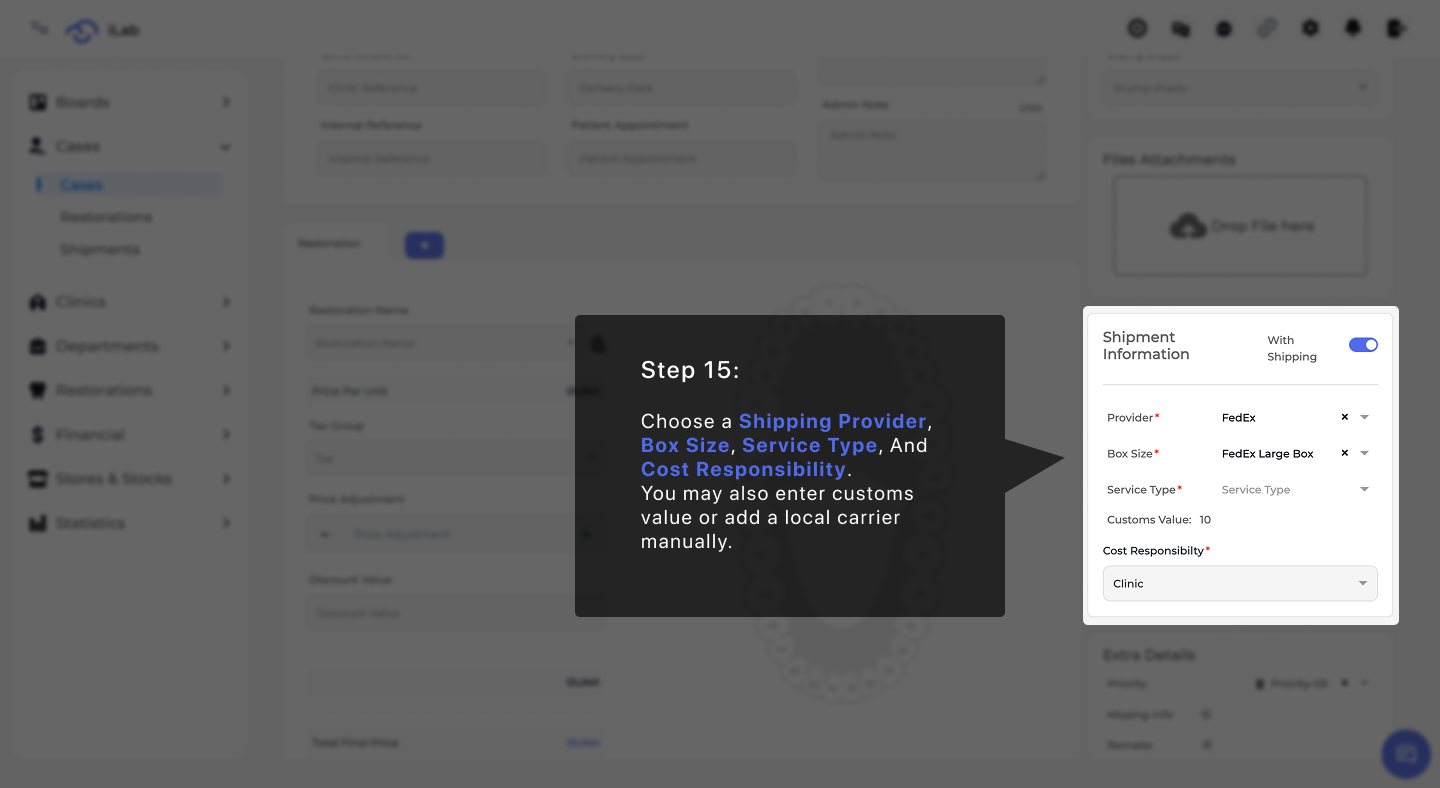
Define how the case will be shipped by selecting the appropriate shipping options. This includes choosing the delivery method and clarifying responsibility for shipping costs, ensuring the case is prepared and delivered according to expectations.
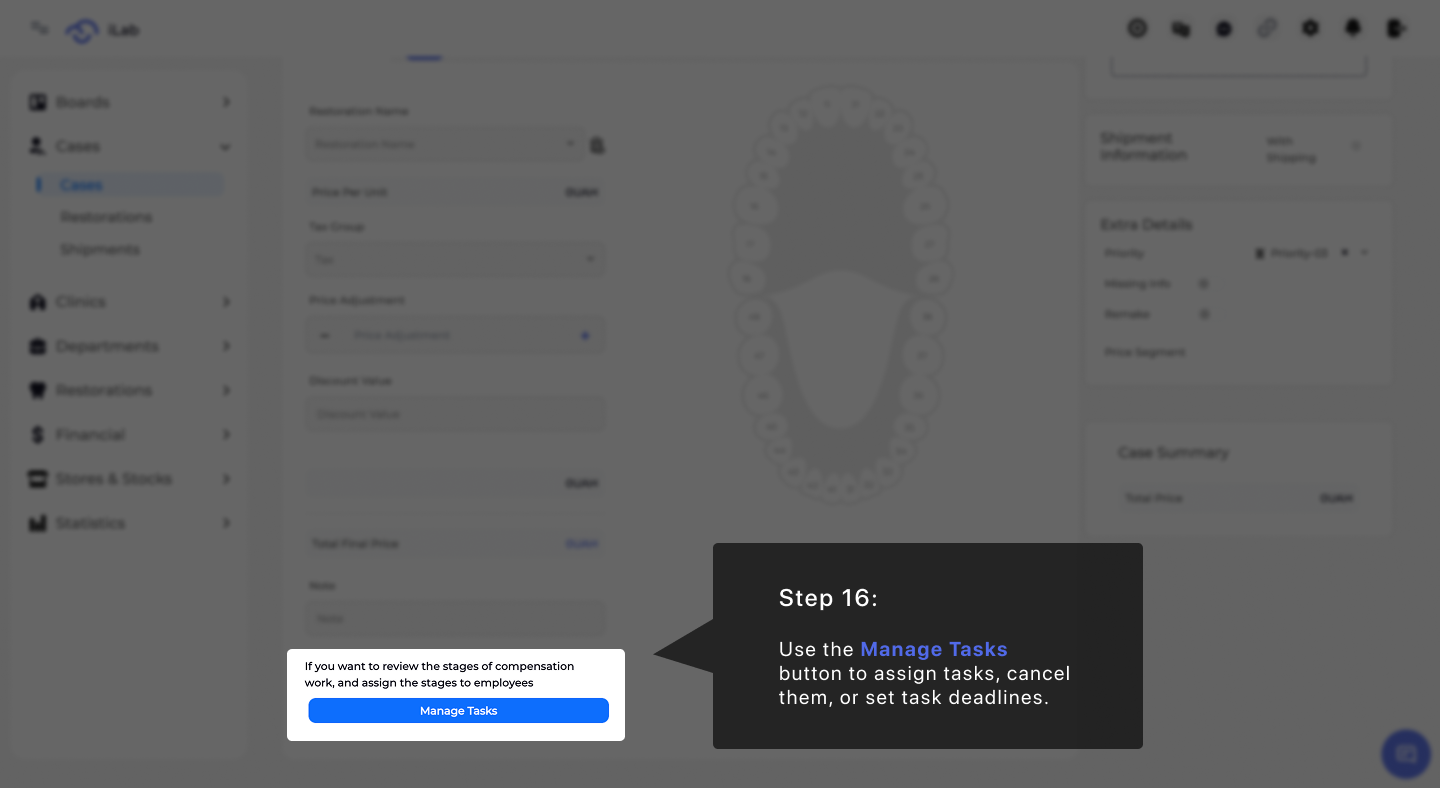
Use this step to organize and control tasks associated with the case. Assign responsibilities, update task statuses, or set deadlines to keep everyone aligned and ensure smooth progress throughout the workflow.
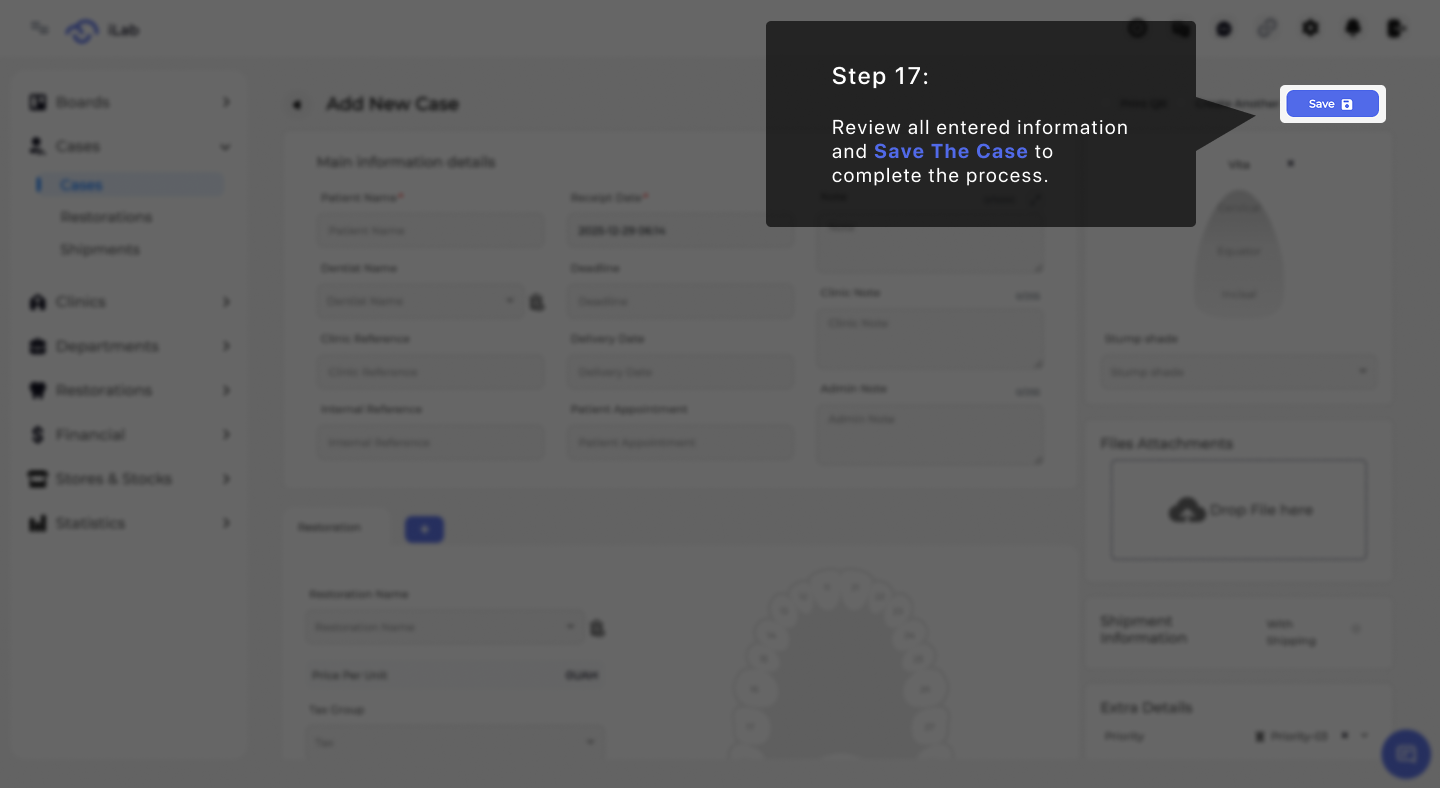
Carefully review all case details to confirm everything is complete and accurate. Once verified, save the case to finalize creation and move it forward into the next stage of processing.