Learn to use iLab chat to communicate with your team: create chats, add participants, and share files for case-specific or general discussions.
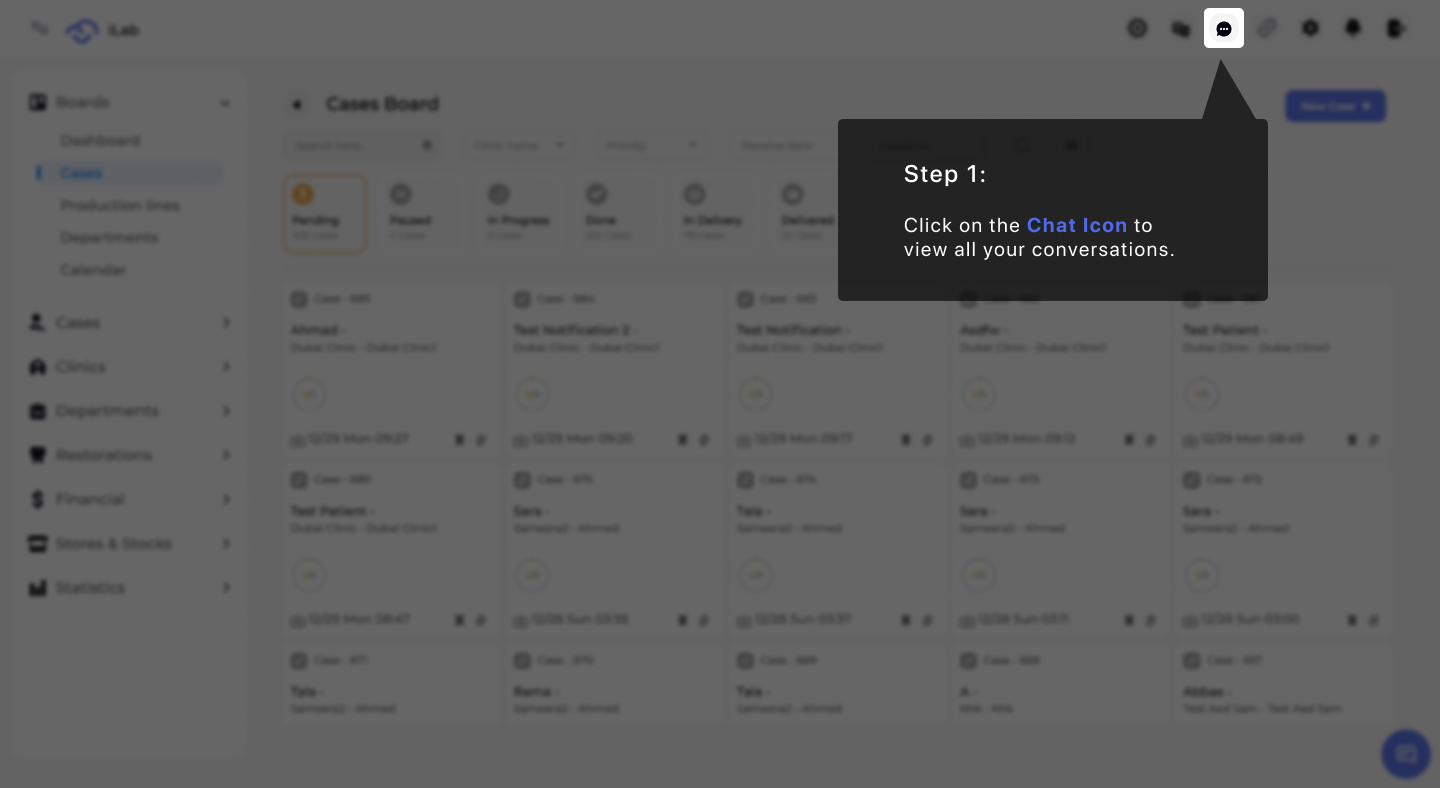
To manage your messages, look at the top navigation bar of your dashboard and click on the Chat icon. This action opens the primary communication interface where you can monitor all your current interactions in one centralized location.
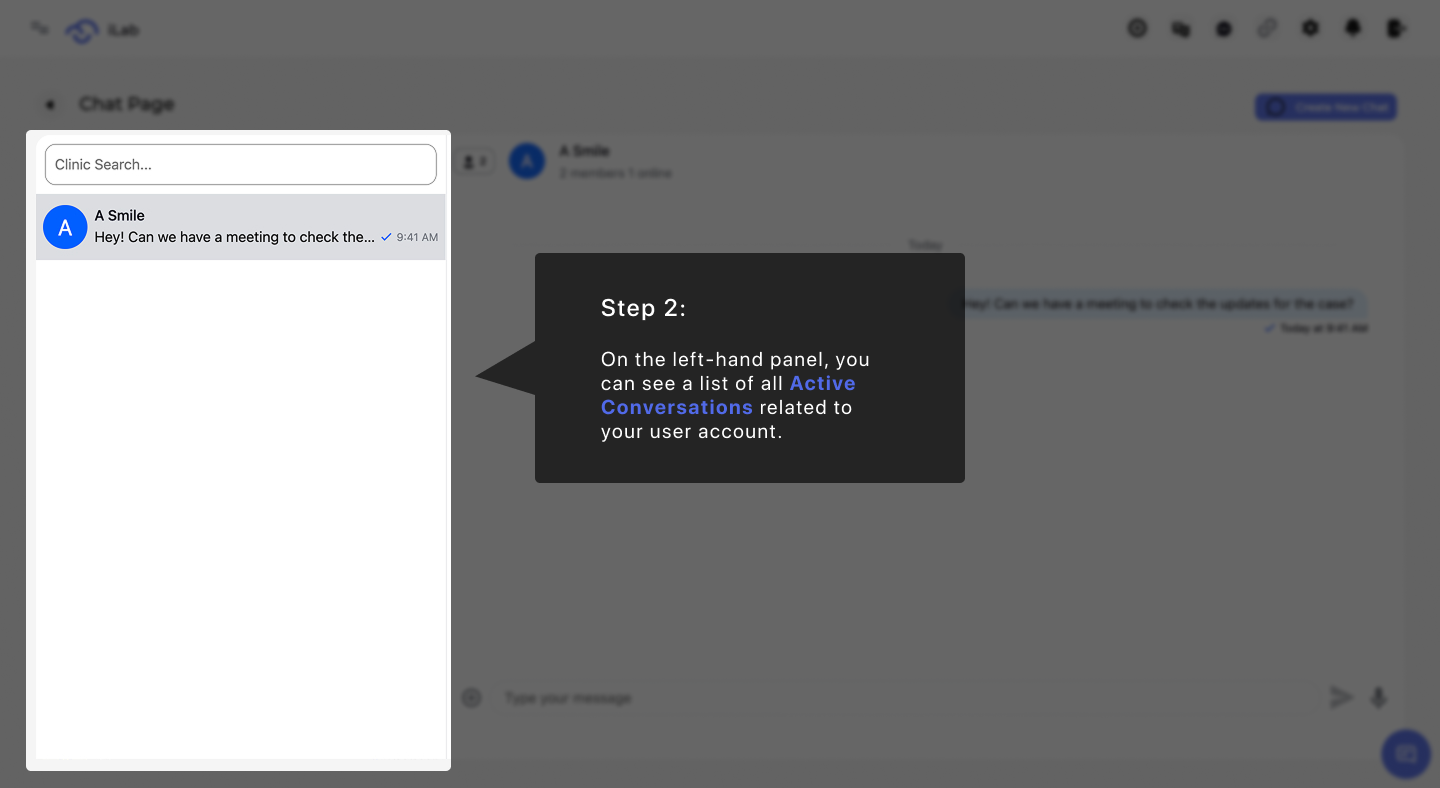
Once the chat window is active, you can easily review your ongoing history. The left-hand panel displays a complete list of all active conversations that are currently linked to your user account, allowing you to stay updated on existing threads.
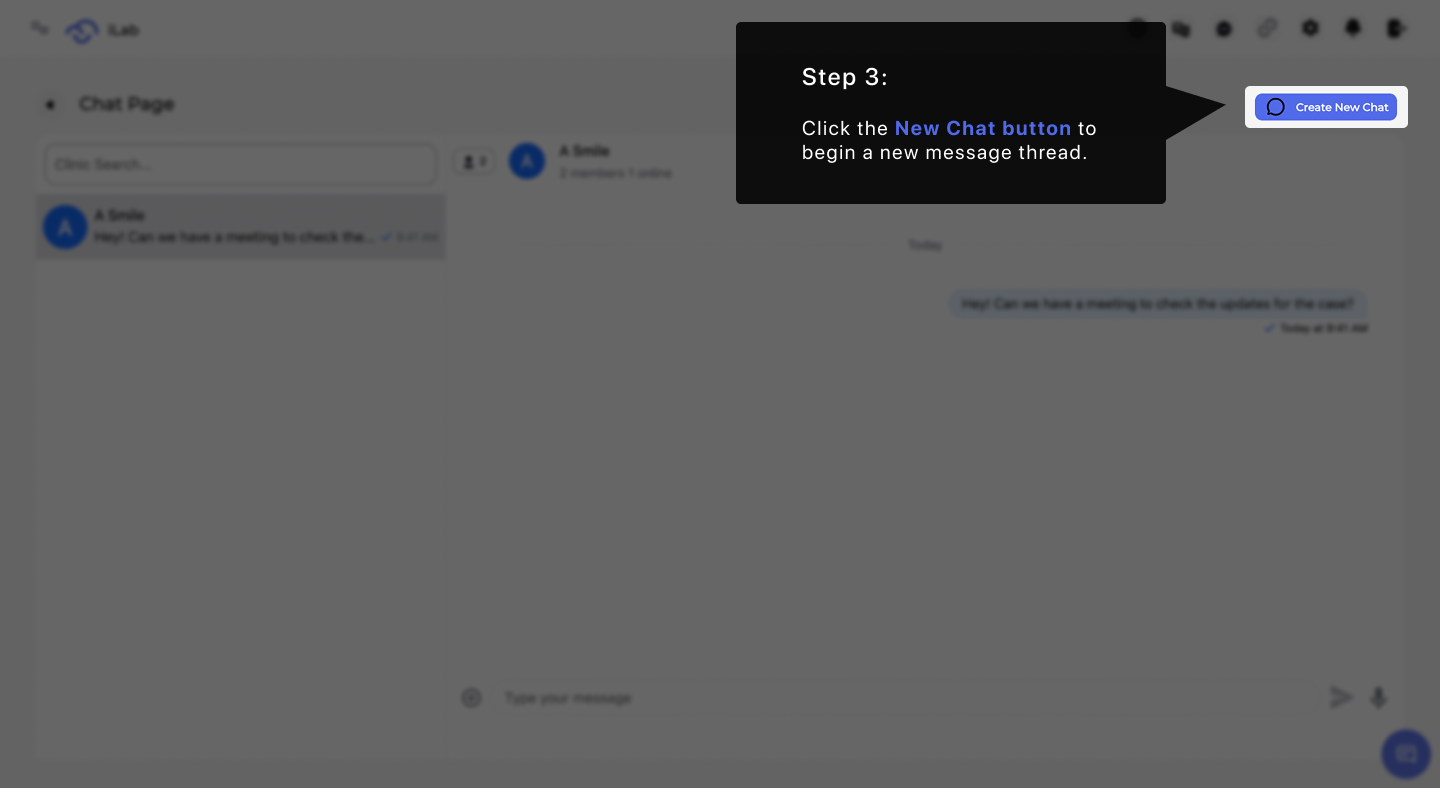
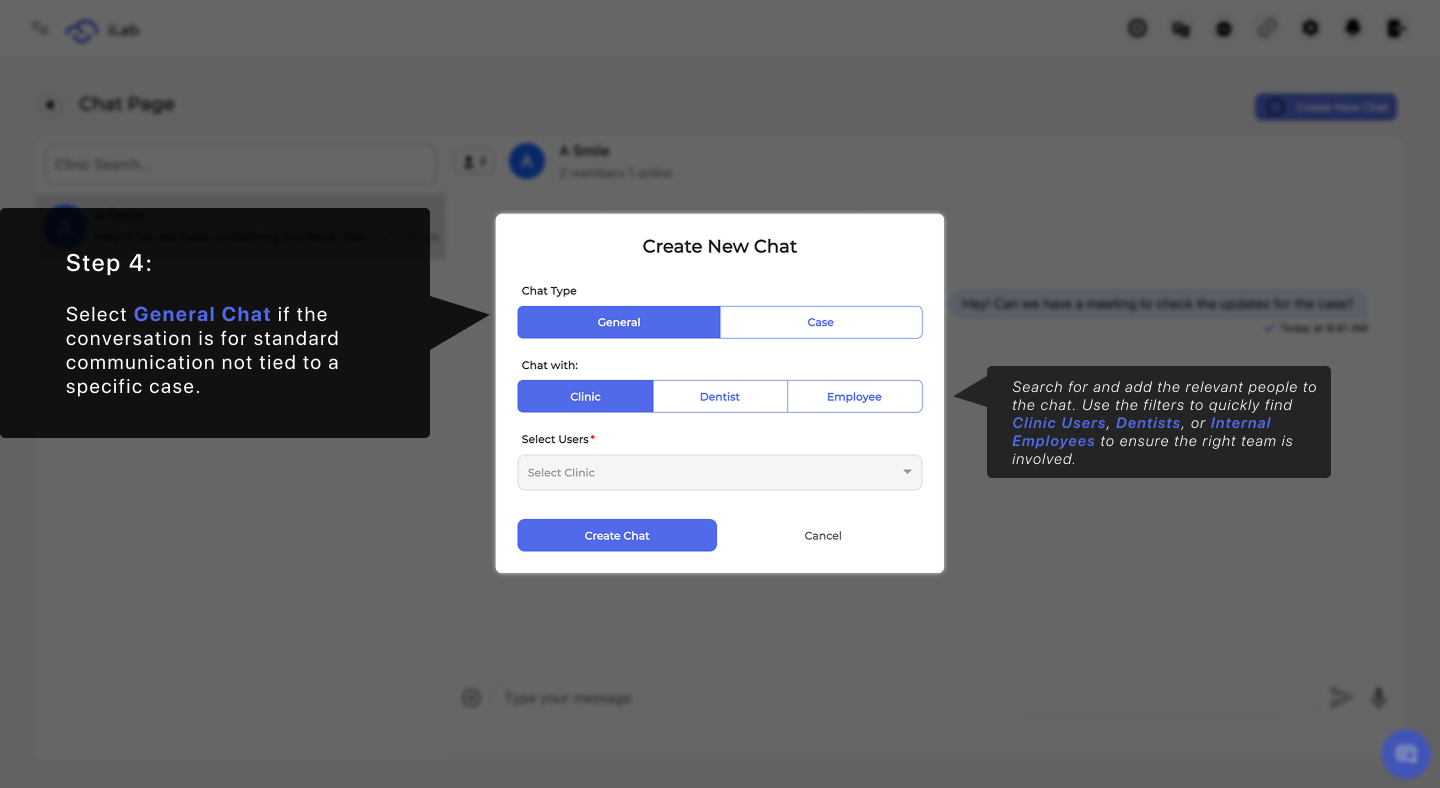
If you need to discuss a topic that isn't already listed, you will need to start a fresh thread. Click the Create New Chat button to open the message setup options and begin a new message sequence from scratch.
The system asks you to define the nature of your message to keep your workspace organized. Choose the General Chat option if your conversation involves standard administrative tasks or broad communications that are not connected to a specific clinical case.
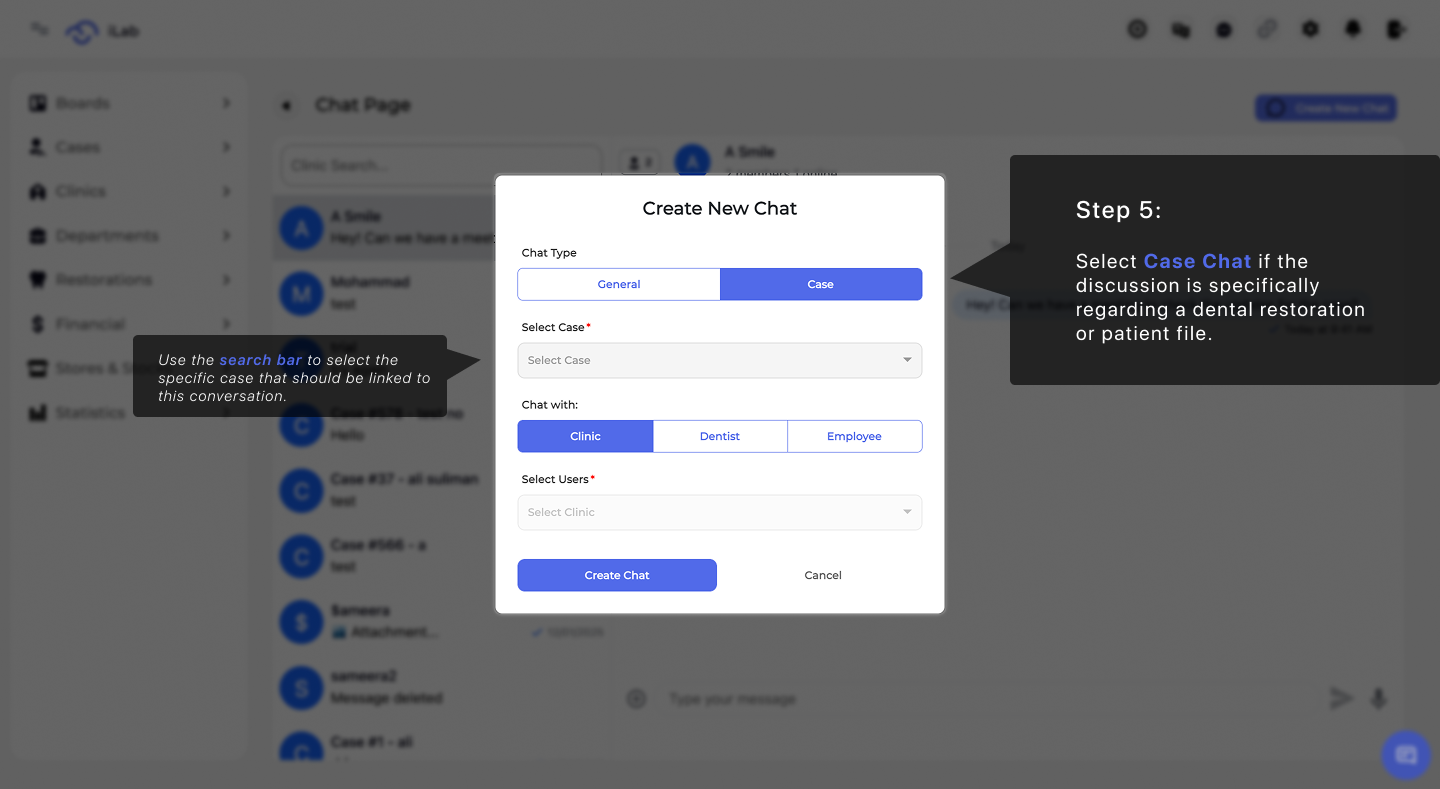
For clinical or patient-focused updates, you should use a more specialized channel. Select the Case Chat option if the discussion is specifically regarding the dental restoration of a patient, which ensures the data is filed correctly within the clinical records.
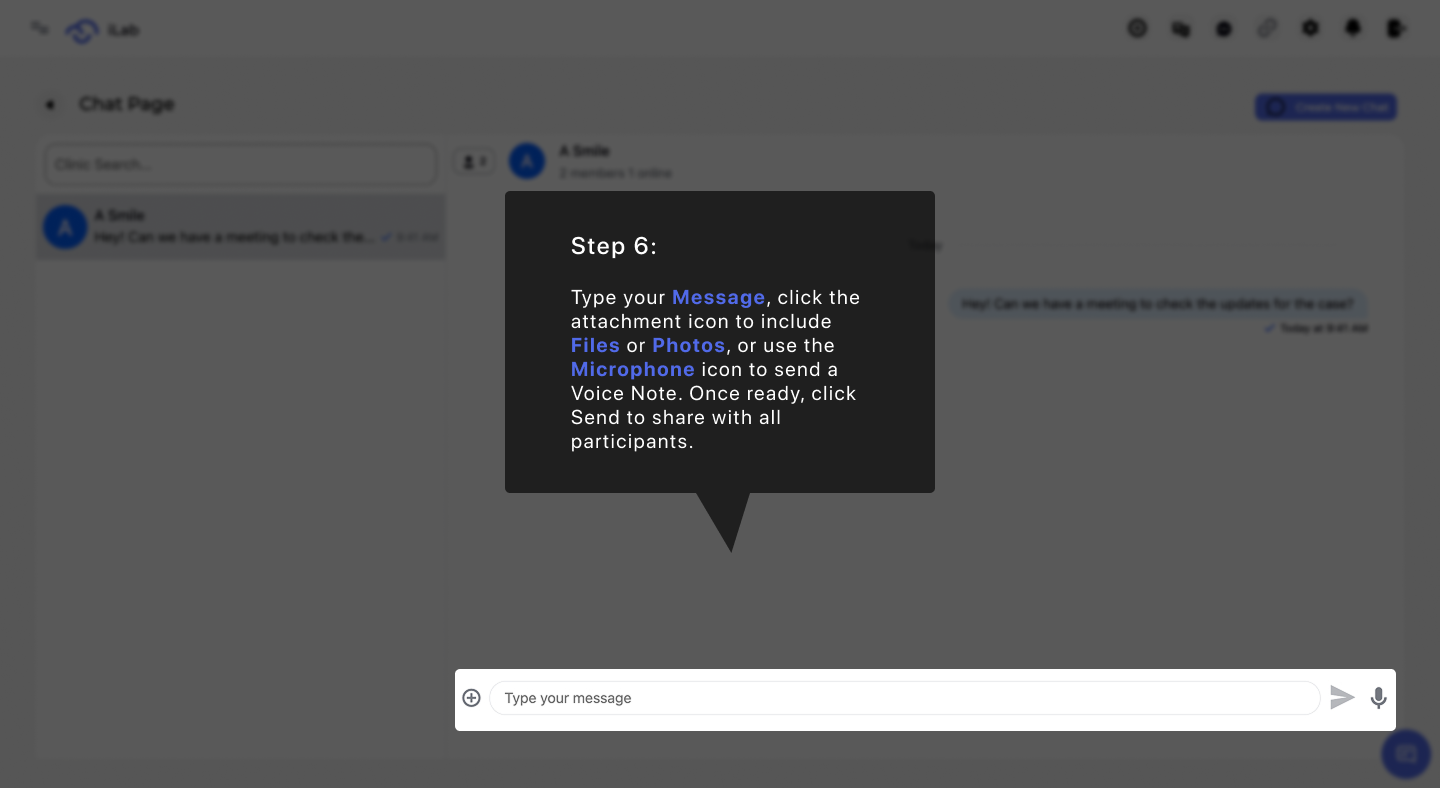
The final step is to prepare your content for the participants. Type your message into the text box, or record a voice note using the microphone icon. If you need to include supporting documents or images, click the attachment icon. Once ready, click the Send icon to distribute the information to everyone involved.