Record payments accurately to manage your clinic's balance. This guide explains entering amounts, linking them to invoices, and using the online payment link to speed collections.
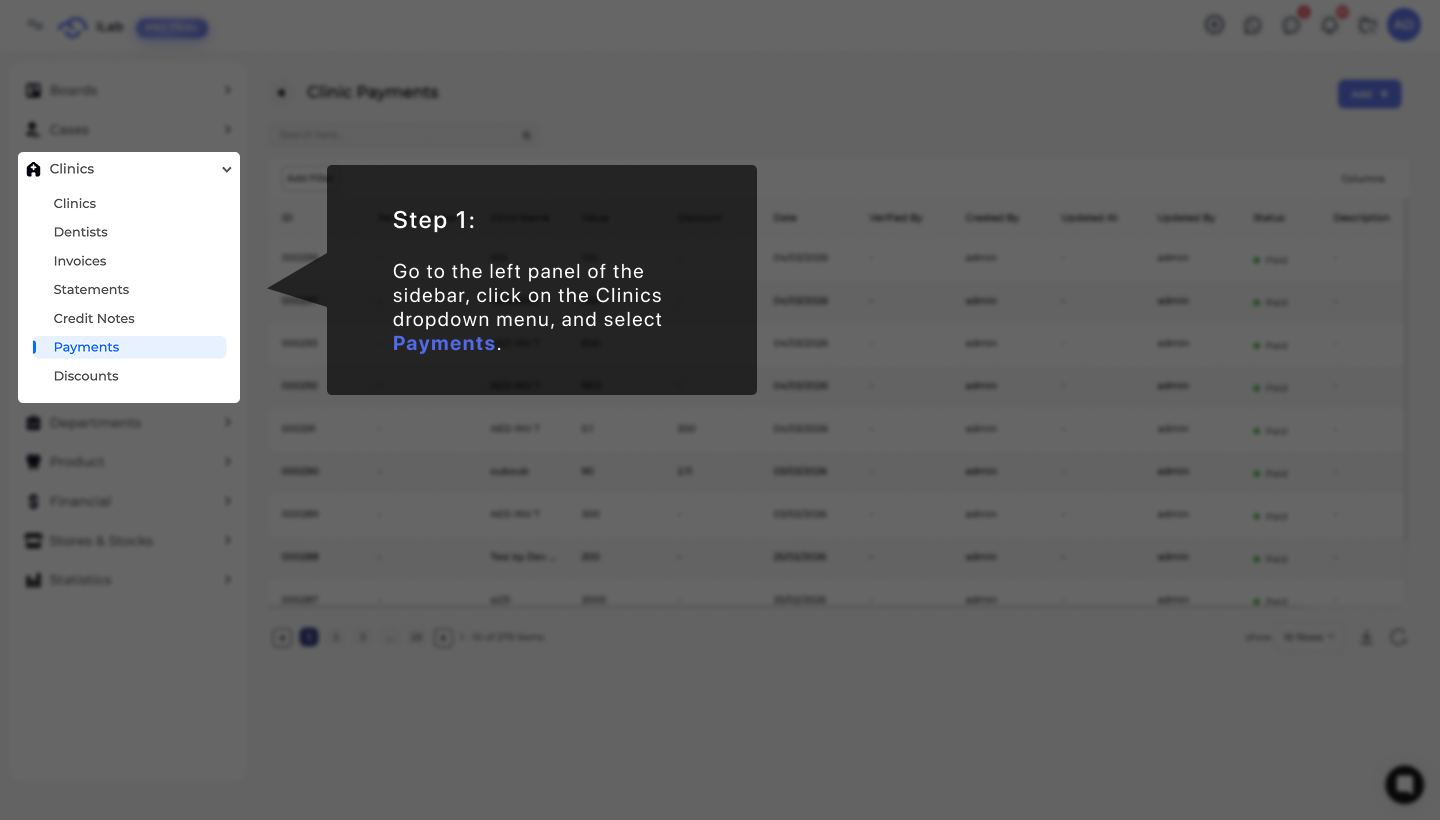
To begin, navigate to the main dashboard menu on the left side of your screen. Select the Clinics Payment option to open the management area where you can view existing billing records or start a new entry.
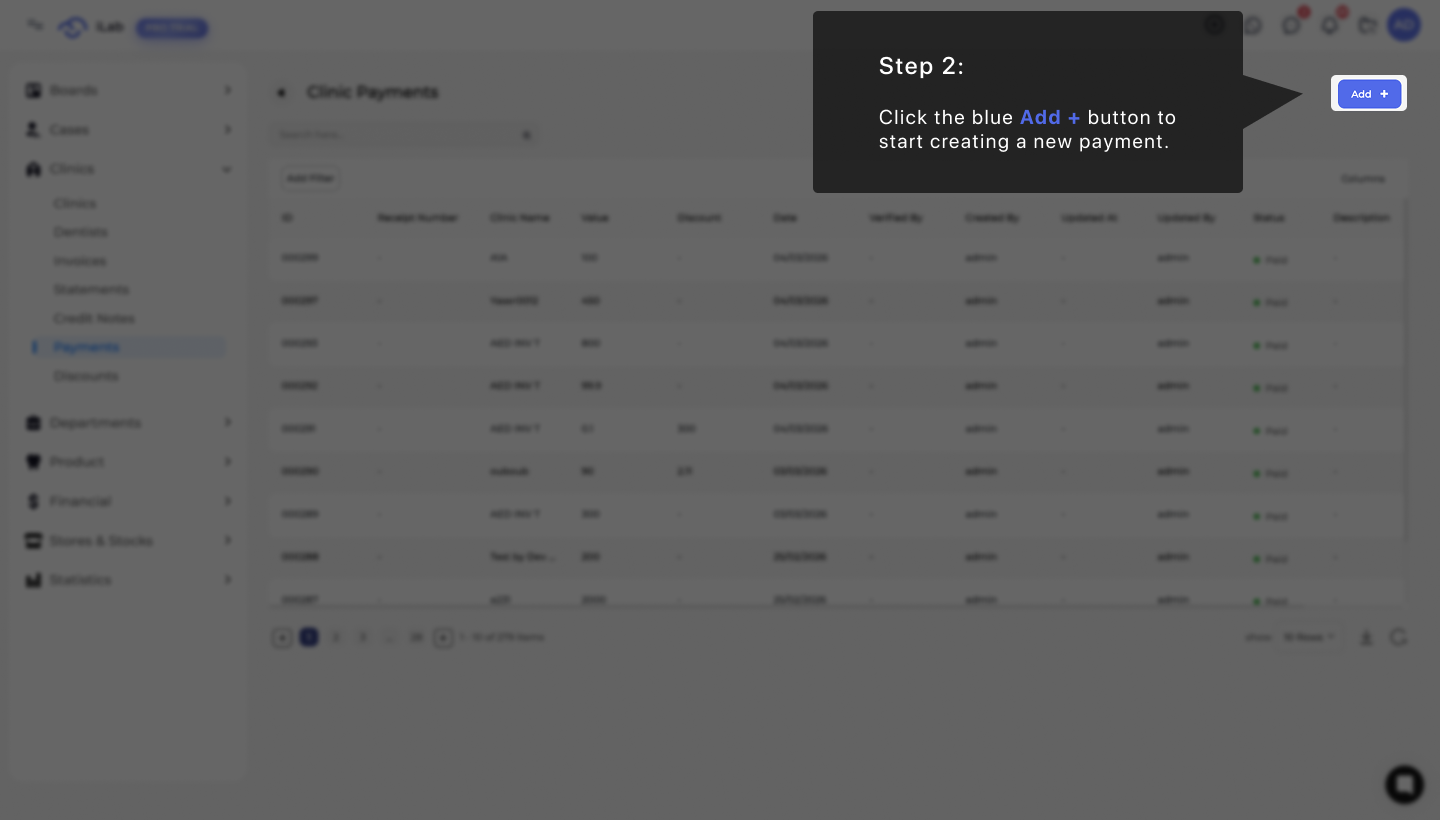
Once you are on the Clinic Payments page, you can start a new payment by clicking the blue + Add button at the top right of the screen. This opens the "Add Payment" window where you will fill in the details about the money being received.
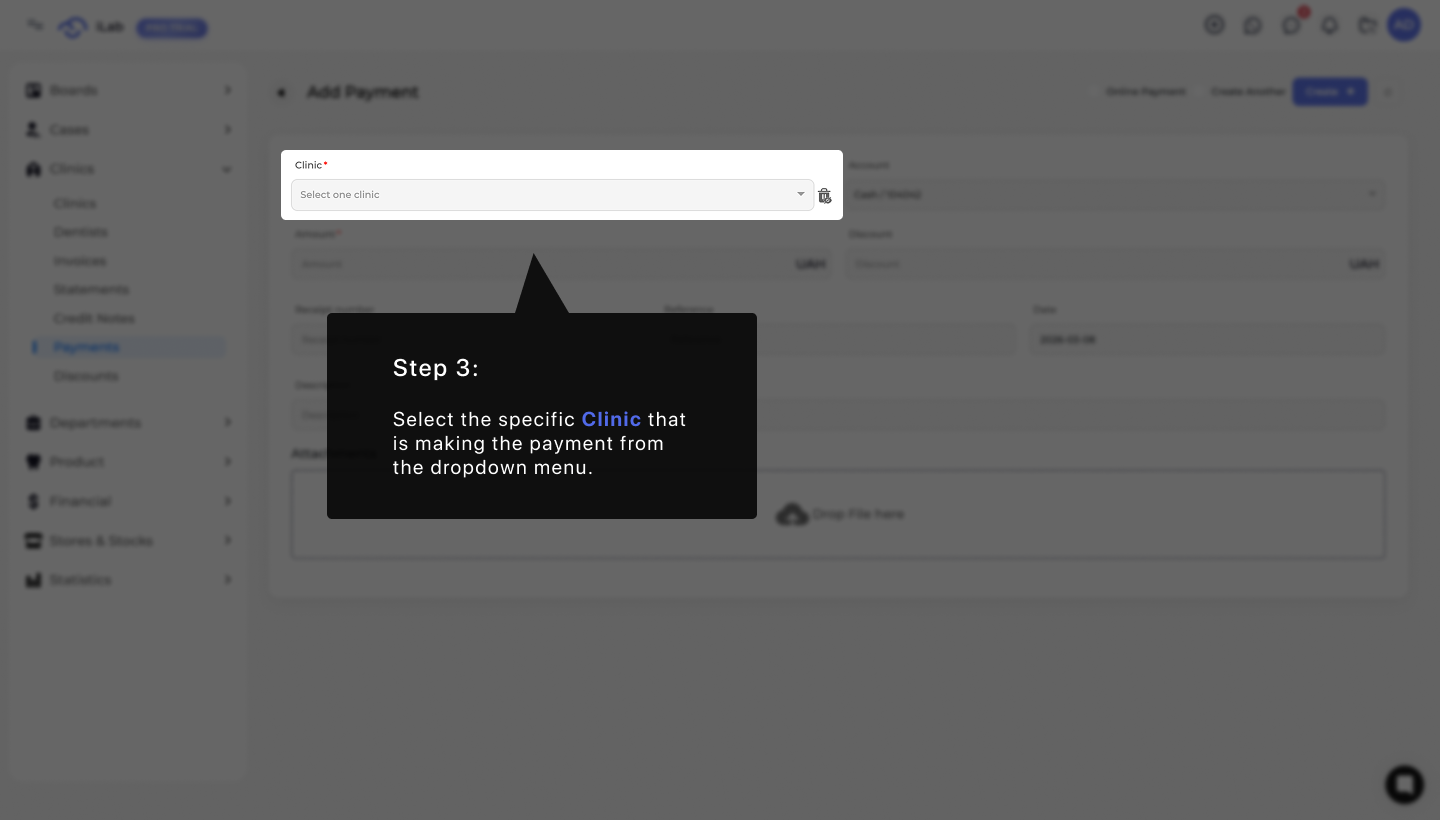
The first thing you need to do in the new window is identify which clinic is paying. Go to the Clinic box and choose the name of the specific clinic from the list in the dropdown menu. This step is very important because it makes sure the money is added to the correct account and shows up in that clinic's history.
Next, you need to record how much money was received. Go to the Value field and type in the total payment amount. It is important to enter the exact number so your financial records stay accurate.

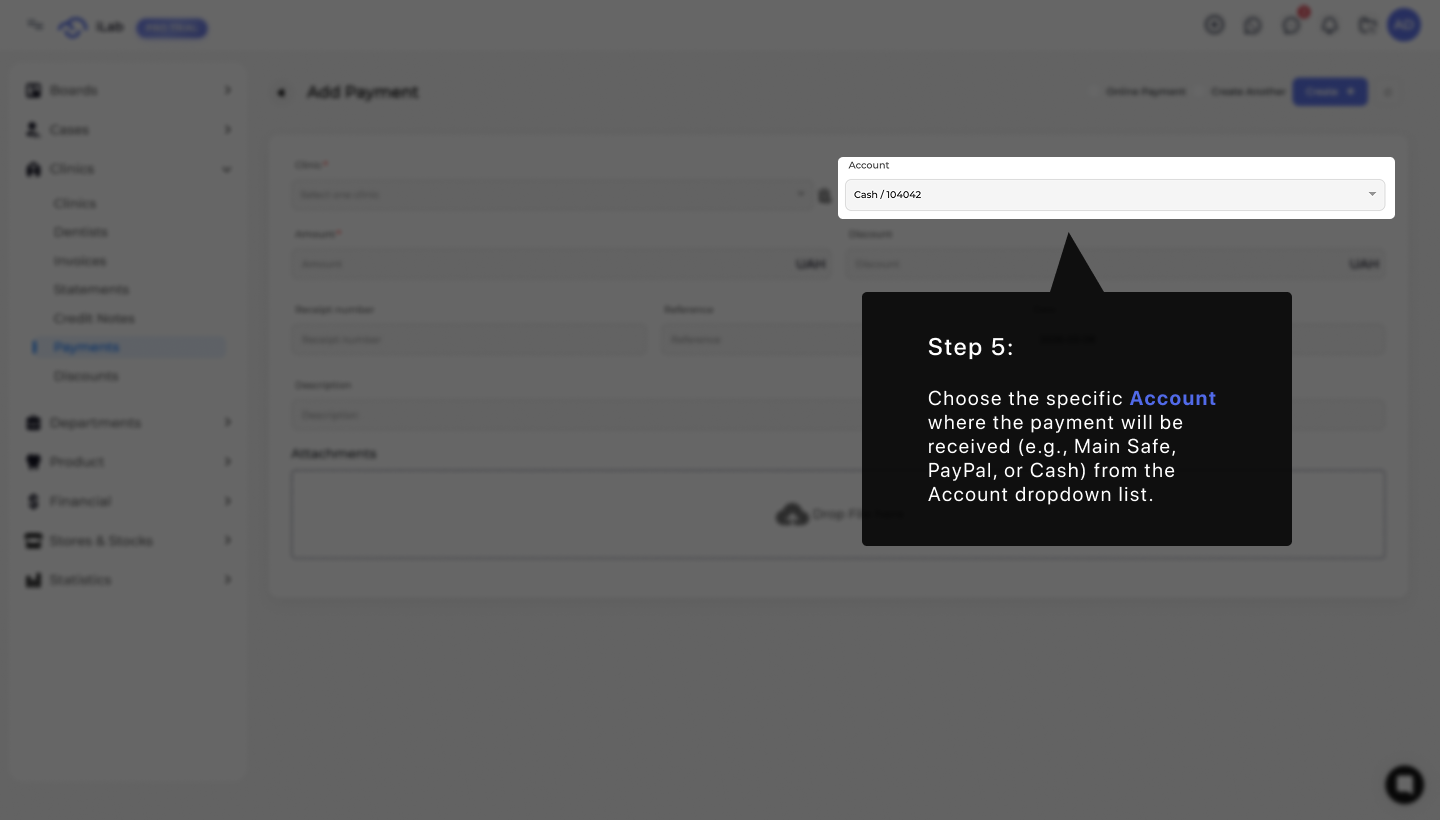
You must tell the system where the payment will be kept. Open the Account dropdown list and pick the specific account where the money was received, such as the Main Safe, PayPal, or Cash account.
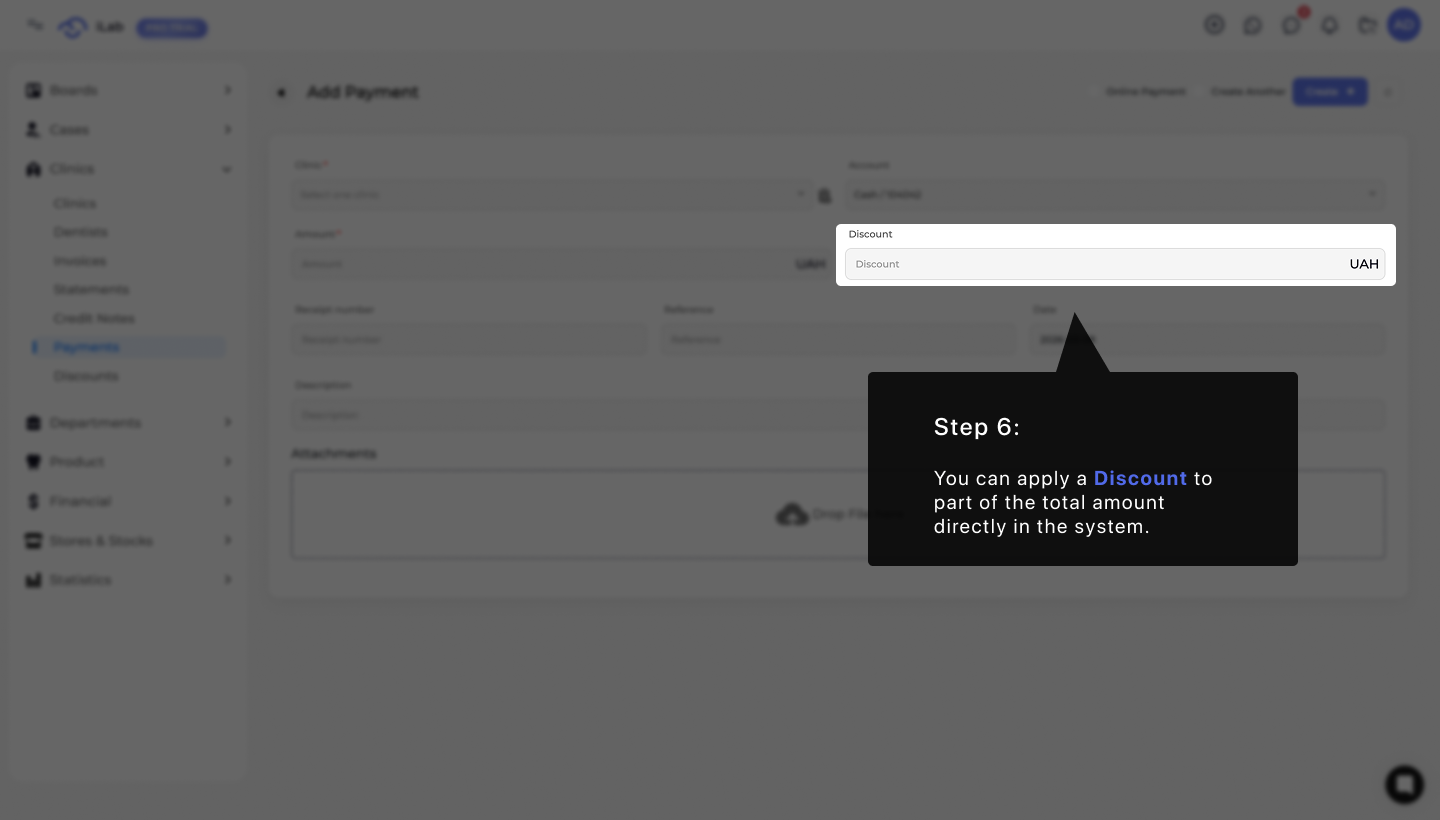
In this step, a discount can be applied to reduce part of the total invoice. The system automatically updates the remaining balance and adjusts the invoice status based on the new total.
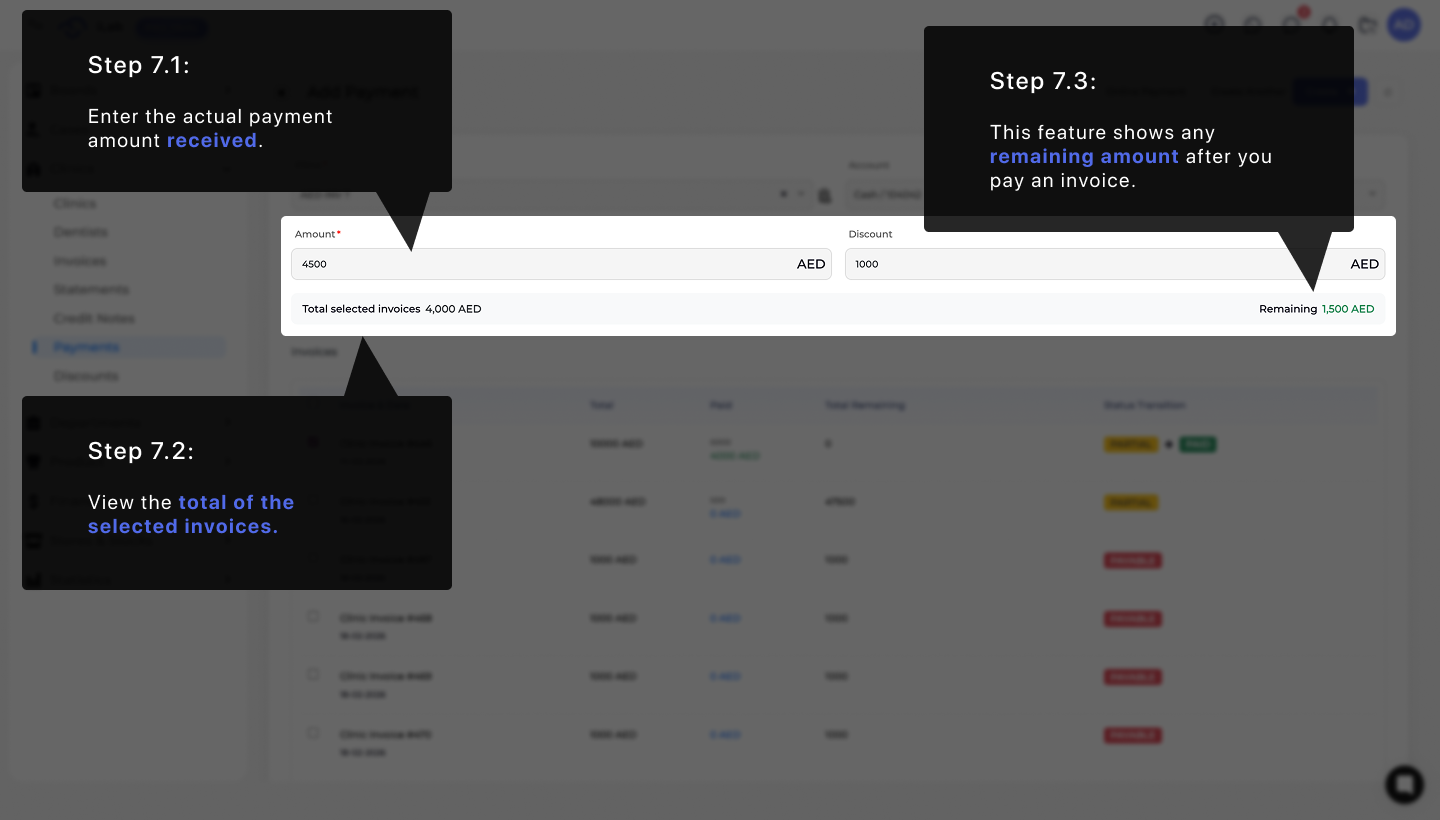
Below is an example of how the payment process might look. In this step, you enter the payment amount and apply any applicable discount. The system automatically calculates the total of the selected invoices and updates the remaining balance.
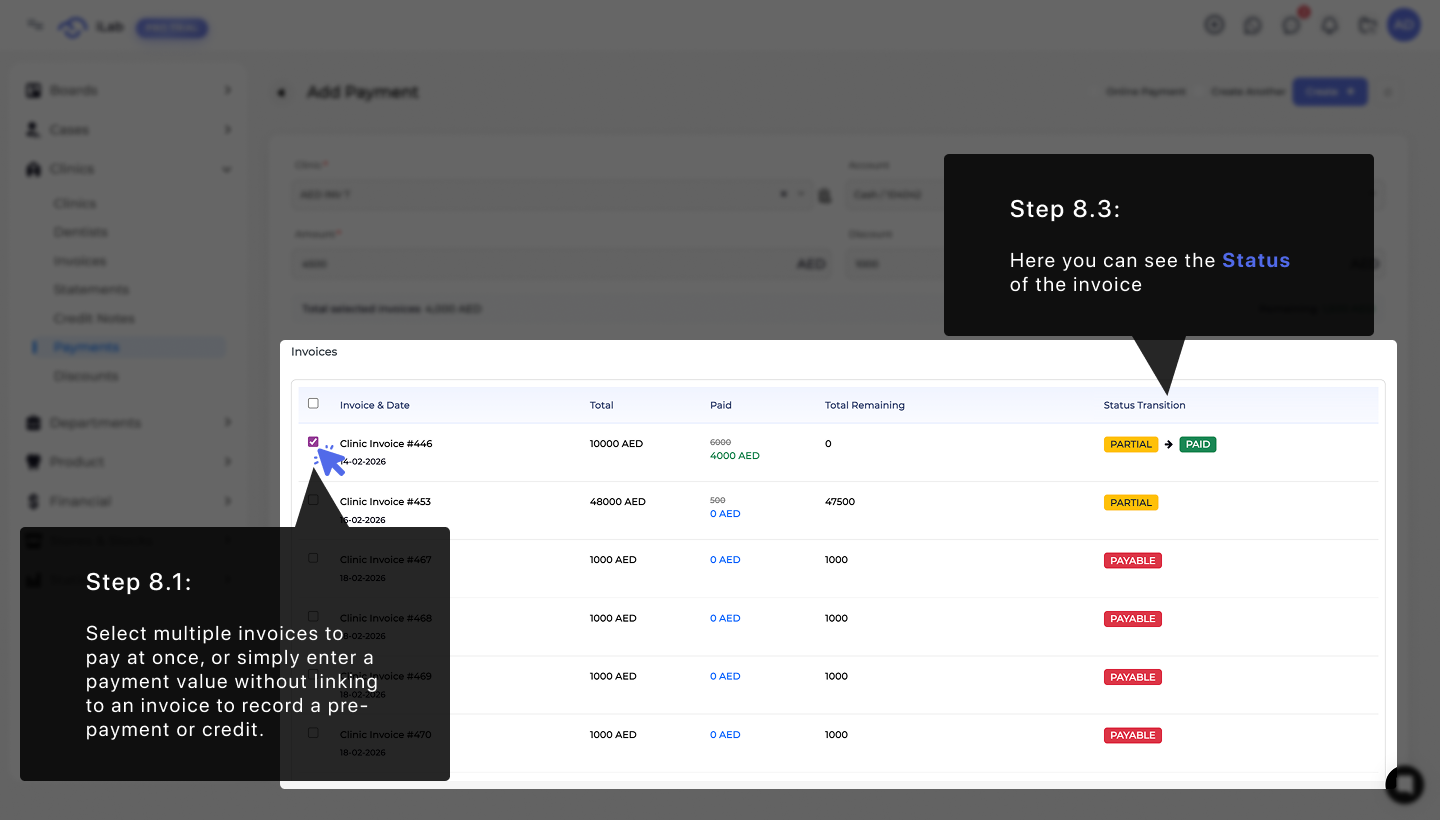
Process multiple invoices in a single payment, or simply enter a payment value to record money ahead of work without linking to a specific invoice. The system automatically calculates the totals and applies them to your balance. As well as you can see the Status of the invoice as payments are recorded and the balance is updated.
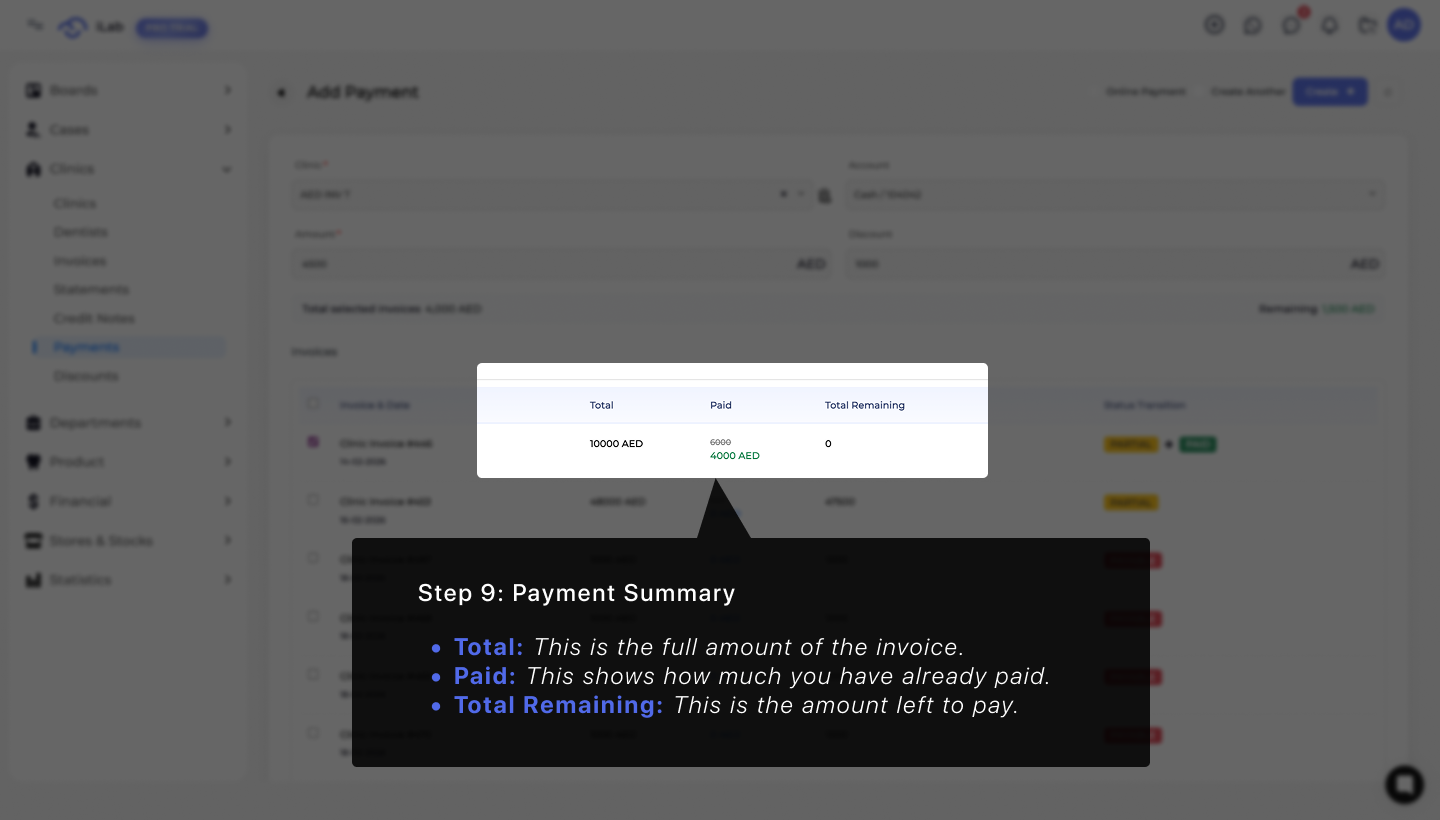
Understanding your numbers shouldn't be a headache. To keep things simple, we’ve included a Payment Summary section that does the math for you. It breaks down the full invoice amount, shows you what’s already been covered, and highlights exactly what’s left to pay. This way, you always know where your money is going.
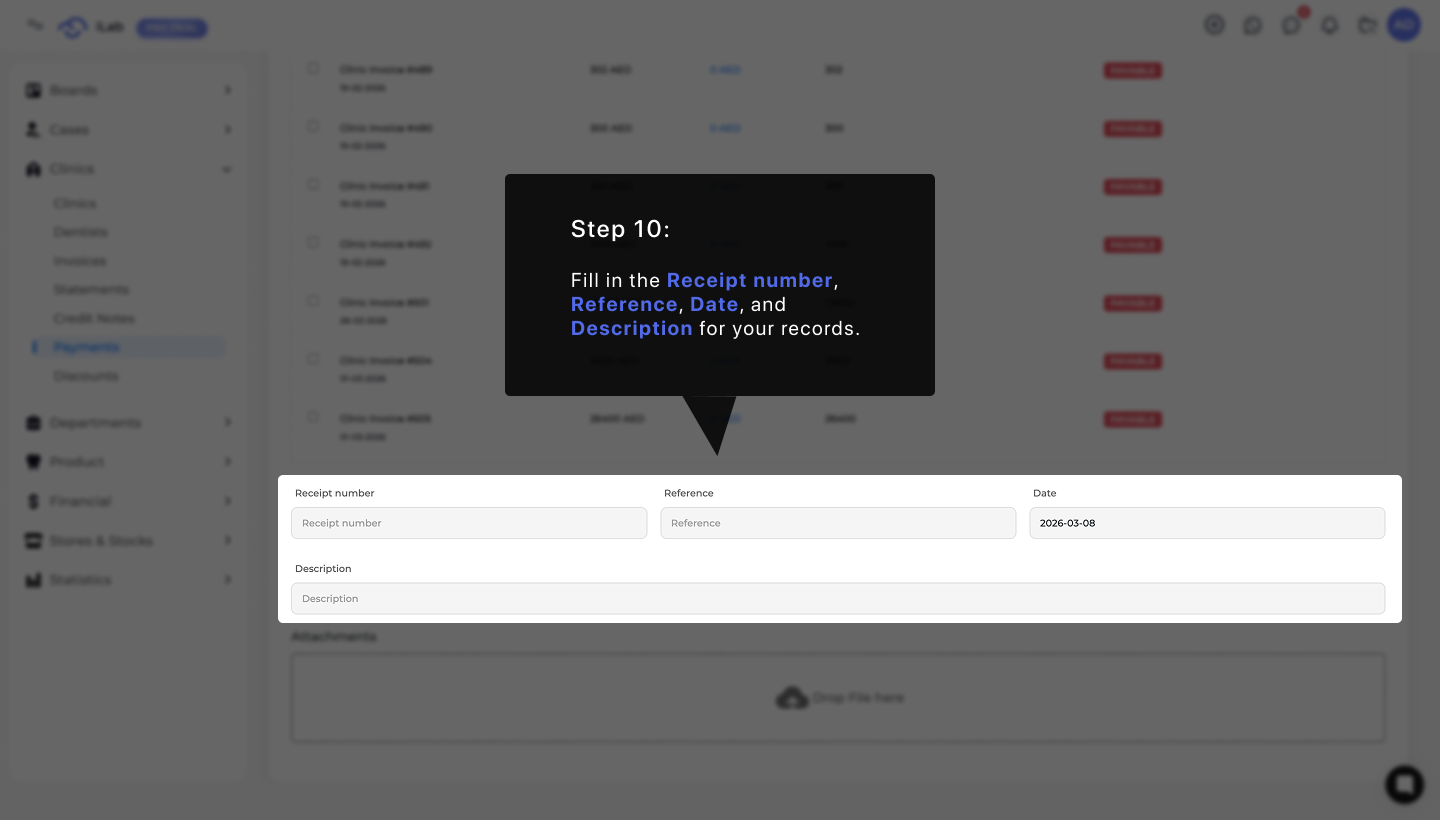
To keep your records organized, you can add extra information about the payment. Fill in the Receipt number, Reference, and Date. You can also write a short Description to help you remember the details of this transaction later.
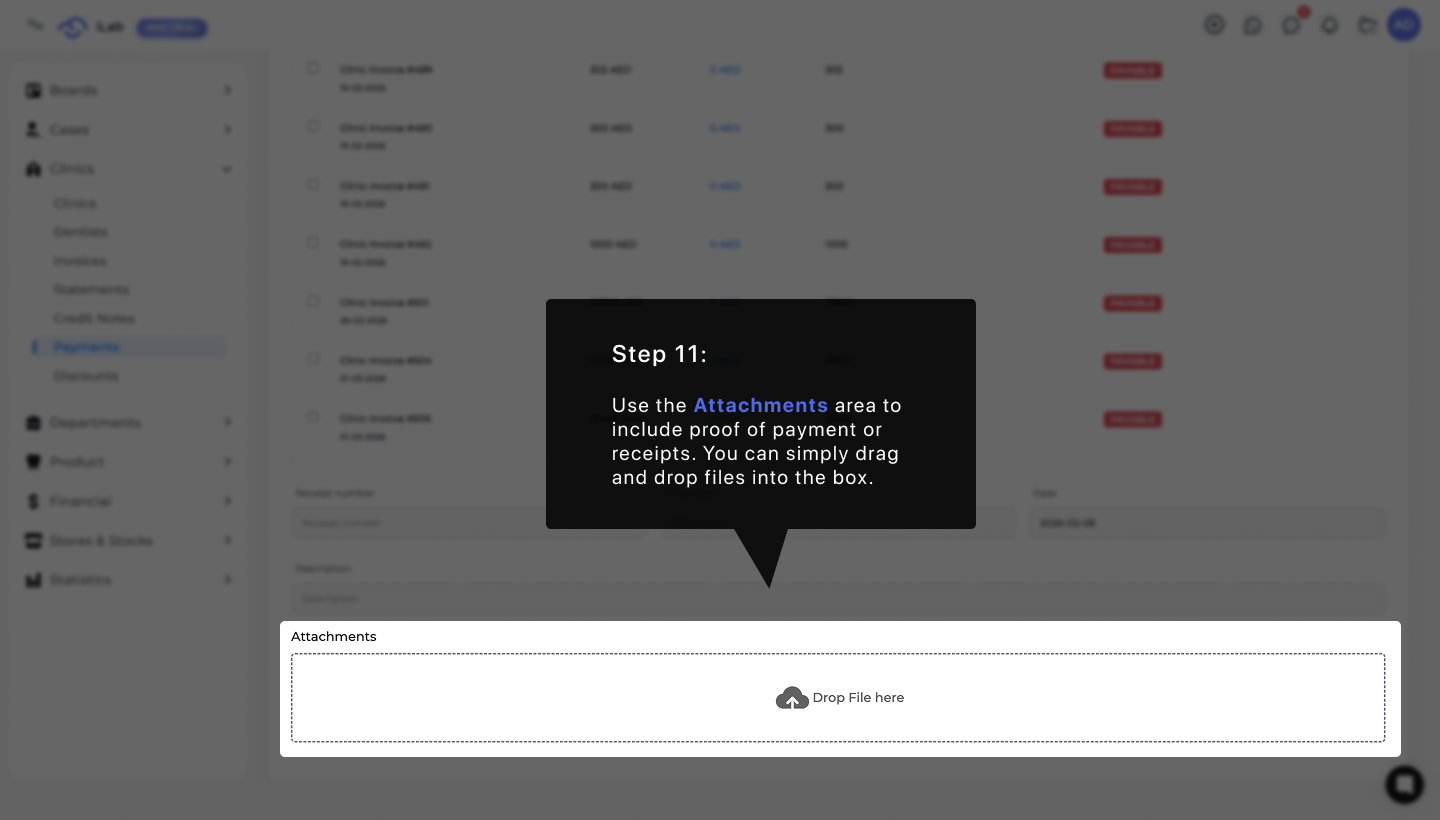
Use the Attachments area at the bottom to include proof of payment or receipts for your records. To make this process quick, you can simply drag and drop your files directly into the box that says "Drop File here". This helps keep all your digital receipts and physical documents in one safe place.
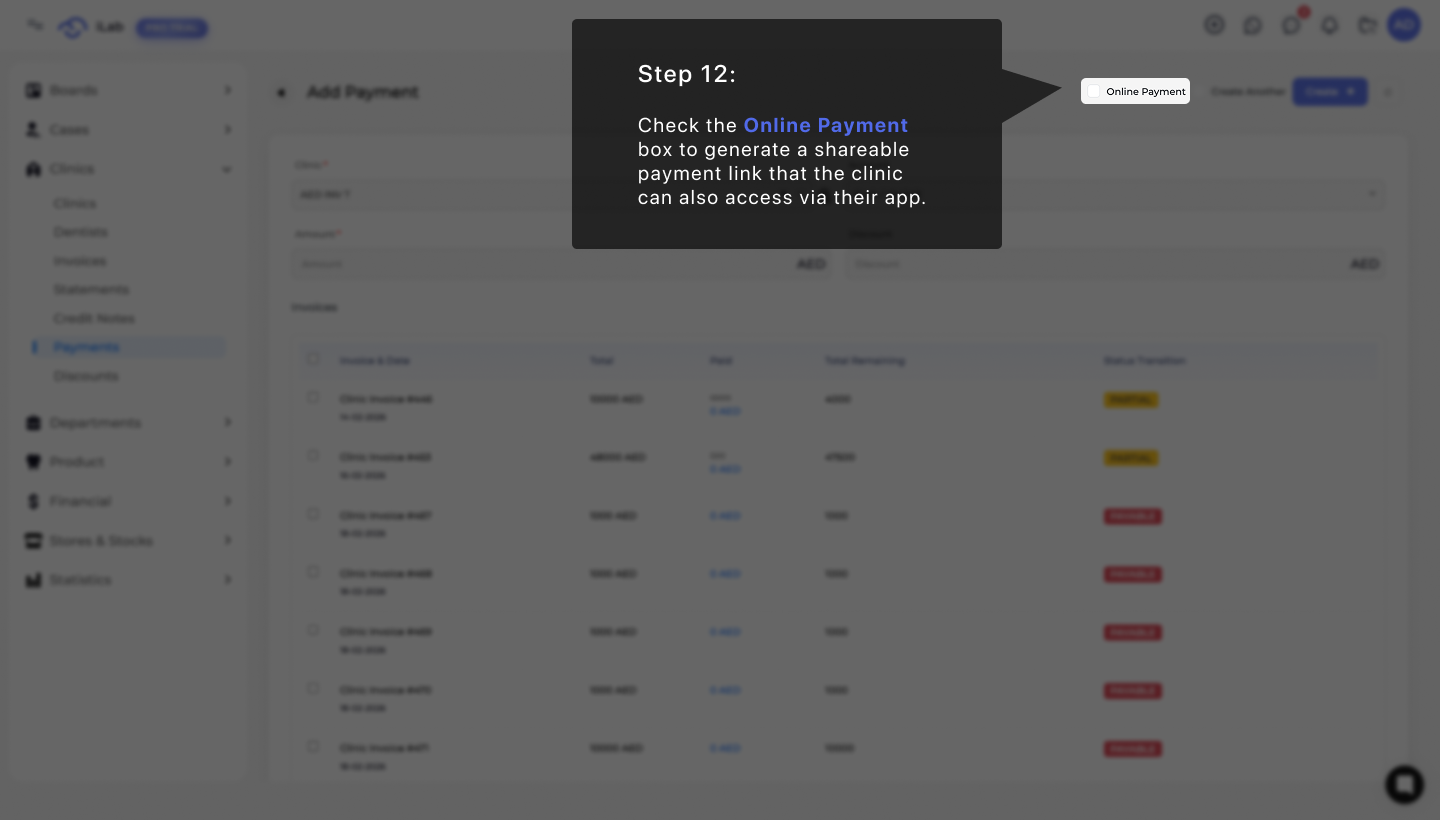
Check the Online Payment box at the top of the window to generate a shareable payment link for the clinic. When this feature is turned on, the clinic can see the request and complete the payment through their own app, making the process much faster for everyone.
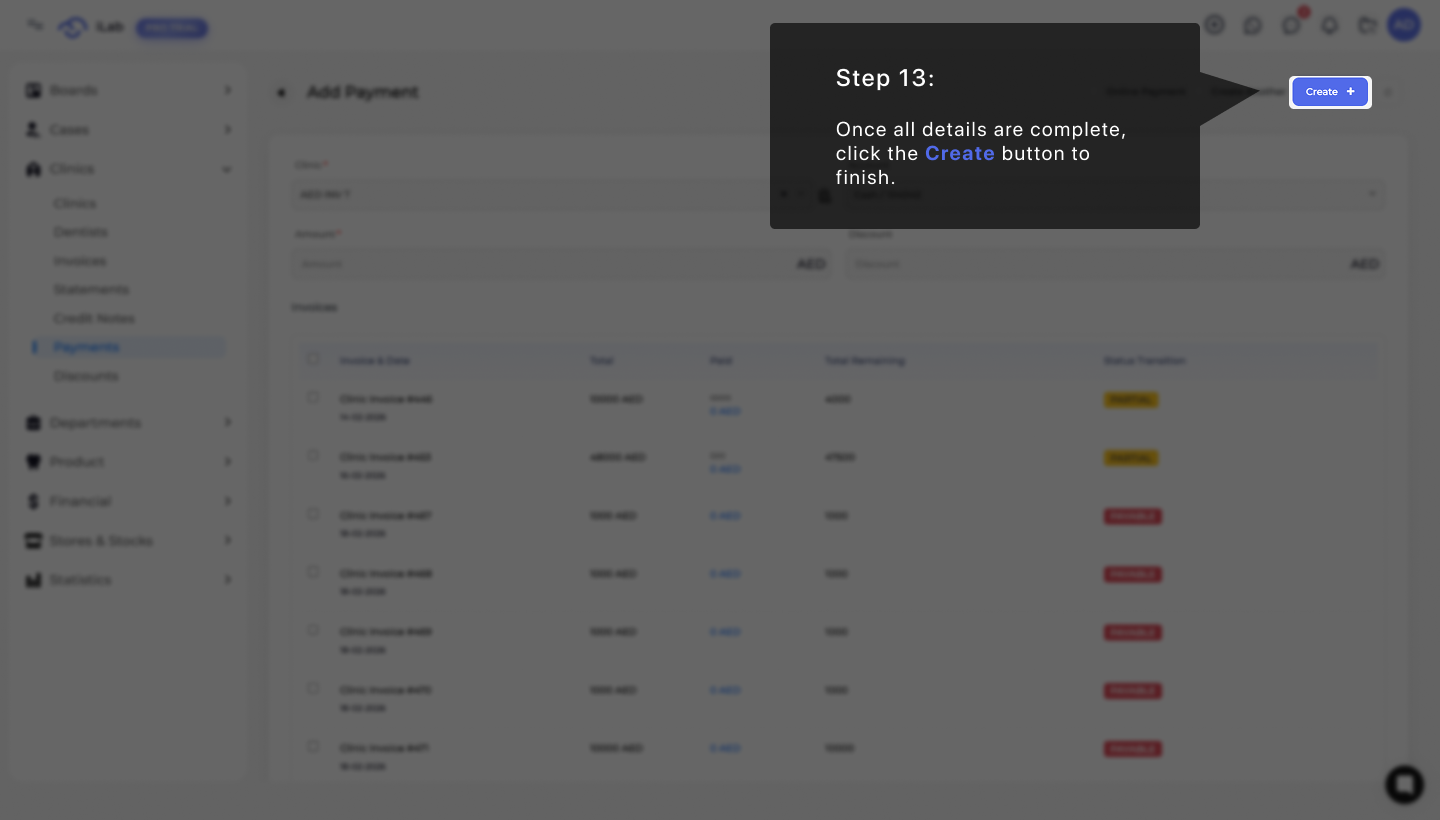
Once you have checked that all the details are complete and correct, look for the blue button at the top right. Click the Create + button to save the transaction and finish creating the new payment record in the system.