Guide to add a dentist in iLab: link them to a clinic, enter professional details, and set treatment preferences to create their profile.
To begin, go to the left panel on your dashboard. Look for the Clinics section, click on it, and then select Dentists from the list.

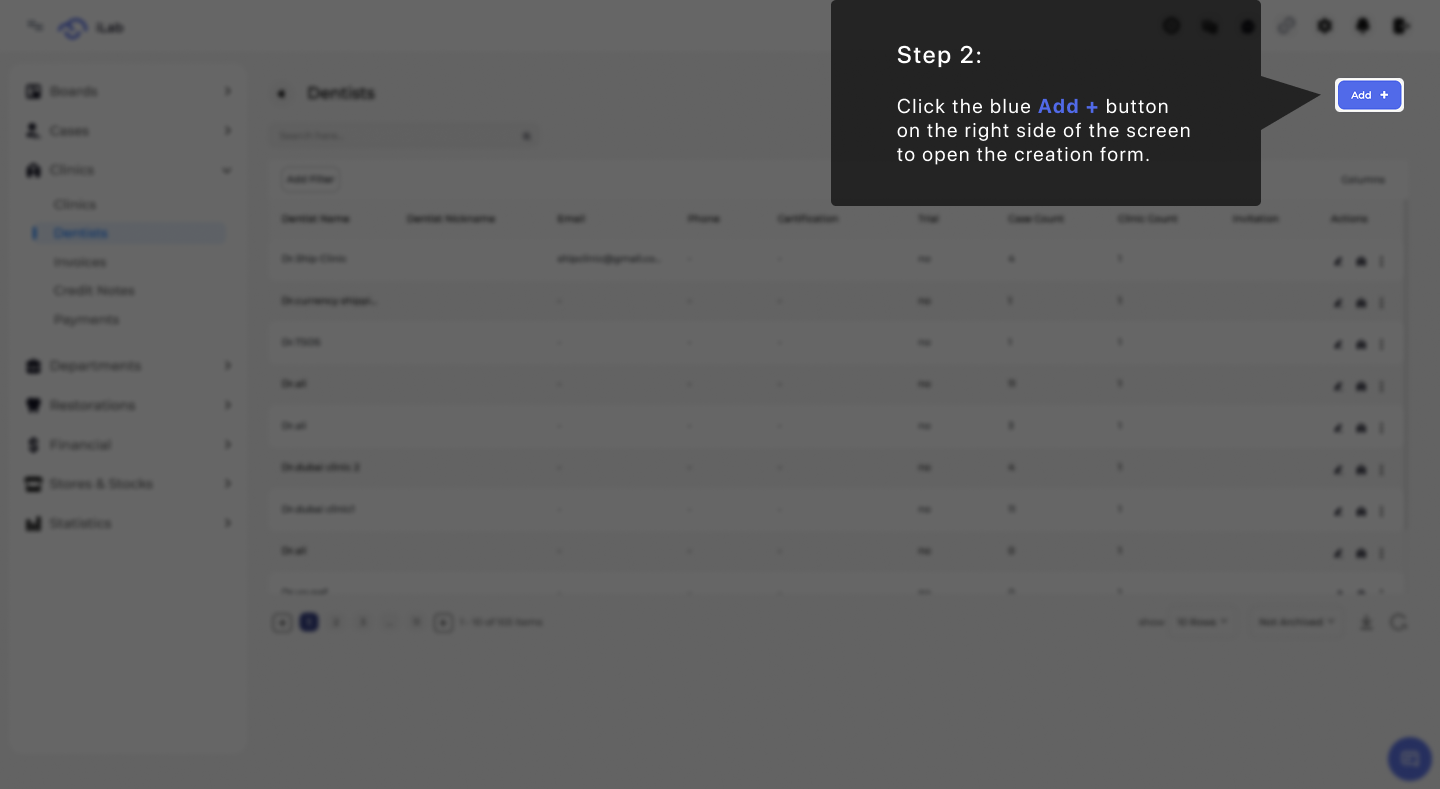
Once you are on the Dentists page, look at the right side of the screen. Click the blue Add + button to open the form and start creating a new dentist profile. This action pulls up a fresh window so you can enter the specific details for the new staff member.
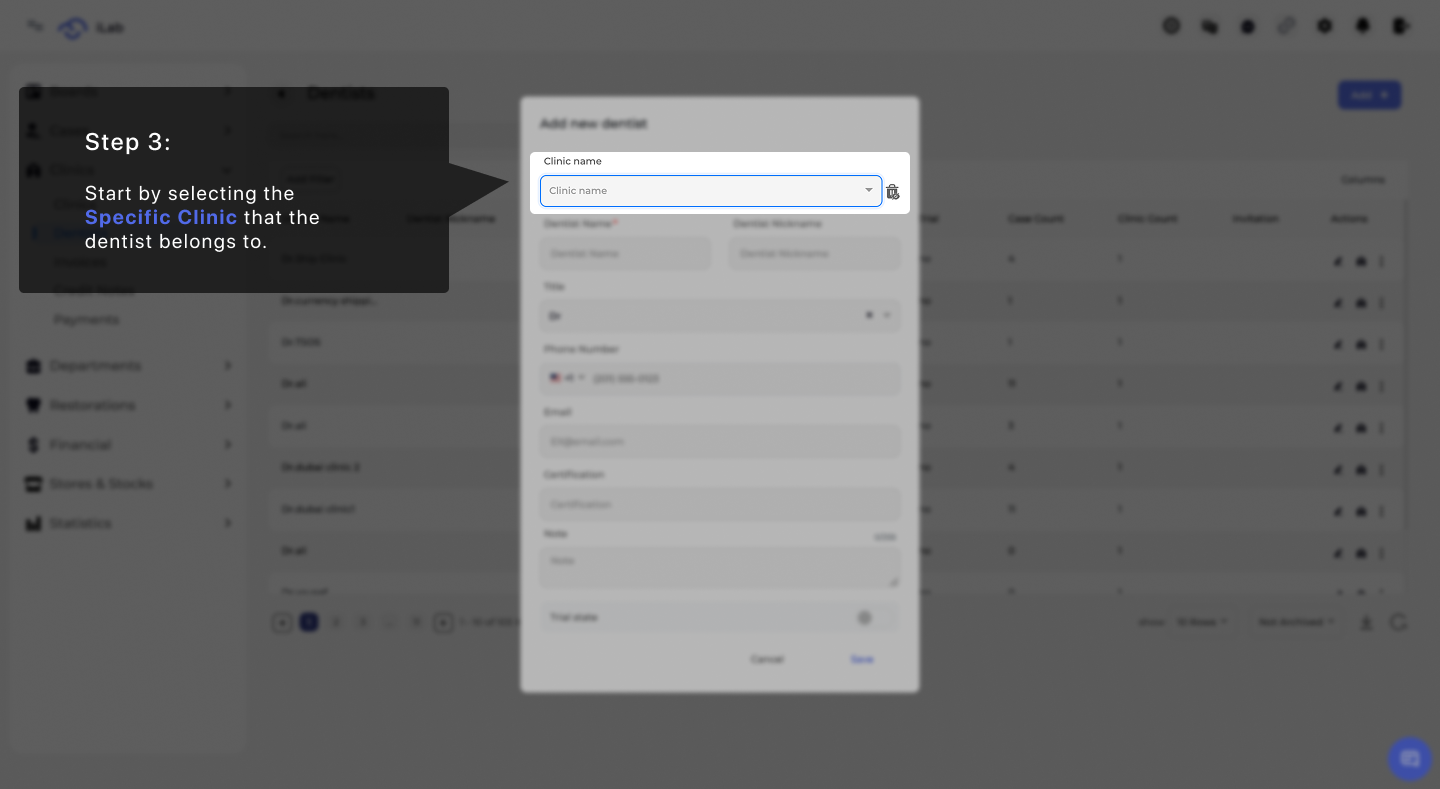
The first thing you need to do in the new window is identify which clinic the dentist belongs to. Click on the Specific Clinic box and choose the correct clinic name from the dropdown menu. Connecting a dentist to a clinic is important because it organizes your records and ensures cases are sent to the right location.
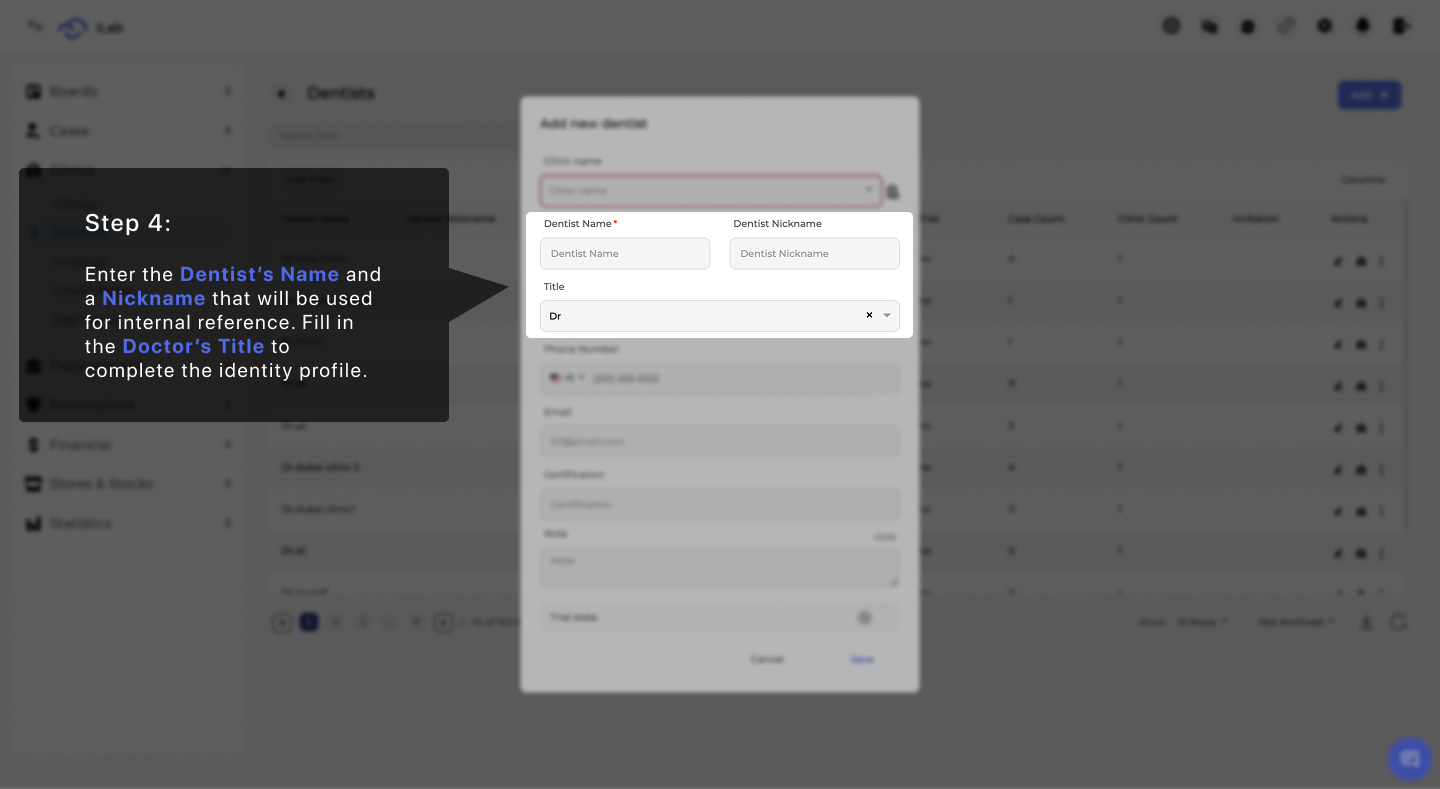
After choosing the clinic, you need to set up how the doctor appears in the system. Type in the Dentist's Name for official use and a Nickname. This nickname is a helpful tool for the admin; if they do not want to show the full name on financial documents or in the employee app, the nickname will be used instead. Be sure to add the Doctor's Title to complete the identity profile.
This section is for the dentist’s contact info and professional credentials. Enter their Phone Number and Email Address so they can receive case updates. You can also record their Certifications and use the Notes box to save any specific clinical preferences they have.

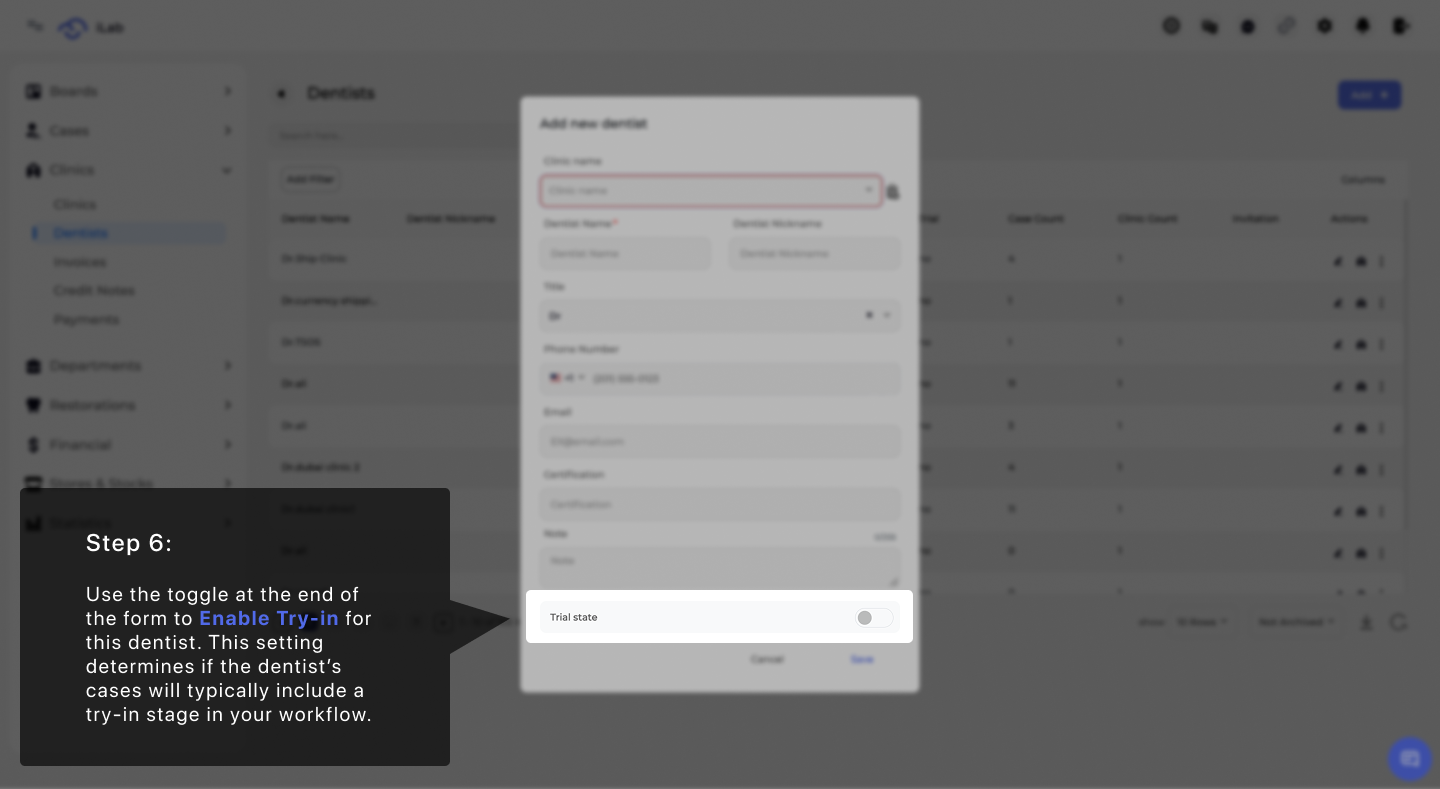
Use the toggle at the bottom to customize how the lab handles this doctor's cases. If you Enable Try-in, the system will automatically add a try-in stage to their workflow. This helps match the lab's process to the dentist's specific clinical requirements.