Accurate billing is essential for lab–clinic partnerships. This guide shows how to generate invoices in iLab for single cases and consolidated batches—filter by date, set custom due dates, and finalize professional invoices for clients.
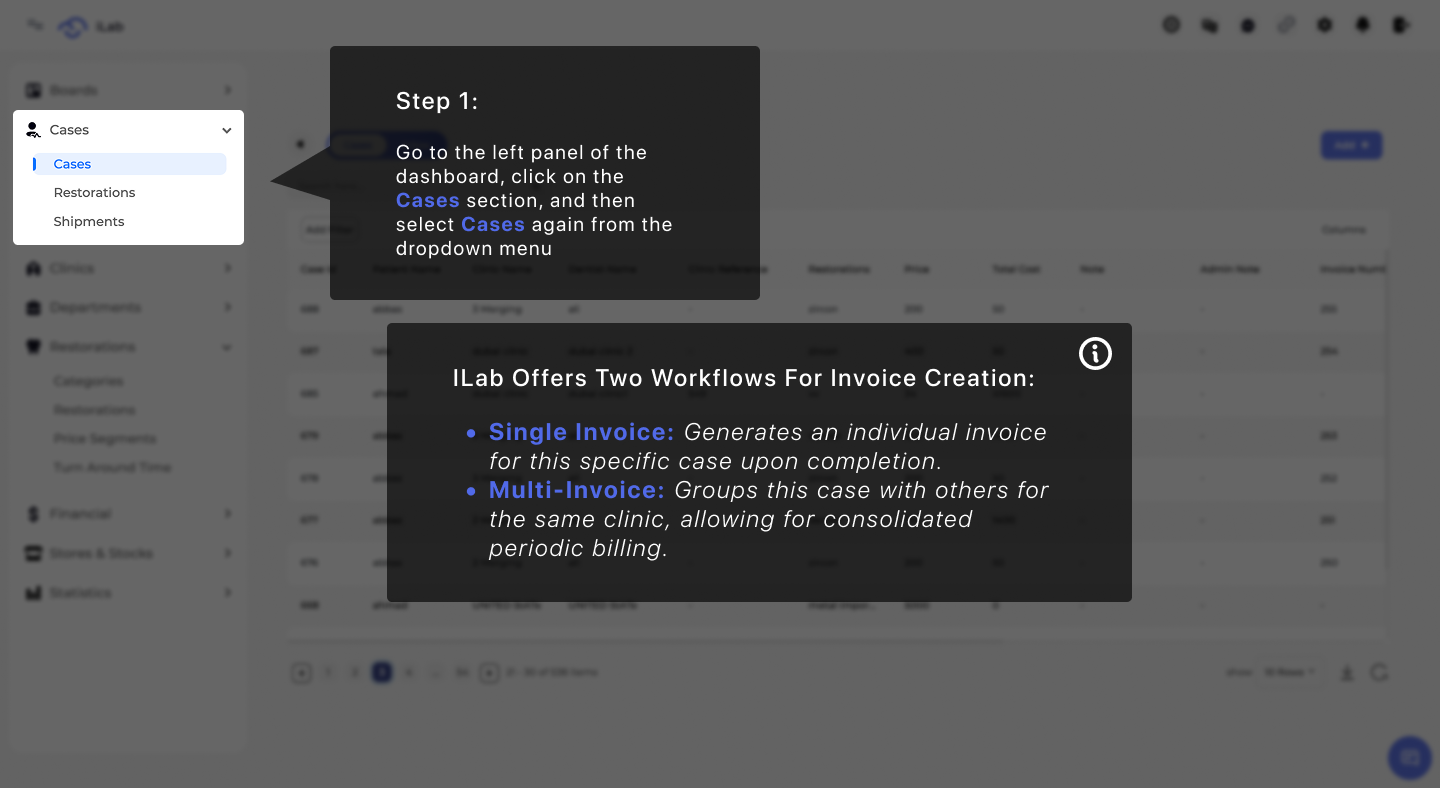
To start the process, open the main navigation menu on the left side of your dashboard. Locate the Cases category and click on it, then select the Cases sub-item from the options that appear. This will open the primary list where you can see all your laboratory orders. From this screen, iLab gives you two different ways to handle your billing. You can choose the Single Invoice workflow if you want to create an individual bill for one specific case as soon as the work is finished. Alternatively, you can use the Multi-Invoice workflow to group multiple cases together for the same clinic, which is perfect for labs that prefer to send out consolidated bills on a regular schedule.
Selecting the Specific Order Scroll through your active list to find the patient or order number you are ready to bill. Click on that row to pull up the comprehensive Case Details screen.

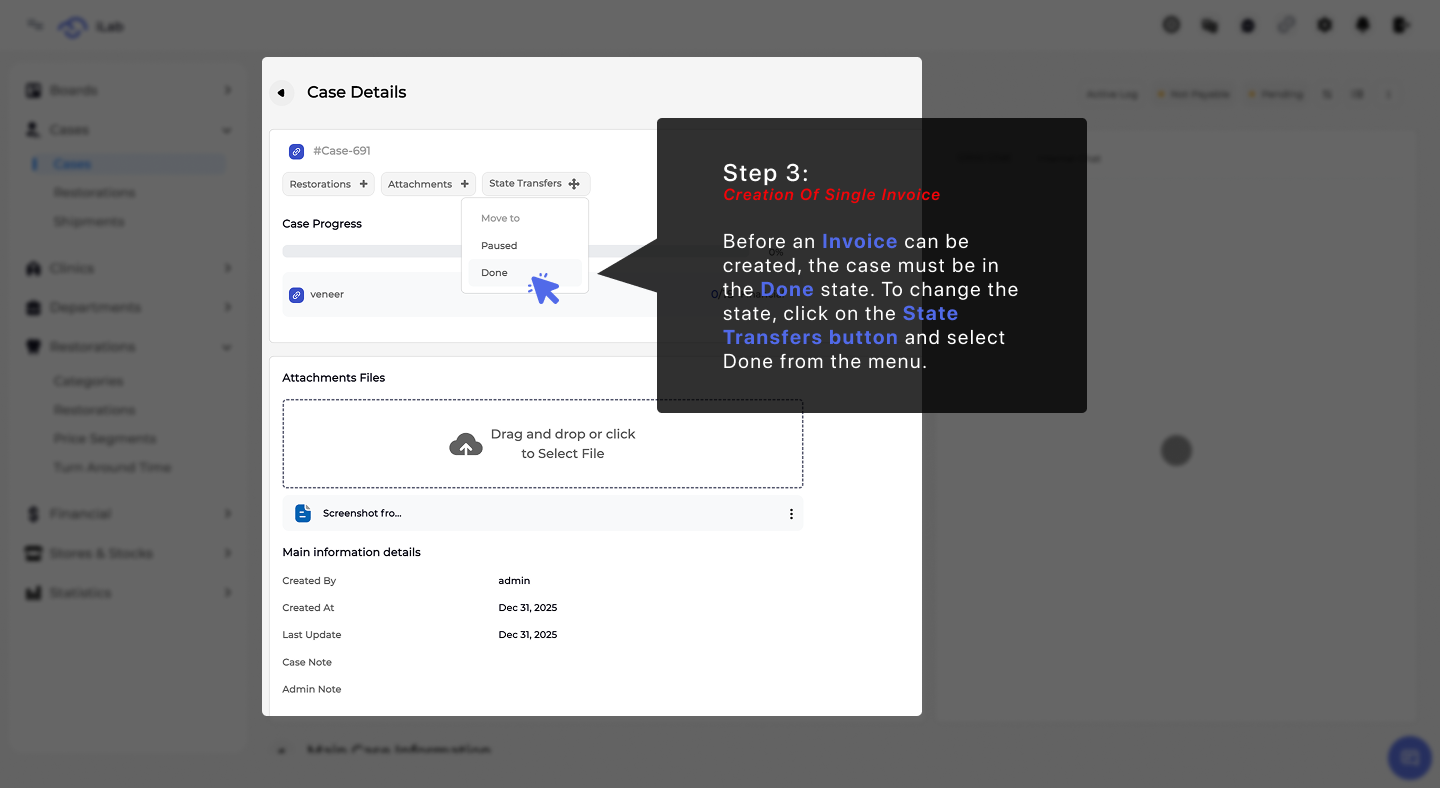
Confirming Completion An invoice cannot be issued while a case is still in production. Use the State Transfers dropdown menu and move the case into the Delivered or Done category to confirm the work is finished.
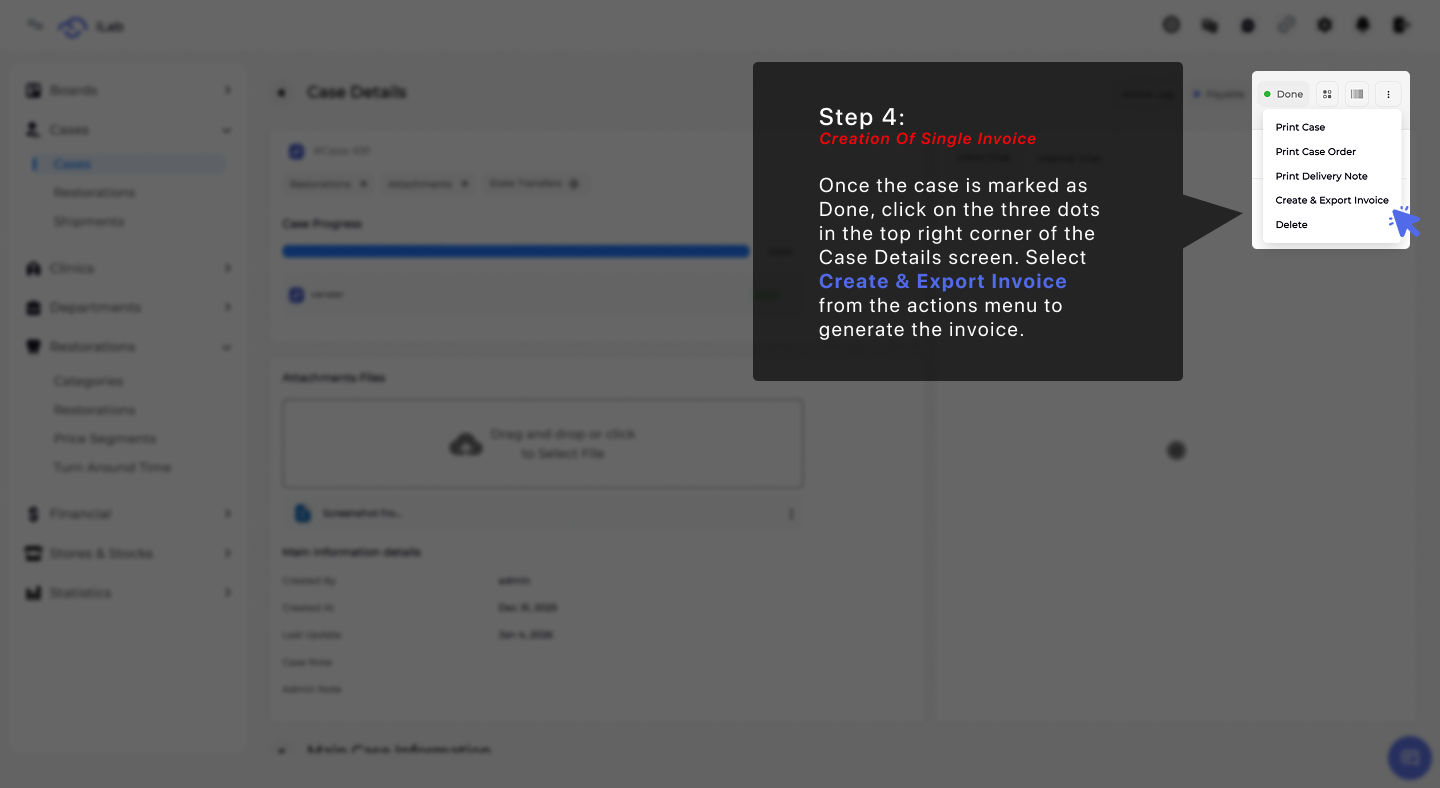
Creating the Billing Document Look for the action menu (represented by three dots) in the upper-right corner of the page. Choose Export Invoice from the list to automatically generate the document based on the case details.
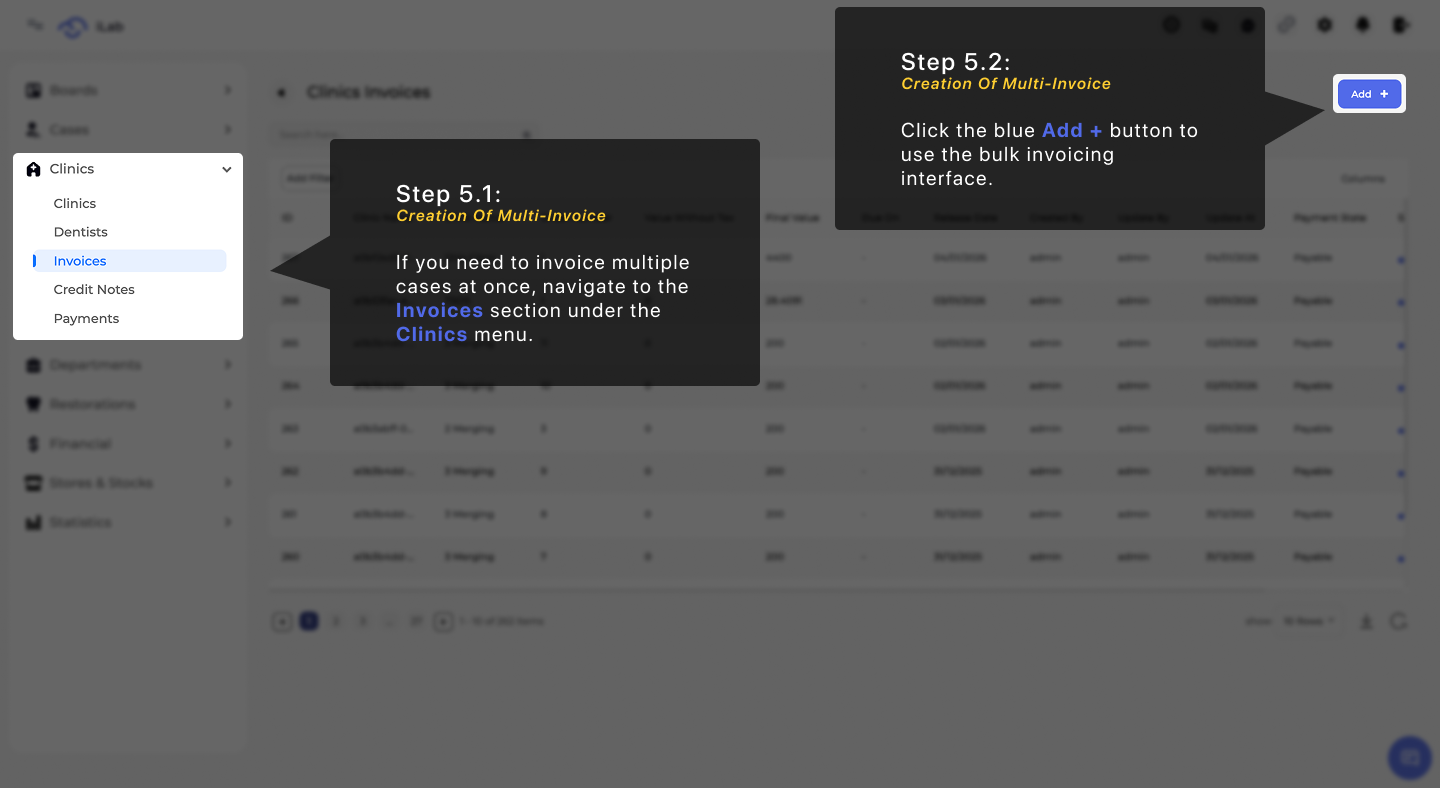
Opening the Invoice Manager Head back to the left panel and click on Clinics, then choose the Invoices tab. Click the blue Add + button to start a new bulk billing session.
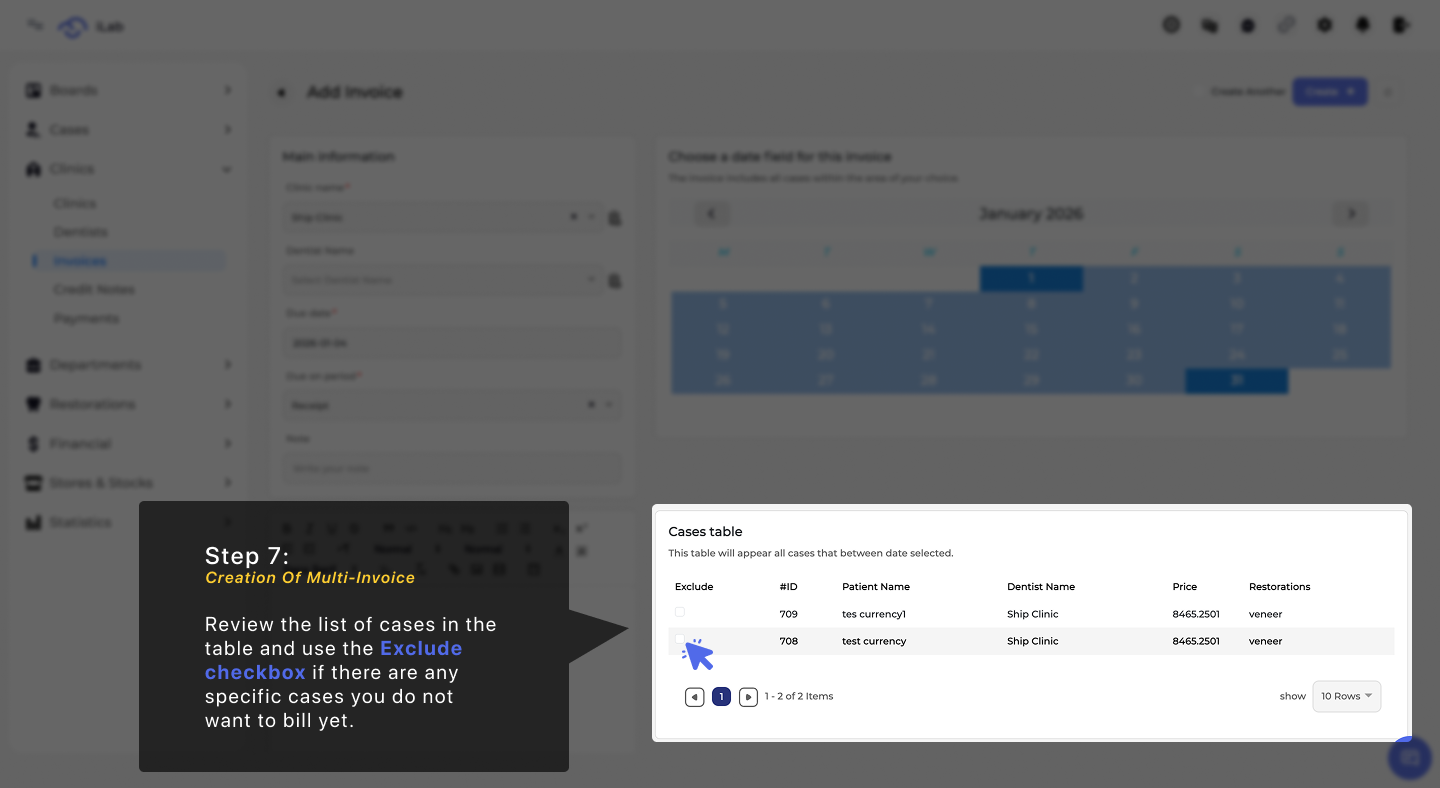
Setting the Invoice Parameters In the main form, pick the Clinic you want to bill. You can also specify a Dentist, set a future Due Date, and add any custom Notes for the clinic's accounting department. Filtering by Date On the right side of the form, use the calendar tool to select the specific timeframe you want to bill for. This will automatically pull up every case that was completed within those dates.

Finalizing the Case List Look at the Cases table that appears at the bottom. If there are any specific jobs that should not be billed yet, simply check the Exclude box next to them. Once the list looks perfect, hit Create to generate the master invoice.