For labs handling many partners, use iLab’s "Import from Excel" to batch-upload clinics: download the template, enter required fields (Clinic Names, Price Segment IDs), and import to sync partner data for production.
Prefer to watch? Follow the steps below in this quick 90-second screen recording.
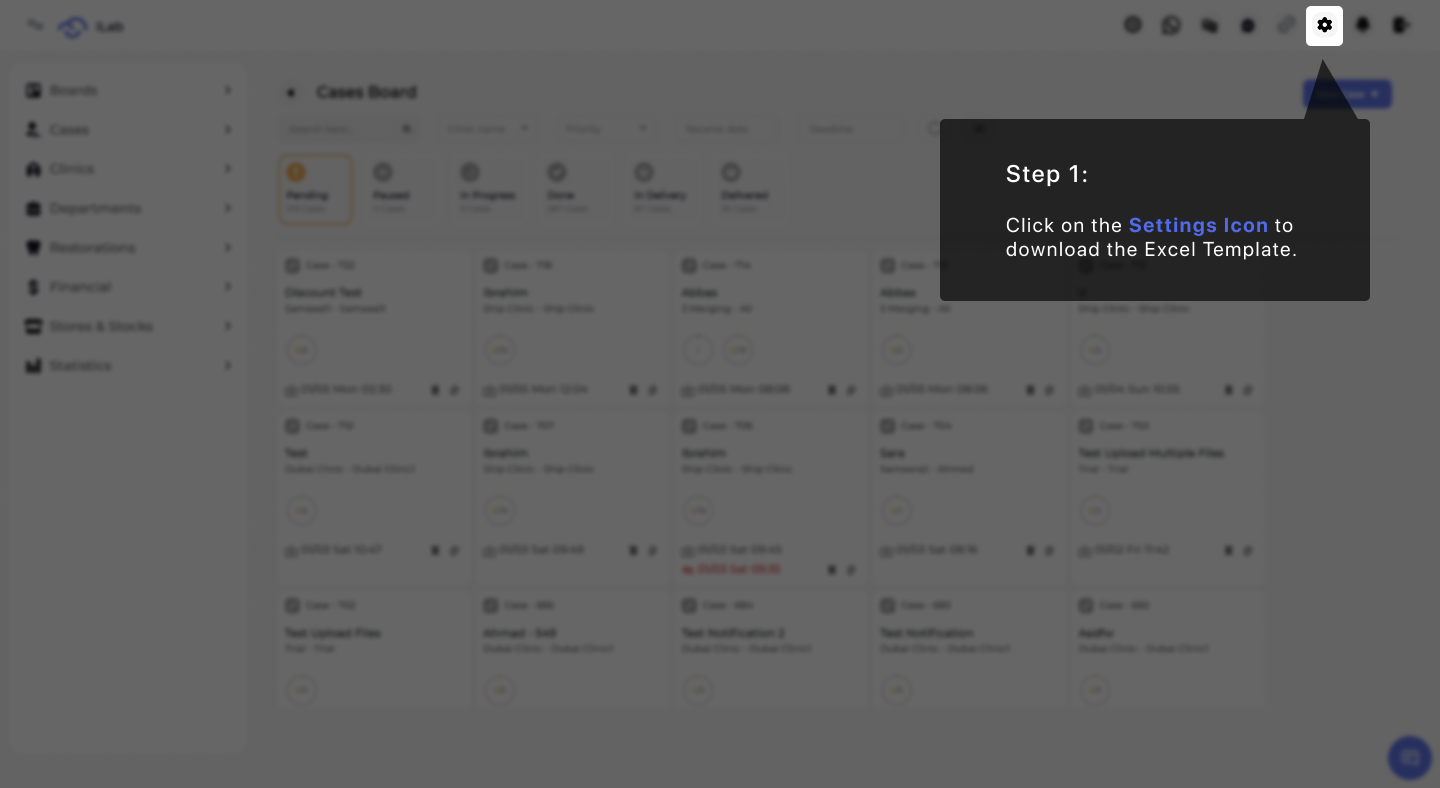
The foundation of your lab setup is found in the administrative area. To begin the data migration process, locate and click the Settings Icon in the top navigation bar. This serves as the portal for all bulk data management tools within the platform.
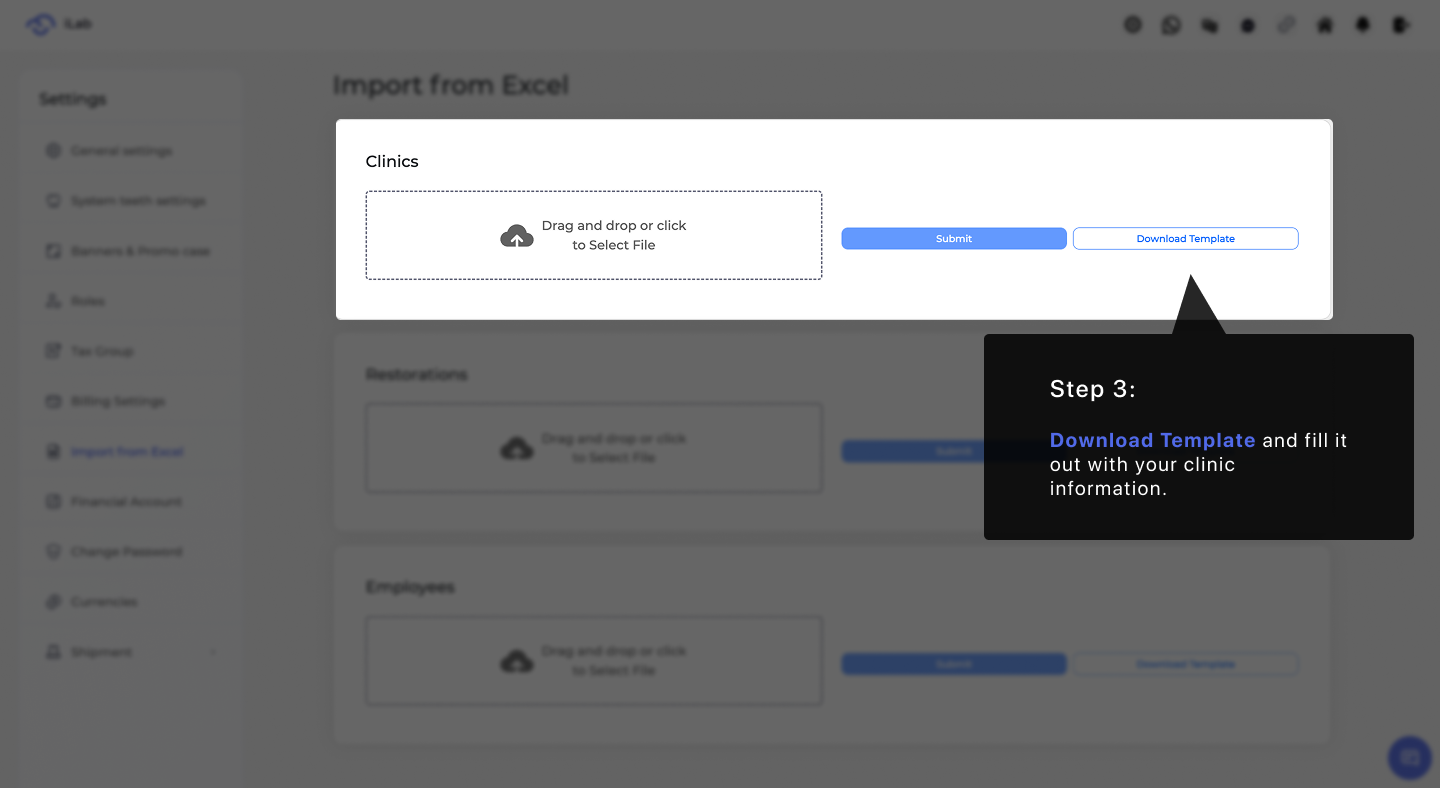
Once inside the settings menu, you need to navigate to the specialized Import From Excel module located on the left side panel. This area is dedicated to synchronizing external spreadsheets with your lab's active database to ensure a seamless transition of client records.

To ensure the system reads your information accurately, you must use a specific file structure. Use the Download Template button to obtain the official Excel file. This document contains the pre-configured headers necessary for the system to map your clinic data correctly.
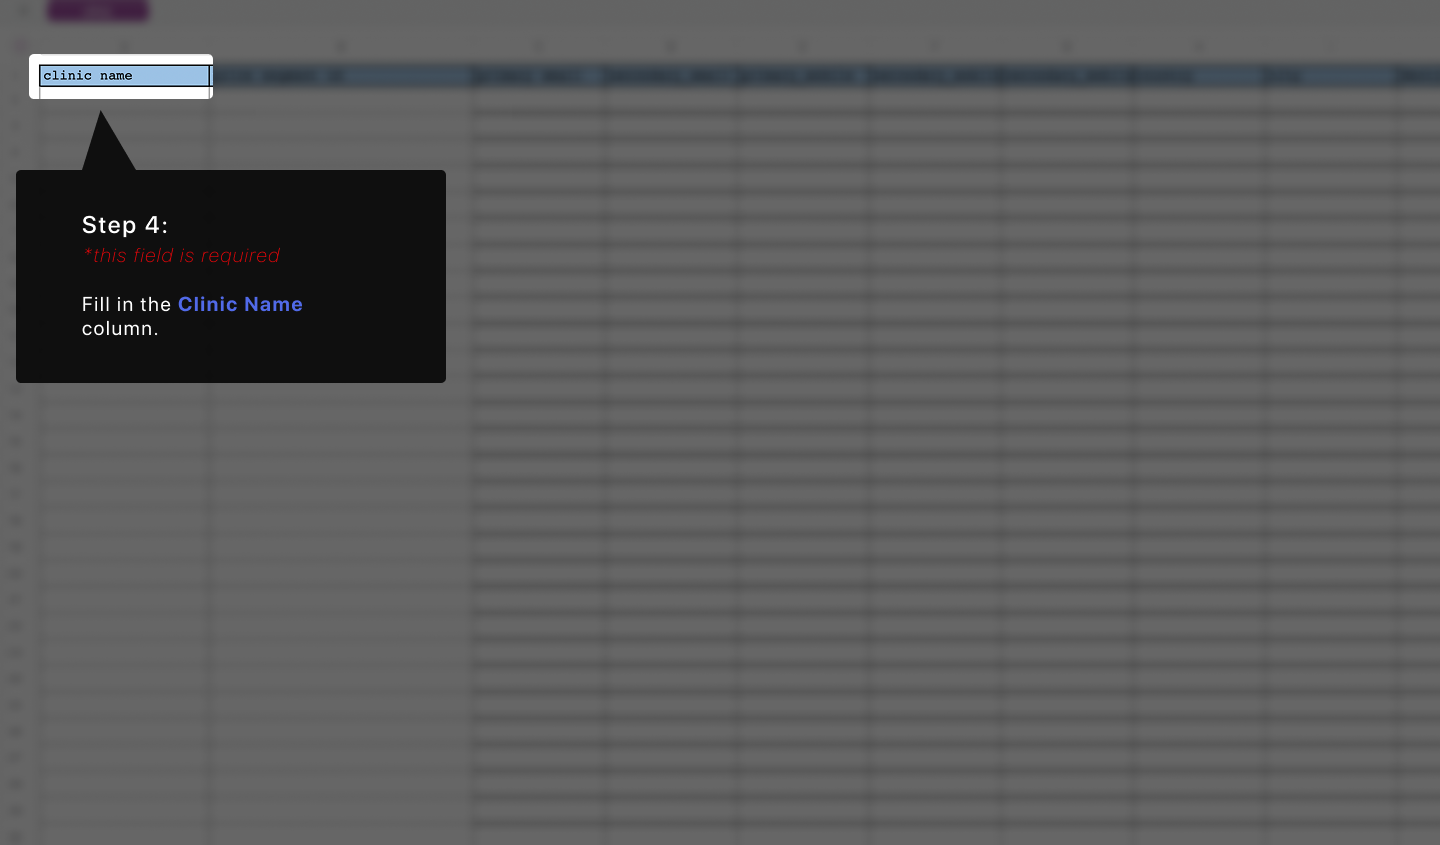
The most critical column in your spreadsheet is the Clinic Name. As a required field, this entry establishes the primary identity for each client in your system, ensuring they can be selected during case creation and billing.
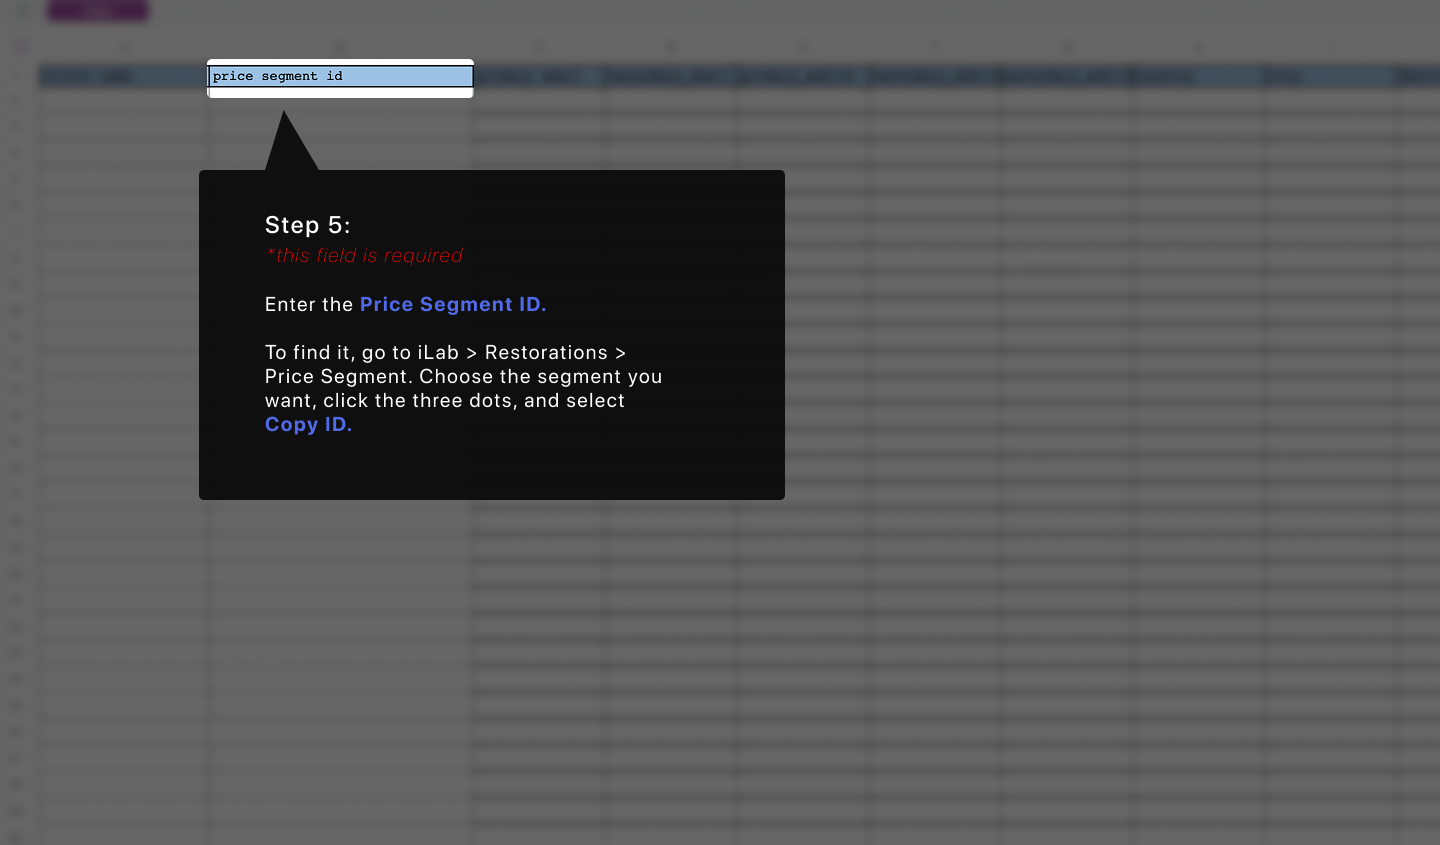
To automate your billing, you must assign a Price Segment ID to each clinic. By copying the unique ID from your Price Segments menu in iLab and pasting it here, you ensure the system automatically applies the correct contract rates for each specific customer.
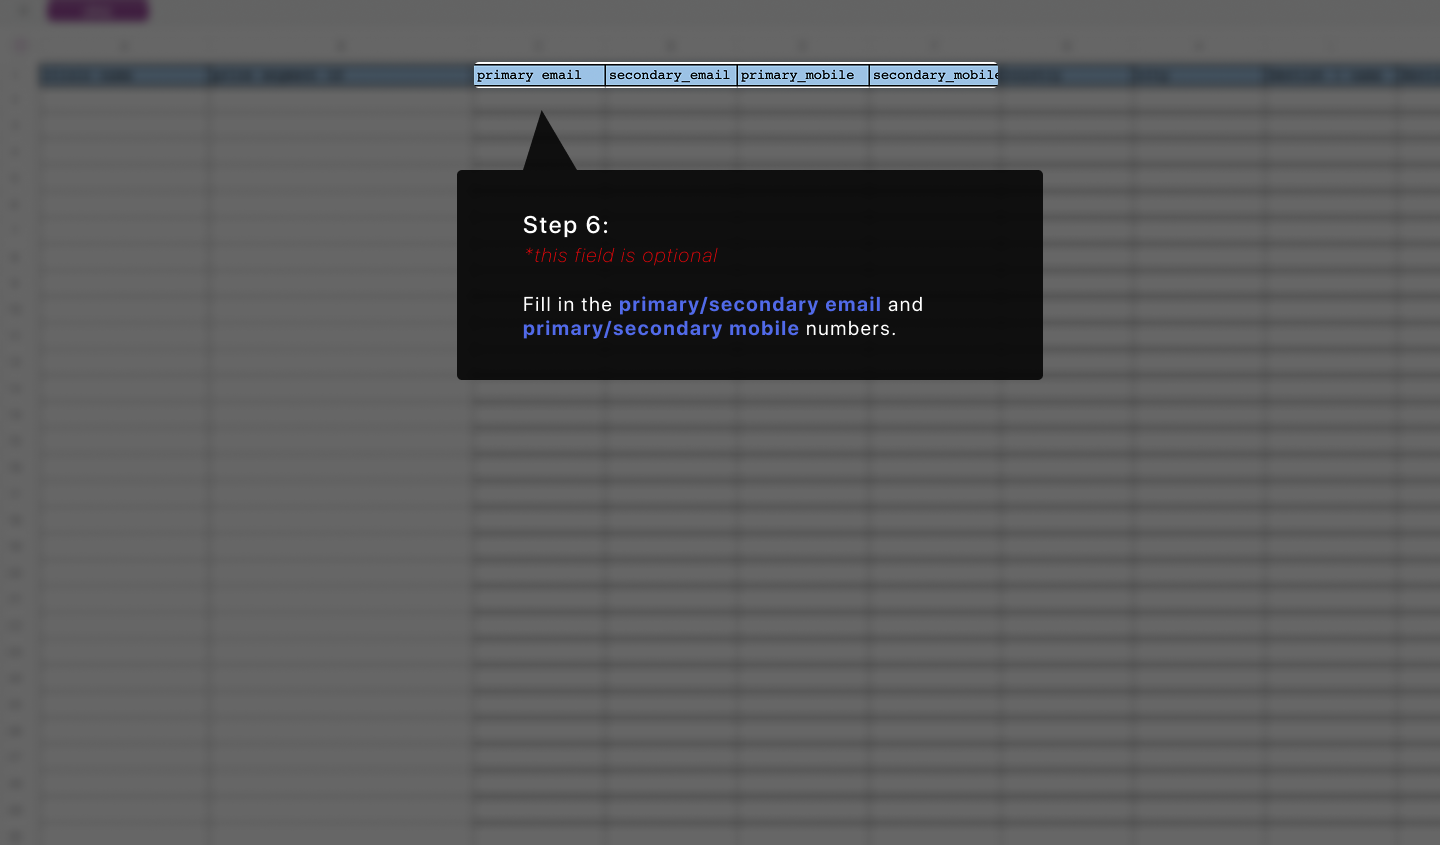
While optional, providing Email and Mobile contact information is highly recommended. Entering these details during the import phase enables automated notifications and improves the speed of communication between your lab and your clients.
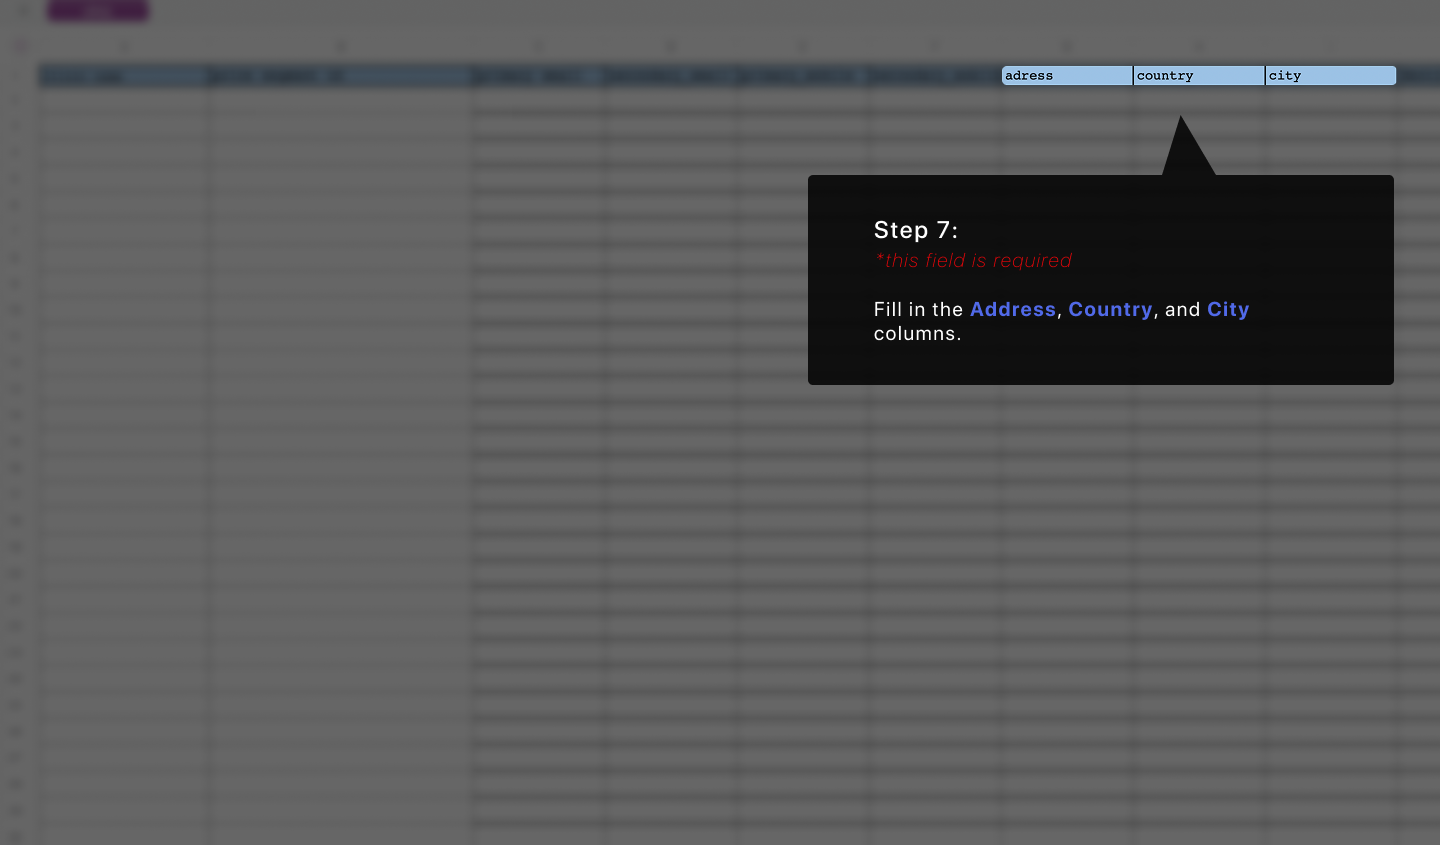
To ensure accurate delivery and billing records, complete the columns for Address, Country, and City. These required fields allow the system to generate correct shipping labels and organize your client directory by region.
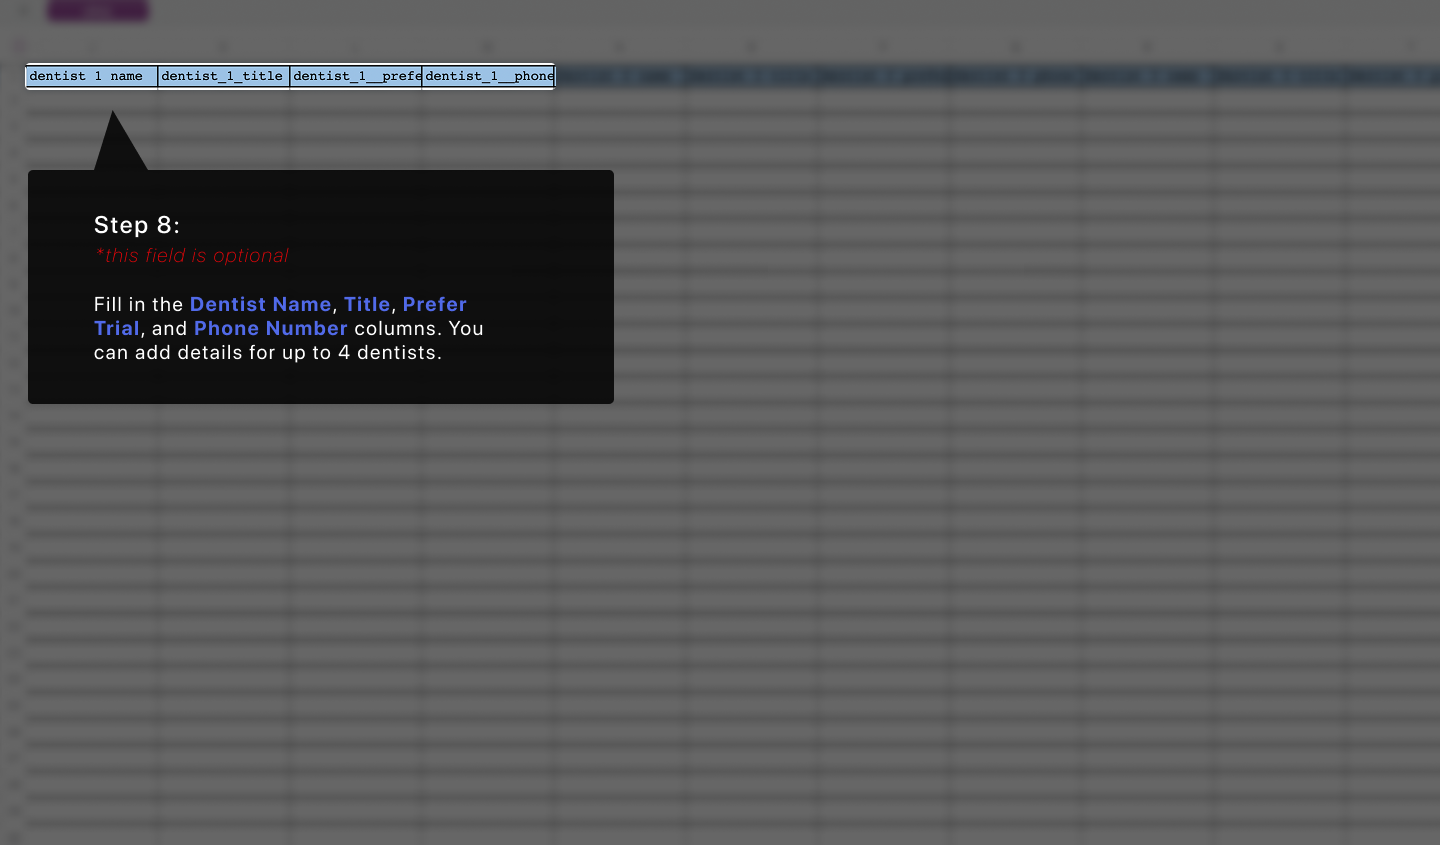
The template allows you to list up to four specific Dentists for each clinic profile. Including their names and professional titles helps your lab staff know exactly who is responsible for each case, leading to more personalized service.
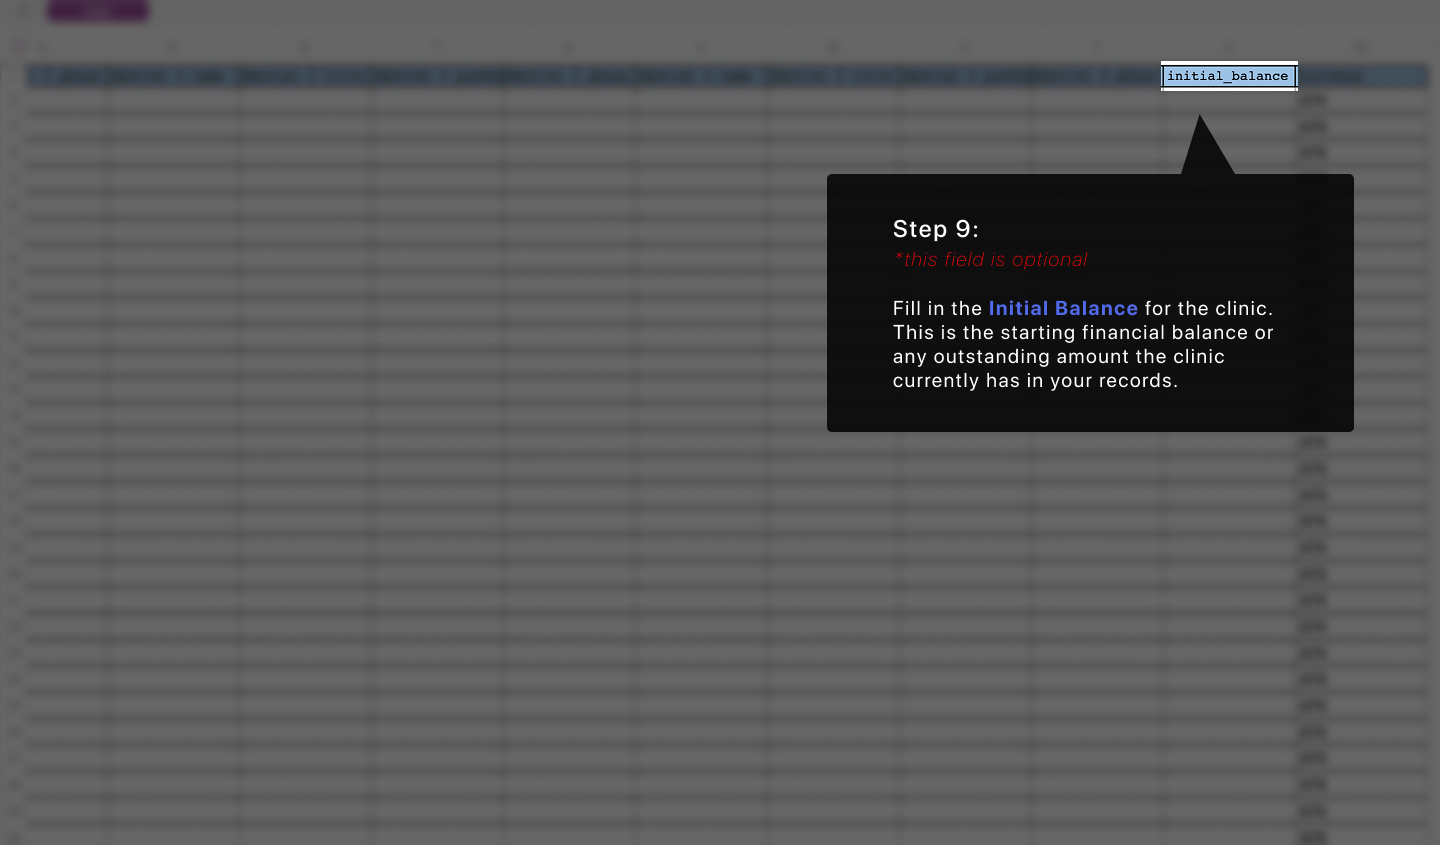
If you are migrating from another system, use the Initial Balance column to record any outstanding amounts for each clinic. This ensures your financial records in iLab start with accurate, up-to-date data from the moment of transition.
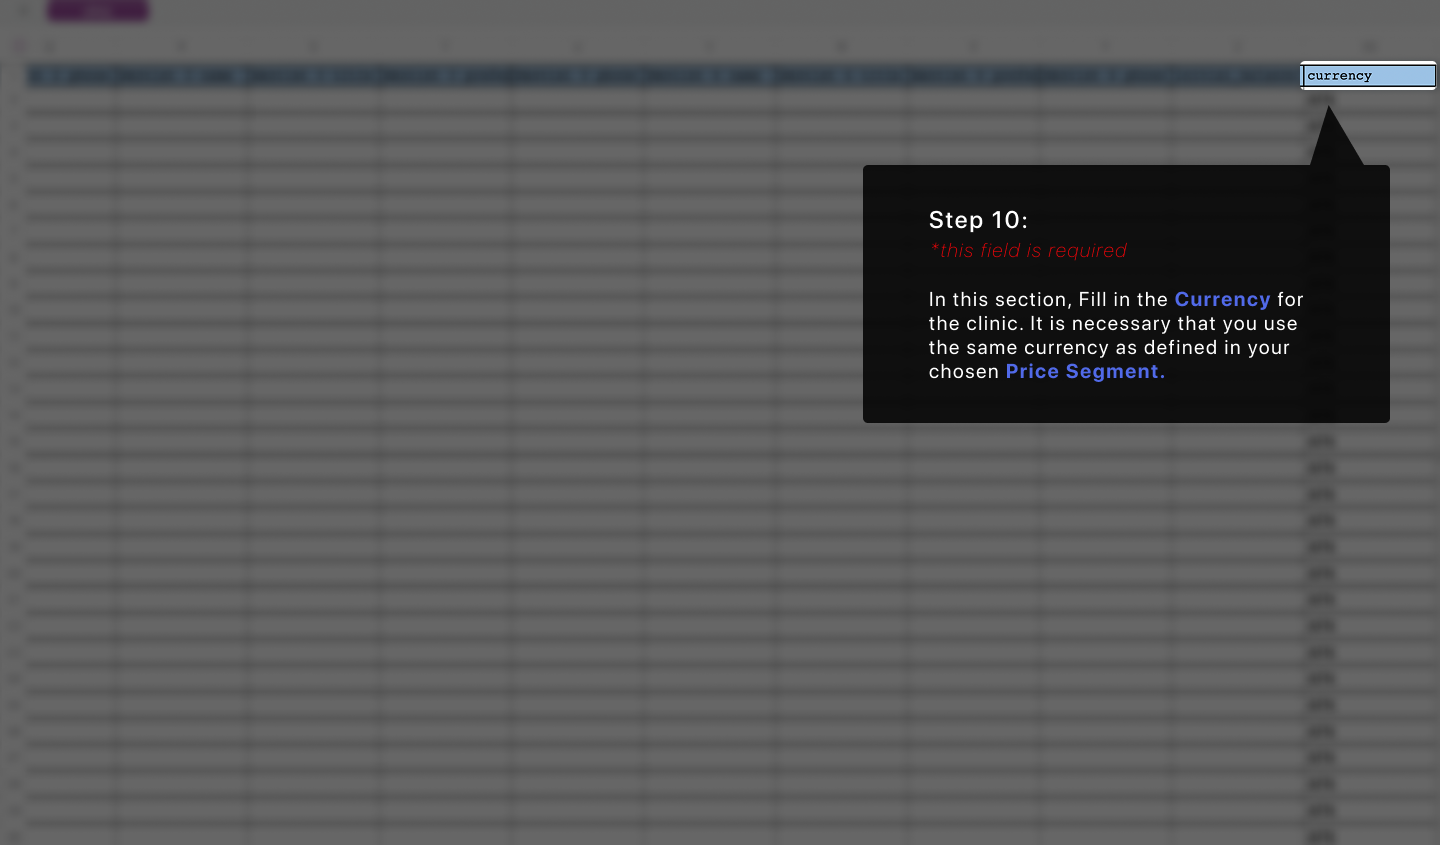
In this section, you must fill in the Currency for the clinic. It is necessary that you use the same currency as defined in your chosen Price Segment to ensure financial consistency and prevent billing errors during the synchronization process.
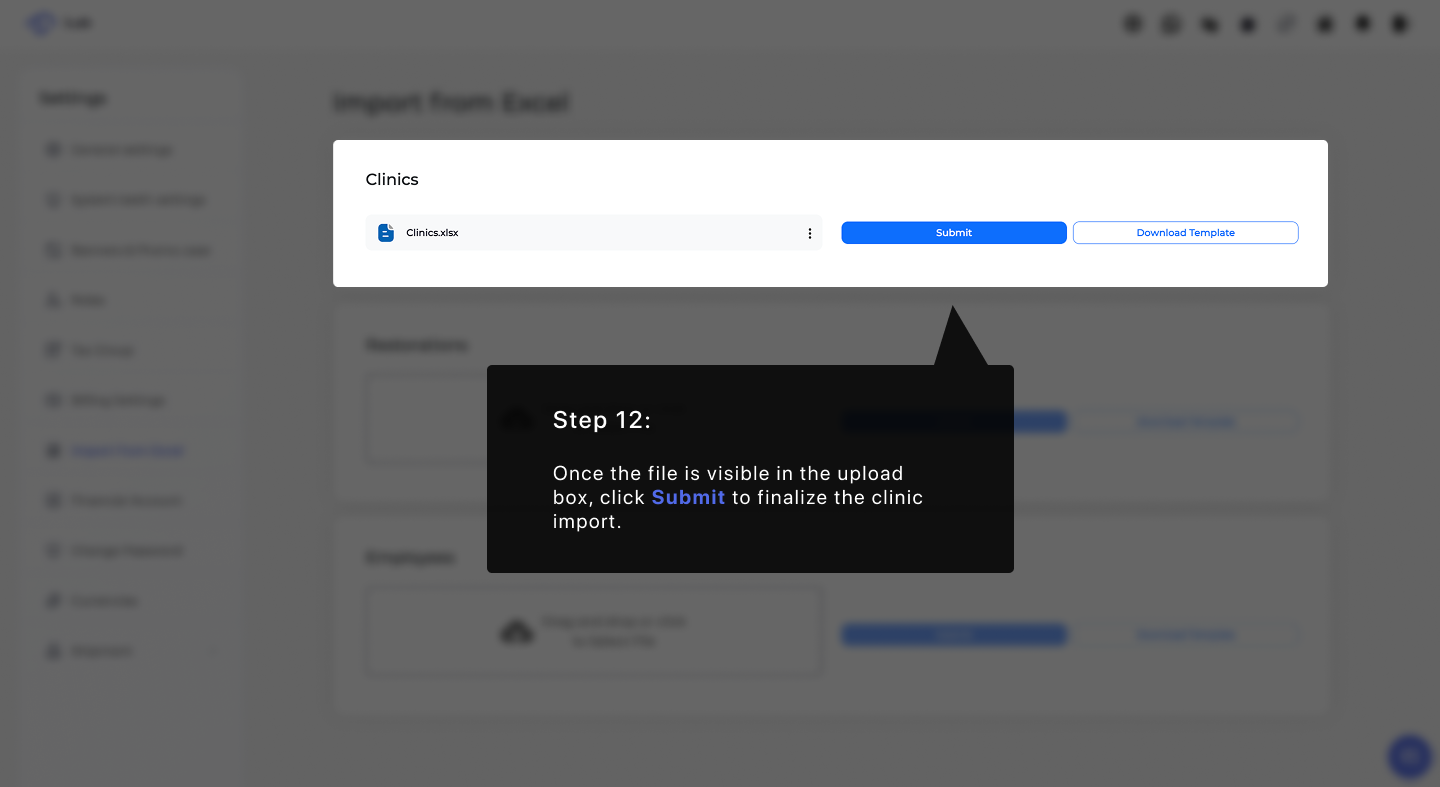
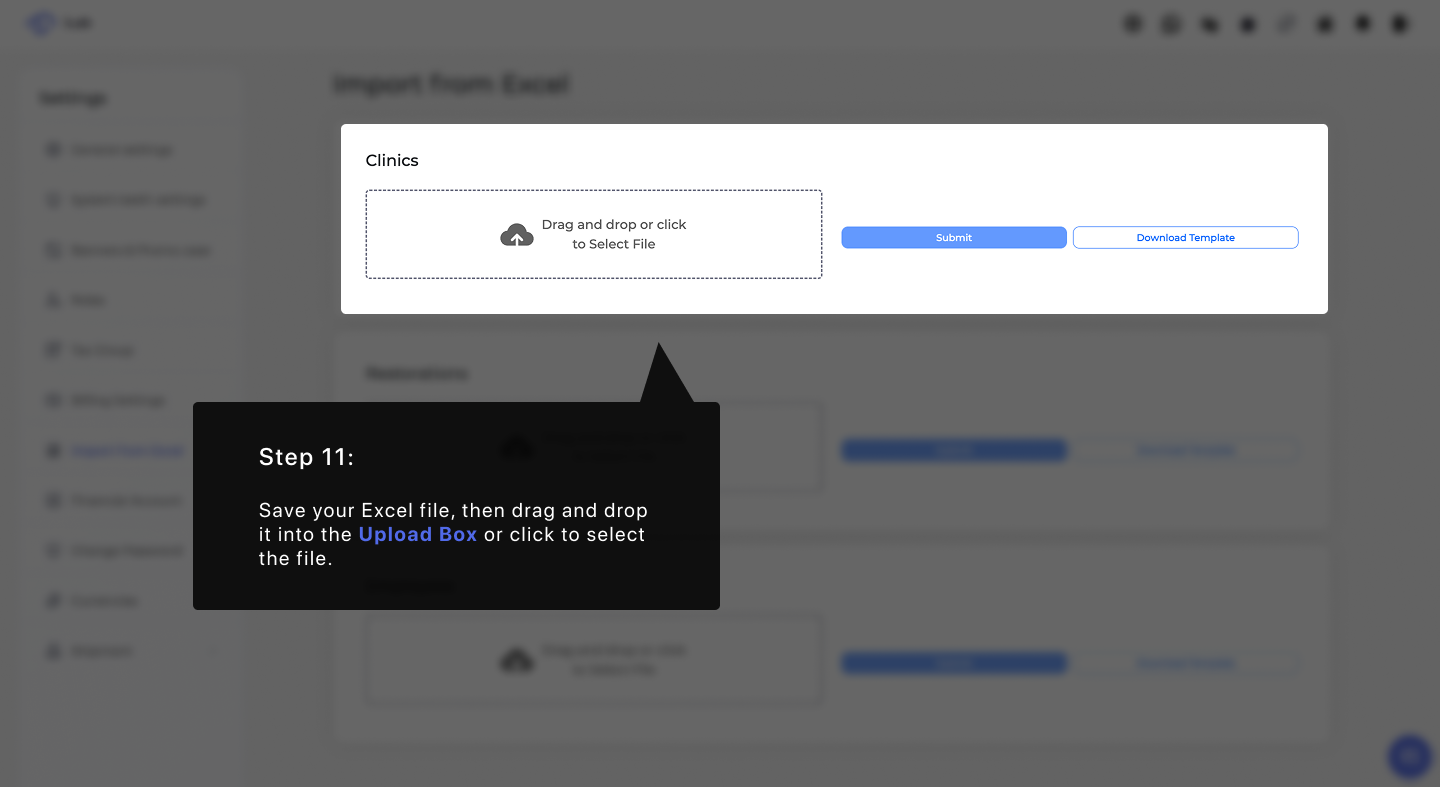
Once your spreadsheet is complete, save your Excel file and return to the system. Drag and drop the file directly into the Upload Box or click the area to select the file from your computer to prepare it for synchronization.
Once the file is visible in the upload box, click Submit to finalize the clinic import. This action initiates the data sync, officially adding all listed clinics to your active laboratory directory.