Manage your product catalog for accurate pricing and efficient production. This guide shows how to add restorations in iLab, set default pricing, assign production workflows, and configure clinical options like try-ins.
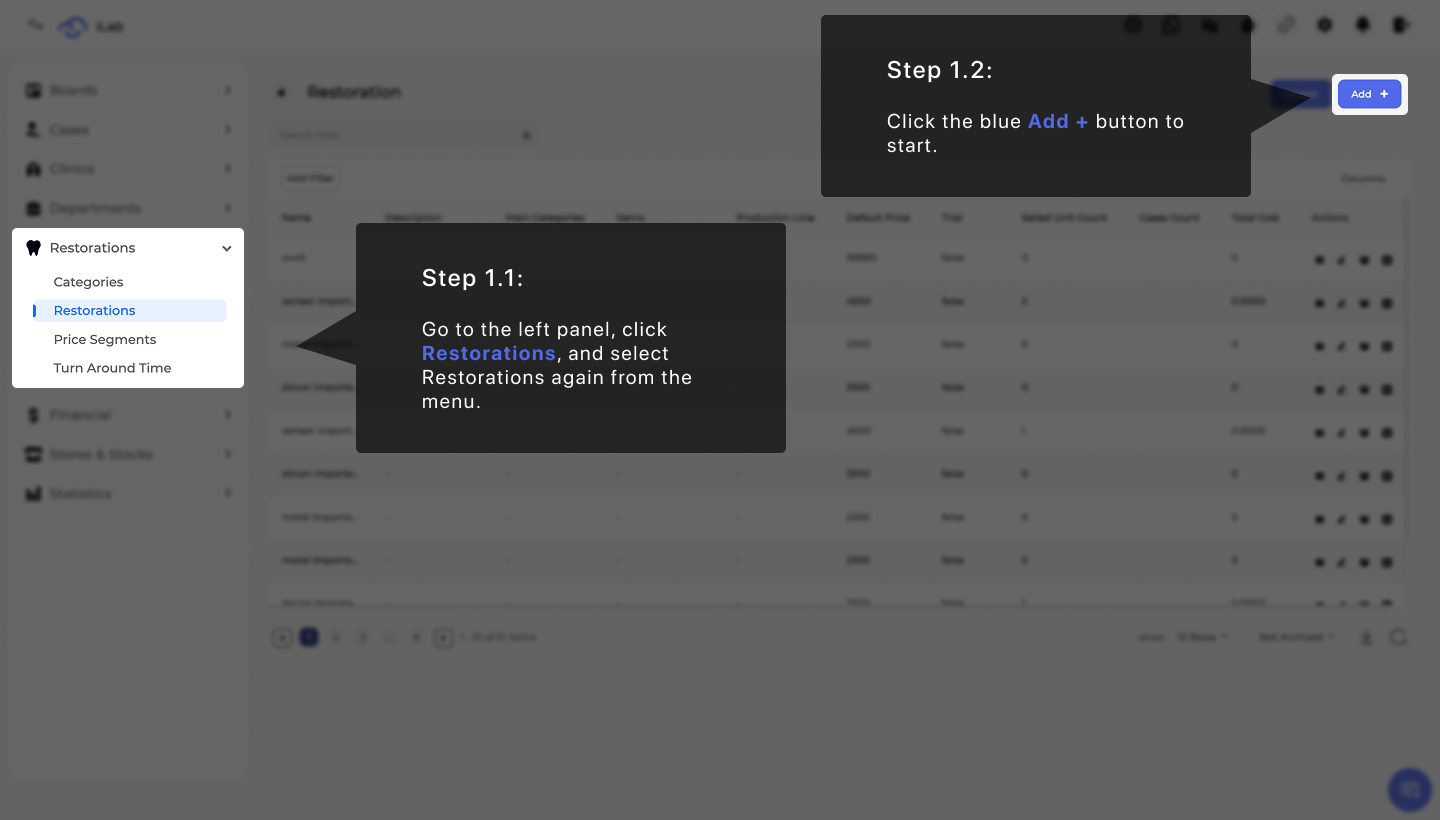
In iLab, restorations represent the products offered by the lab. To begin, go to the left panel, click on the Restorations section, and select Restorations from the menu. Click the blue Add + button in the top right corner to open the creation form.
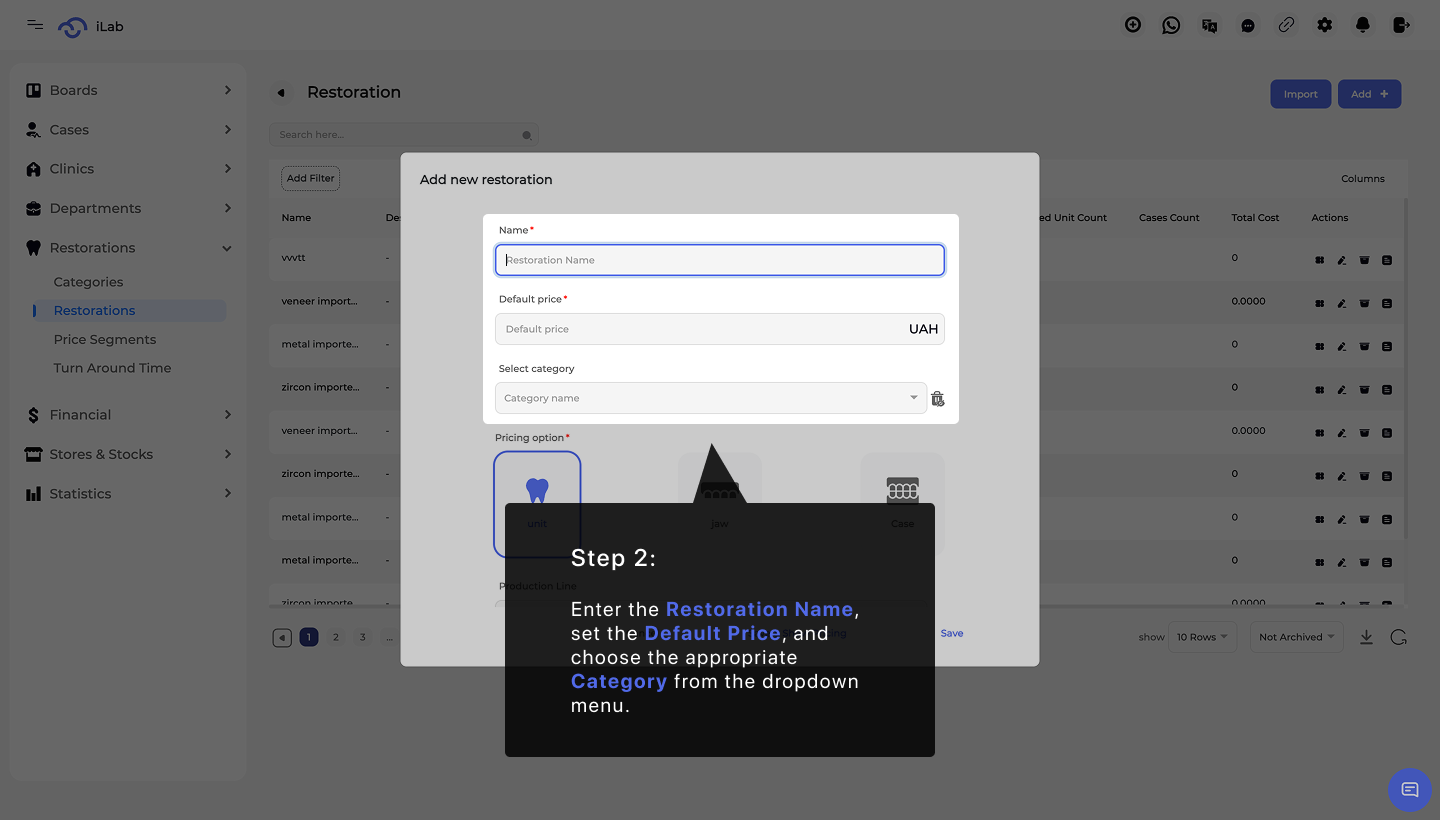
To create a new restoration, start by entering the Restoration Name, setting the Default Price, and selecting the appropriate Category. These details identify the product in your catalog and set the base cost for your services.
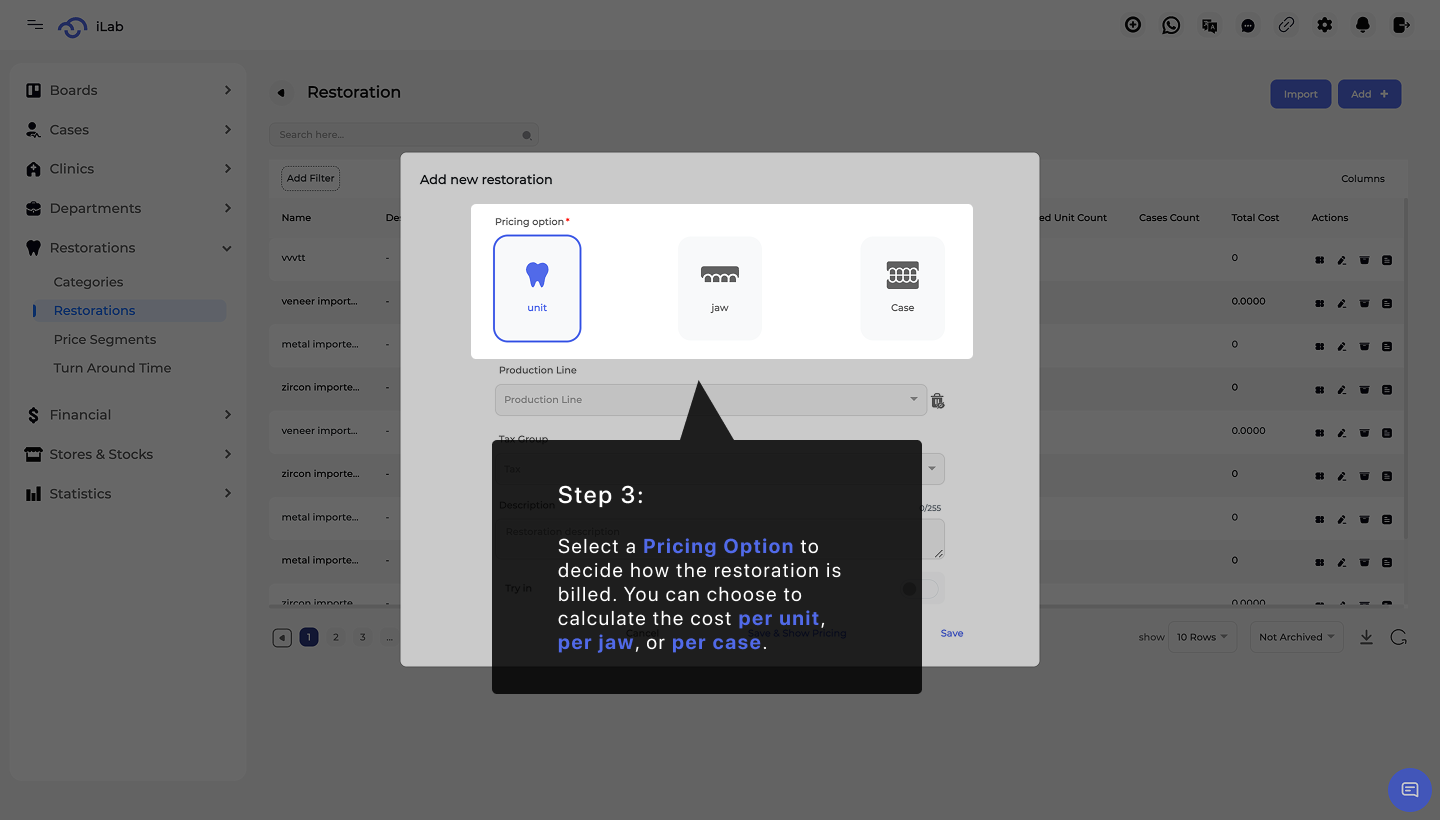
Next, you must define the Pricing Option. This determines how the restoration’s price is calculated for different clinics. Depending on the work type, some restorations are priced per unit, others per jaw, and some are priced per case. This built-in flexibility helps labs quickly adapt to various pricing strategies and clinic requirements.
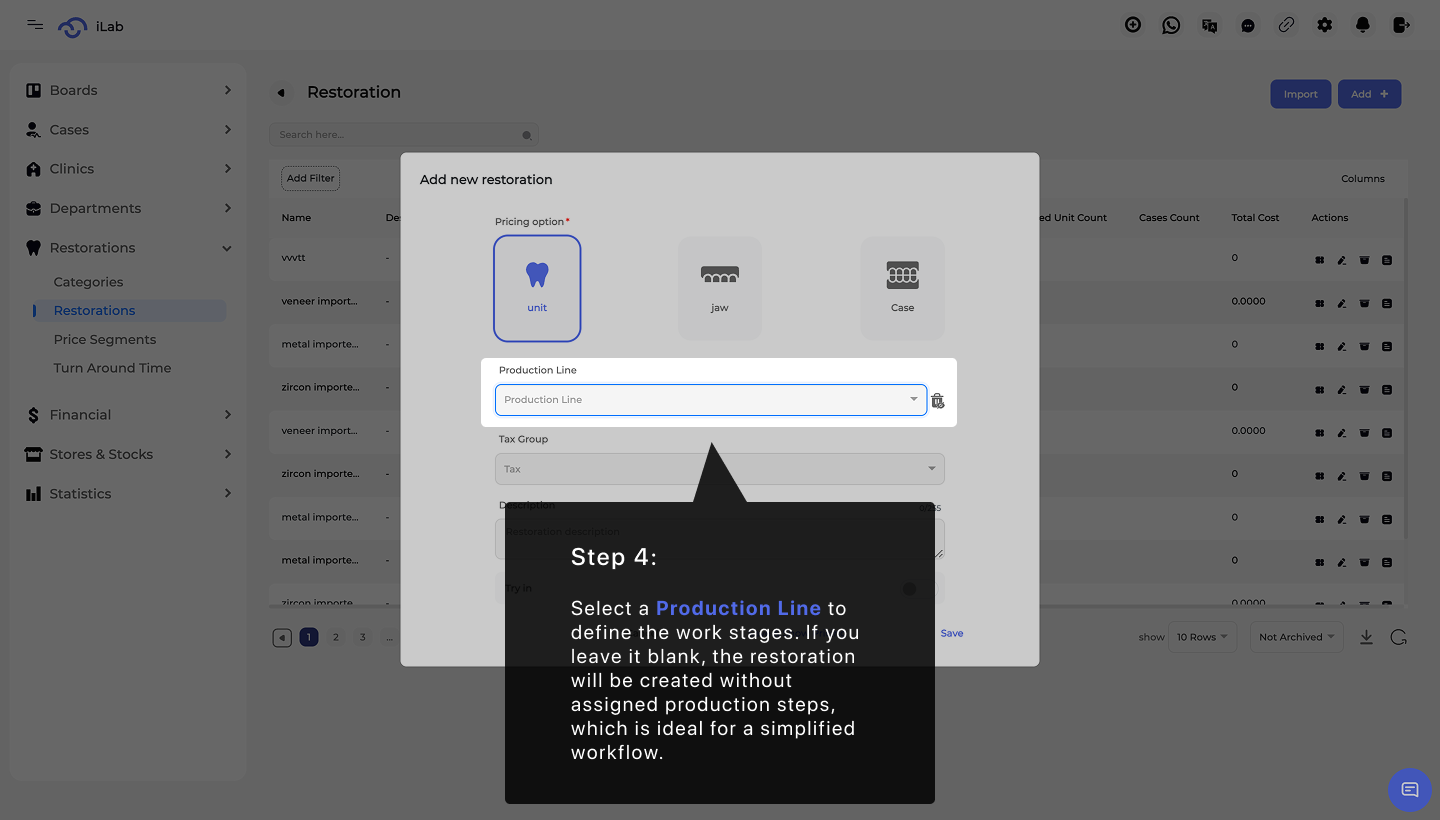
You can select a Production Line to define specific manufacturing stages for this restoration. If you choose to skip selecting a production line, the restoration will simply be created without assigned work stages. This is ideal for labs that prefer a simplified workflow or for specific items that do not require tracking through multiple laboratory departments.
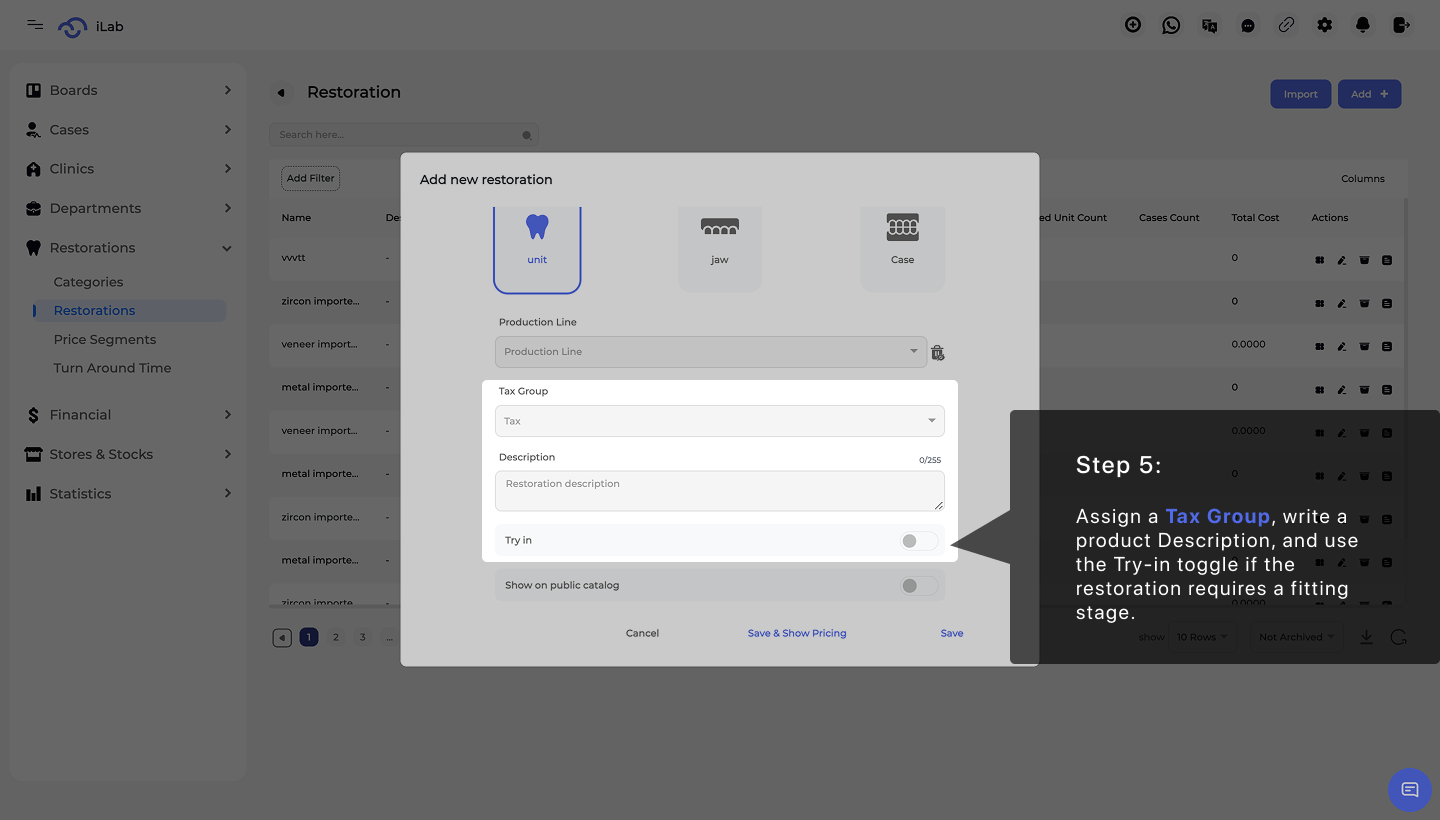
Next, you can assign a Tax Group to this restoration and add a detailed Description. You should also enable the Try-in toggle if this restoration requires a fitting stage before the final product is completed. This ensures the system tracks the extra steps needed for clinical success.
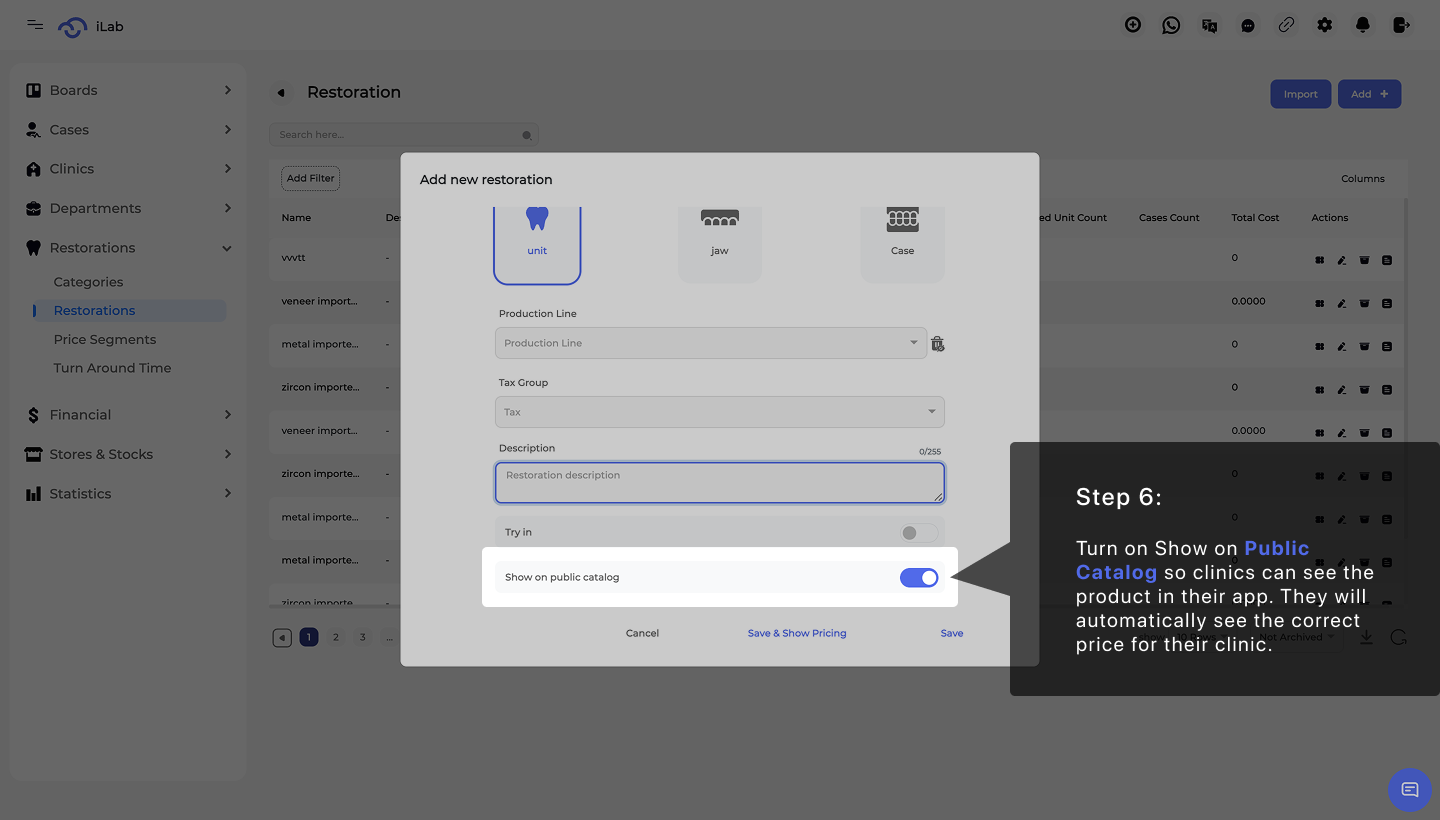
The Show on Public Catalog toggle allows this restoration to appear in the clinic app or public catalog. When this is enabled, your clients can browse your offerings digitally. Most importantly, clinics will automatically see pricing that matches their specific assigned price segment, ensuring they always see the correct rates for their account.
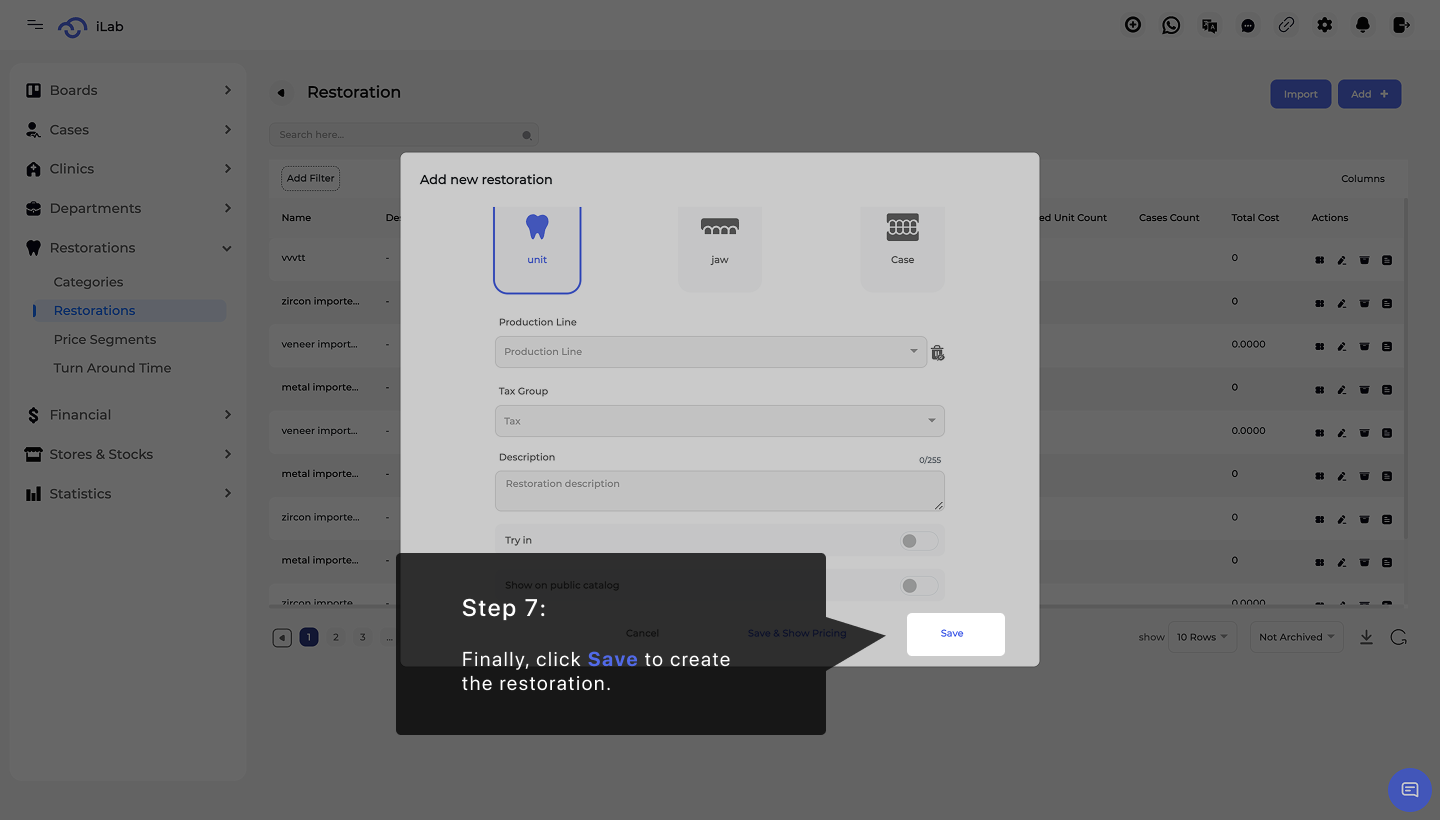
Once you have reviewed all the product details, including pricing, production, and visibility settings, click the Save button. This action officially creates the restoration and makes it available for selection in new cases. You can return to this screen at any time to update prices or adjust the product's settings as your lab's offerings grow.